주요 콘텐츠로 건너뛰기

Panasonic Lumix DMC-TZ5 button board Replacement

필요한 것

  1. Panasonic Lumix DMC-TZ5 button board Replacement, Back Cover: 1 단계, 이미지 1/1
    • Remove the battery and memory card from the device.

  2. Panasonic Lumix DMC-TZ5 button board Replacement: 2 단계, 이미지 1/1
    • Remove 4 screws from the right side of the camera.

    • There are two 3.4mm screws at the top.

    • There are two 2.2mm screws at the bottom.

  3. Panasonic Lumix DMC-TZ5 button board Replacement: 3 단계, 이미지 1/1
    • Remove the single 3.4mm screw on the left side of the camera.

  4. Panasonic Lumix DMC-TZ5 button board Replacement: 4 단계, 이미지 1/1
    • Remove 5 screws from the base of the camera.

    • There are two 2.2mm screws next to the battery compartment.

    • There are three 4mm screws around the tripod mount.

  5. Panasonic Lumix DMC-TZ5 button board Replacement: 5 단계, 이미지 1/1
    • Slowly slide the back cover away from the device

    • The back casing is held in place by two ribbon cables. Do not pull the back cover too far from the camera.

  6. Panasonic Lumix DMC-TZ5 button board Replacement: 6 단계, 이미지 1/2 Panasonic Lumix DMC-TZ5 button board Replacement: 6 단계, 이미지 2/2
    • Detach both ribbon cables using a spudger.

    • Use the tip of the spudger to lift the black clip upward, unlocking the ribbon cable.

  7. Panasonic Lumix DMC-TZ5 button board Replacement: 7 단계, 이미지 1/1
    • Remove the back casing from the camera.

  8. Panasonic Lumix DMC-TZ5 button board Replacement, button board: 8 단계, 이미지 1/2 Panasonic Lumix DMC-TZ5 button board Replacement, button board: 8 단계, 이미지 2/2
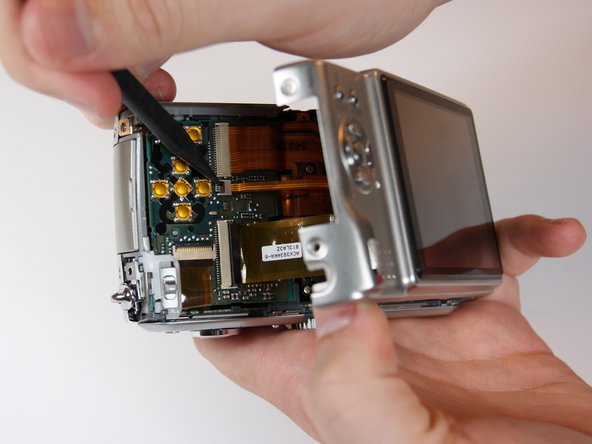
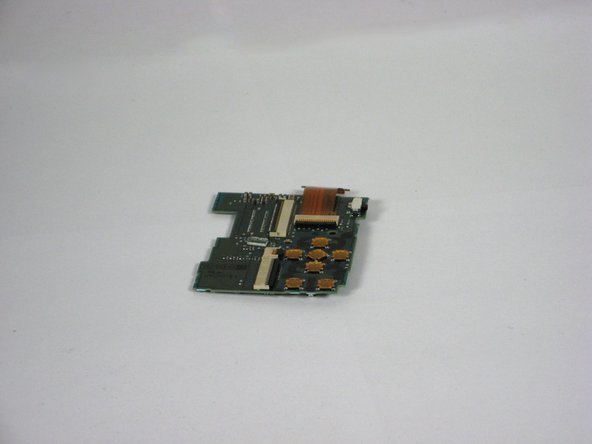
    • Use the spudger to remove the ribbon cable connecting the lens casing to the circuit board by lifting up the black clip.

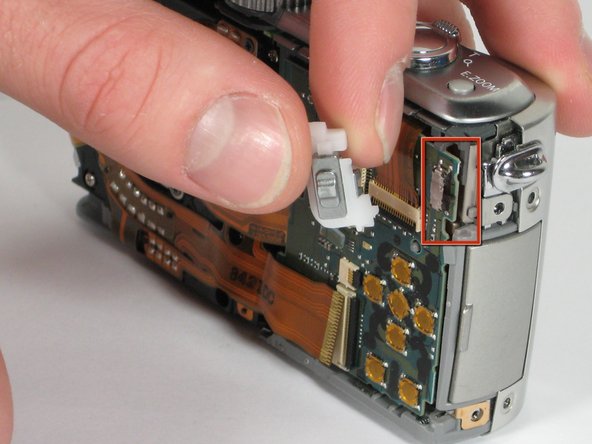
    • Carefully remove the function switch cover. This unit snaps on and off.

  9. Panasonic Lumix DMC-TZ5 button board Replacement: 9 단계, 이미지 1/1
    • Carefully unsnap the front logic board from the rear logic board using a spudger.

  10. Panasonic Lumix DMC-TZ5 button board Replacement: 10 단계, 이미지 1/2 Panasonic Lumix DMC-TZ5 button board Replacement: 10 단계, 이미지 2/2
    • Slide the entire top part of the camera that is attached to the logic board, horizontally away from the camera.

  11. Panasonic Lumix DMC-TZ5 button board Replacement: 11 단계, 이미지 1/3 Panasonic Lumix DMC-TZ5 button board Replacement: 11 단계, 이미지 2/3 Panasonic Lumix DMC-TZ5 button board Replacement: 11 단계, 이미지 3/3
    • Remove the ribbon cable from the top connection panel by unlocking the black clip with a spudger.

    • This leaves you with the logic board and the top connection panel separate and free from the camera

결론

To reassemble your device, follow these instructions in reverse order.

Ben Canfield

회원 가입일: 10/10/10

409 평판

안내서 3개 작성하였습니다

Cal Poly, Team 9-21, Regan Fall 2010 Cal Poly, Team 9-21, Regan Fall 2010 회원

CPSU-REGAN-F10S9G21

4 회원들

안내서 14개 작성하였습니다

댓글 0개

댓글 쓰기

조회 통계:

24 시간 전: 0

7일 전: 1

30일 전: 4

전체 시간: 5,596