주요 콘텐츠로 건너뛰기

Panasonic Lumix DMC-ZS6 Lens Assembly Replacement

필요한 것

  1. Panasonic Lumix DMC-ZS6 Lens Assembly Replacement, Lens Assembly: 1 단계, 이미지 1/1
    • Remove the battery and the SD Card.

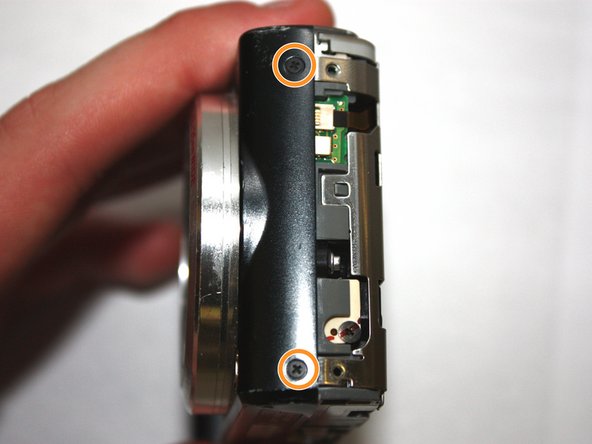
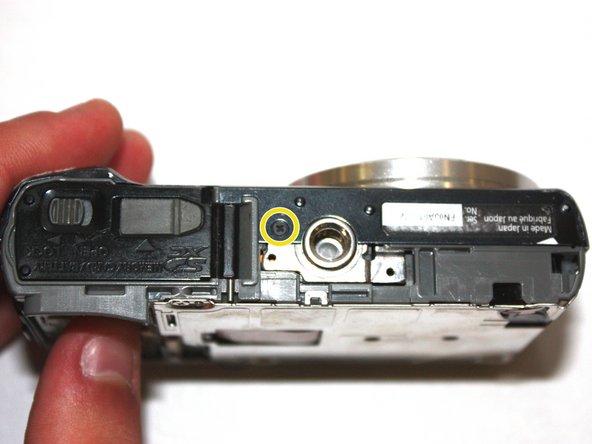
  2. Panasonic Lumix DMC-ZS6 Lens Assembly Replacement: 2 단계, 이미지 1/3 Panasonic Lumix DMC-ZS6 Lens Assembly Replacement: 2 단계, 이미지 2/3 Panasonic Lumix DMC-ZS6 Lens Assembly Replacement: 2 단계, 이미지 3/3
    • Unscrew the two bottom 1.0 mm screws with a Phillips #000 screwdriver.

    • Unscrew the two 1.0 mm screws to the left with a Phillips #000 screwdriver.

    • Unscrew the two 1.0 mm screws to the right with a Phillips #000 screwdriver.

  3. Panasonic Lumix DMC-ZS6 Lens Assembly Replacement: 3 단계, 이미지 1/1
    • Carefully separate the back of the camera from the main body.

    • Do not apply excessive force. The LCD is connected by ribbon cables that can be easily damaged.

  4. Panasonic Lumix DMC-ZS6 Lens Assembly Replacement: 4 단계, 이미지 1/2 Panasonic Lumix DMC-ZS6 Lens Assembly Replacement: 4 단계, 이미지 2/2
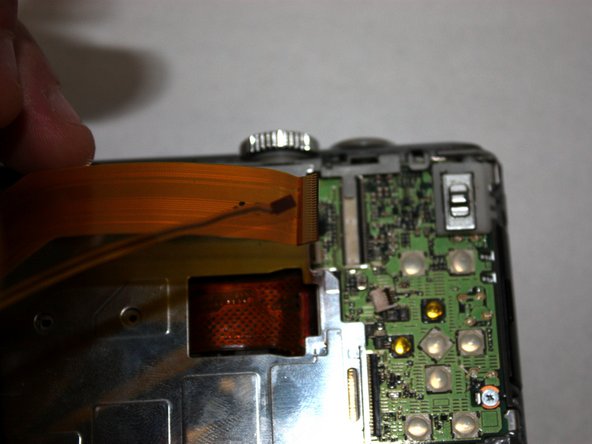
    • Use the tip of the 2.0 mm flathead screwdriver to flip up the black tabs on the ribbon cables.

    • Pull gently on the ribbon cables to unseat them.

  5. Panasonic Lumix DMC-ZS6 Lens Assembly Replacement: 5 단계, 이미지 1/3 Panasonic Lumix DMC-ZS6 Lens Assembly Replacement: 5 단계, 이미지 2/3 Panasonic Lumix DMC-ZS6 Lens Assembly Replacement: 5 단계, 이미지 3/3
    • Unscrew the two 1.0 mm screws to the left with a Phillips #000 screwdriver.

    • Unscrew the two 1.0 mm screws to the right with a Phillips #000 screwdriver.

    • Unscrew the two bottom 1.0 mm screws with a Phillips #000 screwdriver.

  6. Panasonic Lumix DMC-ZS6 Lens Assembly Replacement: 6 단계, 이미지 1/1
    • Carefully separate the front of the camera from the main body.

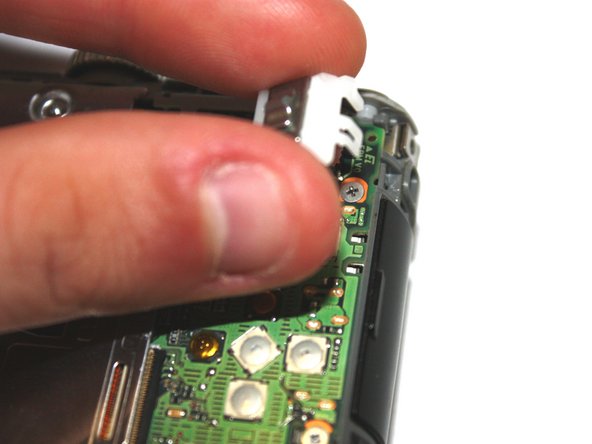
  7. Panasonic Lumix DMC-ZS6 Lens Assembly Replacement: 7 단계, 이미지 1/2 Panasonic Lumix DMC-ZS6 Lens Assembly Replacement: 7 단계, 이미지 2/2
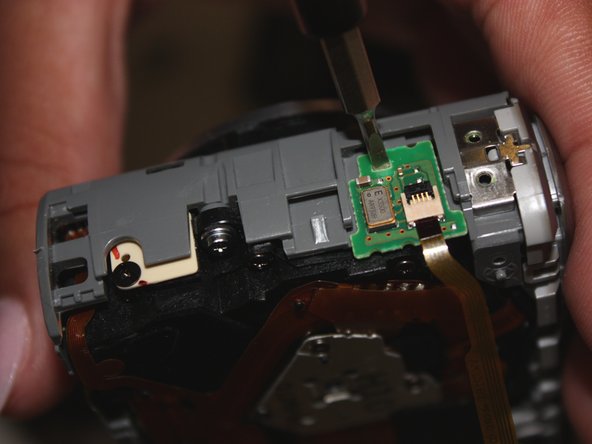
    • Use the tip of the 1.5 mm flathead screwdriver to disengage the plastic tab.

    • Carefully lift the selector switch away from the motherboard.

  8. Panasonic Lumix DMC-ZS6 Lens Assembly Replacement: 8 단계, 이미지 1/2 Panasonic Lumix DMC-ZS6 Lens Assembly Replacement: 8 단계, 이미지 2/2
    • Unscrew the three silver 1.0 mm screws with a Phillips #000 screwdriver.

    • Use the tip of the 2.0 mm flathead to disengage the metal tab, then carefully lift the shield away from the motherboard.

  9. Panasonic Lumix DMC-ZS6 Lens Assembly Replacement: 9 단계, 이미지 1/1
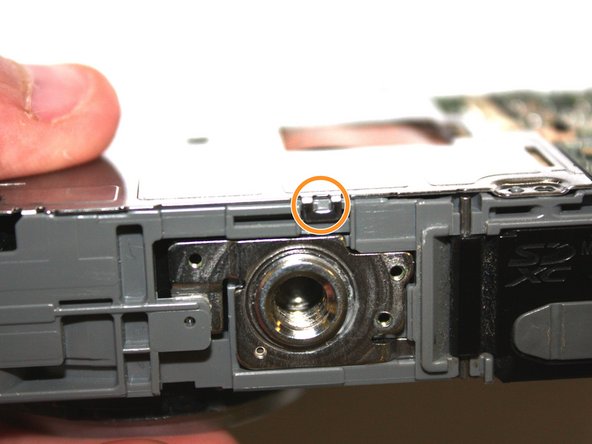
    • Insert the tip of the 2.0 mm flathead into the center hole of the tripod mount, and apply force in the direction facing away from the button.

    • Carefully lift the tripod mount out of the camera body.

  10. Panasonic Lumix DMC-ZS6 Lens Assembly Replacement: 10 단계, 이미지 1/2 Panasonic Lumix DMC-ZS6 Lens Assembly Replacement: 10 단계, 이미지 2/2
    • Use the 2.0 mm flathead to flip up the brown tab on the motherboard and carefully unseat the ribbon cable.

    • Insert the tip of the 2.0 mm flathead screwdriver into the hole on the daughterboard, then apply upward force to remove the daughterboard from the main case.

  11. Panasonic Lumix DMC-ZS6 Lens Assembly Replacement: 11 단계, 이미지 1/3 Panasonic Lumix DMC-ZS6 Lens Assembly Replacement: 11 단계, 이미지 2/3 Panasonic Lumix DMC-ZS6 Lens Assembly Replacement: 11 단계, 이미지 3/3
    • Use the 2.0 mm flathead to flip up the two tabs on the motherboard and carefully unseat the ribbon cables.

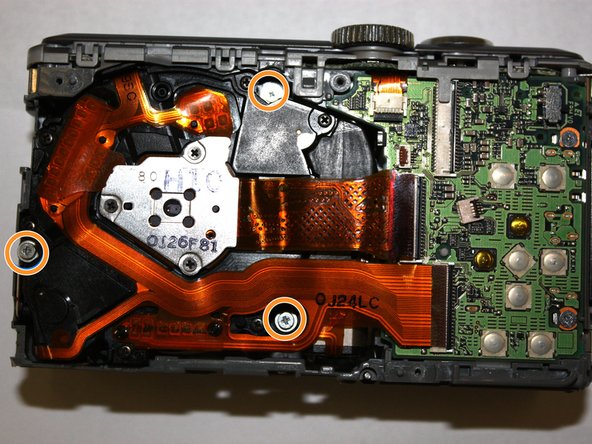
    • Unscrew the three silver 1.0 mm screws with a Phillips #000 screwdriver.

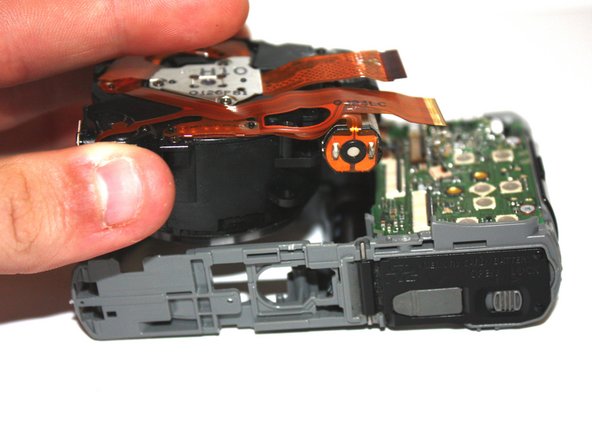
    • Carefully lift the lens assembly out of the camera.

결론

To reassemble your device, follow these instructions in reverse order.

Derrick Thompson

회원 가입일: 01/30/18

1,035 평판

안내서 5개 작성하였습니다

Baylor, Team S2-G5, Johnson Spring 2018 Baylor, Team S2-G5, Johnson Spring 2018 회원

BU-JOHNSON-S18S2G5

3 회원들

안내서 10개 작성하였습니다

댓글 0개

댓글 쓰기

조회 통계:

24 시간 전: 0

7일 전: 1

30일 전: 6

전체 시간: 537