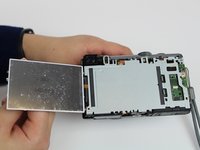
주요 콘텐츠로 건너뛰기

Panasonic Lumix DMC-ZS60 LCD Screen Replacement

필요한 것

  1. Panasonic Lumix DMC-ZS60 LCD Screen Replacement, Battery: 1 단계, 이미지 1개 중 1개
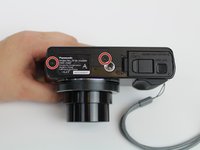
    • Use your finger to slide the black latch from the locked position to the open position on the memory card/battery door. This will open the door of the camera.

  2. Panasonic Lumix DMC-ZS60 LCD Screen Replacement: 2 단계, 이미지 2개 중 1개 Panasonic Lumix DMC-ZS60 LCD Screen Replacement: 2 단계, 이미지 2개 중 2개
    • Push up the black tab on the right-hand-side to spring release the battery.

  3. Panasonic Lumix DMC-ZS60 LCD Screen Replacement: 3 단계, 이미지 1개 중 1개
    • Remove the battery by sliding it out from the camera.

  4. Panasonic Lumix DMC-ZS60 LCD Screen Replacement, LCD Screen: 4 단계, 이미지 3개 중 1개 Panasonic Lumix DMC-ZS60 LCD Screen Replacement, LCD Screen: 4 단계, 이미지 3개 중 2개 Panasonic Lumix DMC-ZS60 LCD Screen Replacement, LCD Screen: 4 단계, 이미지 3개 중 3개
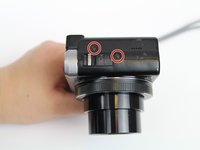
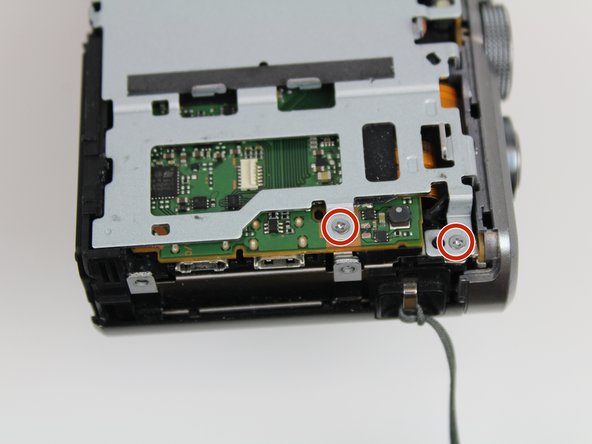
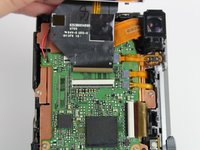
    • Using the Phillips #000 Screwdriver, unscrew six 3mm screws. There are two screws located on three sides excluding the top.

  5. Panasonic Lumix DMC-ZS60 LCD Screen Replacement: 5 단계, 이미지 1개 중 1개
    • Pry off back casing and set aside.

  6. Panasonic Lumix DMC-ZS60 LCD Screen Replacement: 6 단계, 이미지 2개 중 1개 Panasonic Lumix DMC-ZS60 LCD Screen Replacement: 6 단계, 이미지 2개 중 2개
    이 단계에 사용된 도구:
    Tweezers
    $4.99
    • Pull the right side control dial circuit board up.

    • Use tweezers to pry up the white retaining flap and gently pull the circuit board out.

  7. Panasonic Lumix DMC-ZS60 LCD Screen Replacement: 7 단계, 이미지 3개 중 1개 Panasonic Lumix DMC-ZS60 LCD Screen Replacement: 7 단계, 이미지 3개 중 2개 Panasonic Lumix DMC-ZS60 LCD Screen Replacement: 7 단계, 이미지 3개 중 3개
    • Flip the LCD screen to the left.

    • Unscrew the two 3mm on the top right side using the Phillips #000 Screwdriver.

    • Lift the gray plate cover off.

  8. Panasonic Lumix DMC-ZS60 LCD Screen Replacement: 8 단계, 이미지 2개 중 1개 Panasonic Lumix DMC-ZS60 LCD Screen Replacement: 8 단계, 이미지 2개 중 2개
    • Use tweezers to pry up the black retaining flat and gently pull to free the LCD screen from the device.

결론

To reassemble your device, follow these instructions in reverse order.

작성자

4다른 기여자 명과 함께

Audrey Arnold

회원 가입일: 01/16/20

353 평판

안내서 2개를 작성함

0가이드 댓글

댓글 쓰기

조회 통계:

지난 24시간: 2

지난 7일: 7

지난 30일: 25

전체 시간: 749