주요 콘텐츠로 건너뛰기

Panasonic Lumix DMC-ZS60 Motherboard Replacement

필요한 것

  1. Panasonic Lumix DMC-ZS60 Motherboard Replacement, Battery: 1 단계, 이미지 1/1
    • Use your finger to slide the black latch from the locked position to the open position on the memory card/battery door. This will open the door of the camera.

  2. Panasonic Lumix DMC-ZS60 Motherboard Replacement: 2 단계, 이미지 1/2 Panasonic Lumix DMC-ZS60 Motherboard Replacement: 2 단계, 이미지 2/2
    • Push up the black tab on the right-hand-side to spring release the battery.

  3. Panasonic Lumix DMC-ZS60 Motherboard Replacement: 3 단계, 이미지 1/1
    • Remove the battery by sliding it out from the camera.

  4. Panasonic Lumix DMC-ZS60 Motherboard Replacement, LCD Screen: 4 단계, 이미지 1/3 Panasonic Lumix DMC-ZS60 Motherboard Replacement, LCD Screen: 4 단계, 이미지 2/3 Panasonic Lumix DMC-ZS60 Motherboard Replacement, LCD Screen: 4 단계, 이미지 3/3
    • Using the Phillips #000 Screwdriver, unscrew six 3mm screws. There are two screws located on three sides excluding the top.

  5. Panasonic Lumix DMC-ZS60 Motherboard Replacement: 5 단계, 이미지 1/1
    • Pry off back casing and set aside.

  6. Panasonic Lumix DMC-ZS60 Motherboard Replacement: 6 단계, 이미지 1/2 Panasonic Lumix DMC-ZS60 Motherboard Replacement: 6 단계, 이미지 2/2
    • Pull the right side control dial circuit board up.

    • Use tweezers to pry up the white retaining flap and gently pull the circuit board out.

  7. Panasonic Lumix DMC-ZS60 Motherboard Replacement: 7 단계, 이미지 1/3 Panasonic Lumix DMC-ZS60 Motherboard Replacement: 7 단계, 이미지 2/3 Panasonic Lumix DMC-ZS60 Motherboard Replacement: 7 단계, 이미지 3/3
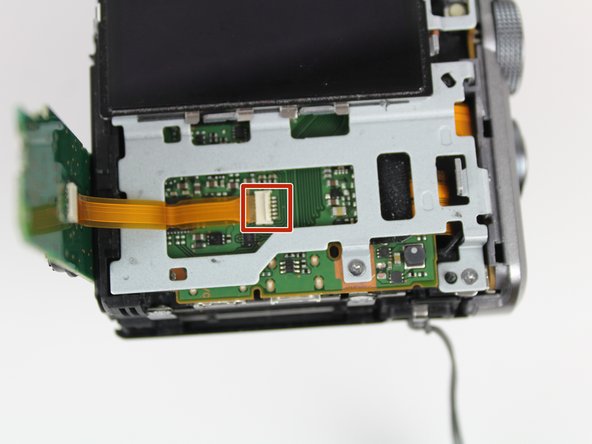
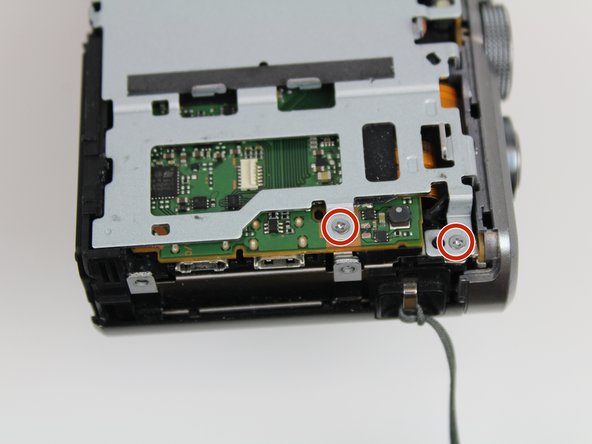
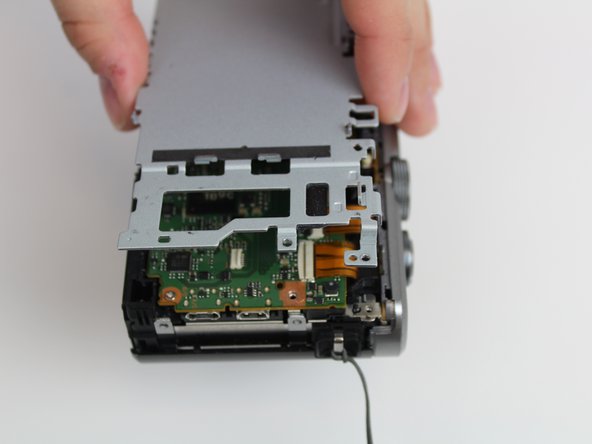
    • Flip the LCD screen to the left.

    • Unscrew the two 3mm on the top right side using the Phillips #000 Screwdriver.

    • Lift the gray plate cover off.

  8. Panasonic Lumix DMC-ZS60 Motherboard Replacement: 8 단계, 이미지 1/2 Panasonic Lumix DMC-ZS60 Motherboard Replacement: 8 단계, 이미지 2/2
    • Use tweezers to pry up the black retaining flat and gently pull to free the LCD screen from the device.

  9. Panasonic Lumix DMC-ZS60 Motherboard Replacement, Motherboard: 9 단계, 이미지 1/1
    • Remove these three 3 mm screws with a Phillips #000 screwdriver.

  10. Panasonic Lumix DMC-ZS60 Motherboard Replacement: 10 단계, 이미지 1/3 Panasonic Lumix DMC-ZS60 Motherboard Replacement: 10 단계, 이미지 2/3 Panasonic Lumix DMC-ZS60 Motherboard Replacement: 10 단계, 이미지 3/3
    • Disconnect these 9 ribbon cables from the motherboard. One ribbon cable is hidden underneath the larger one on the left.

    • Use tweezers to first lift up the retaining flaps for each connector, then pull out the ribbon cable.

  11. Panasonic Lumix DMC-ZS60 Motherboard Replacement: 11 단계, 이미지 1/2 Panasonic Lumix DMC-ZS60 Motherboard Replacement: 11 단계, 이미지 2/2
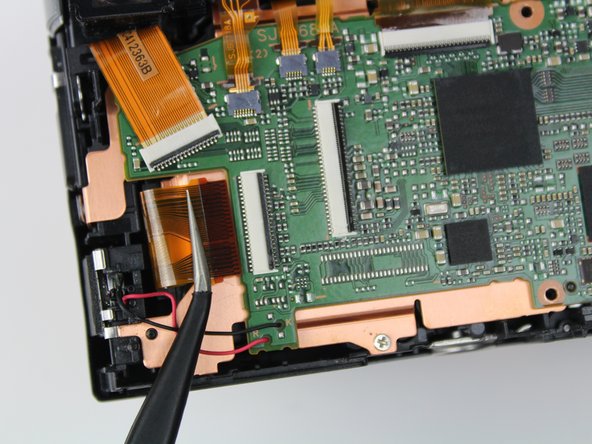
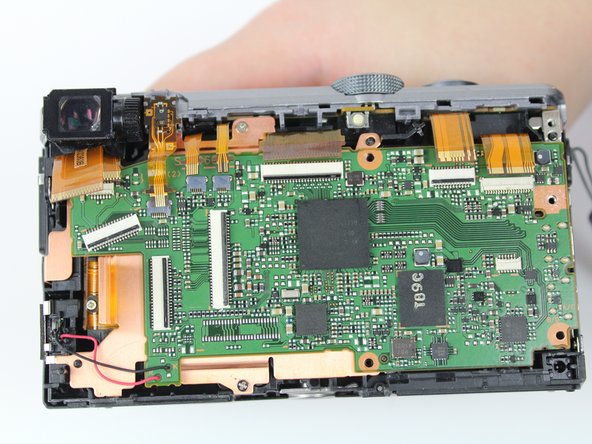
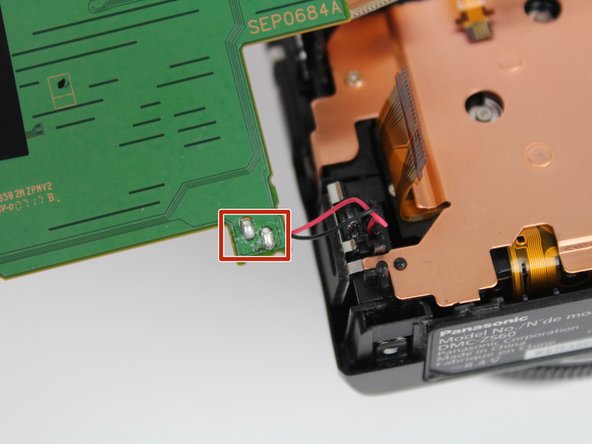
    • Now you will able to lift the motherboard up and it will only be connected by two cables.

    • To fully remove the motherboard, you will have to solder the metal in order to remove the wires.

    • For more information on soldering, please visit the How to Solder and Desolder Connections guide.

결론

To reassemble your device, follow these instructions in reverse order.

Emma Civalier

회원 가입일: 01/16/20

100 평판

안내서 1개 작성함

댓글 0개

댓글 쓰기

조회 통계:

24 시간 전: 0

7일 전: 4

30일 전: 11

전체 시간: 387