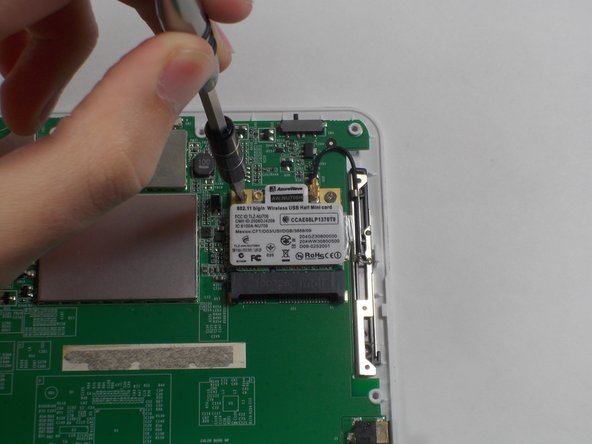
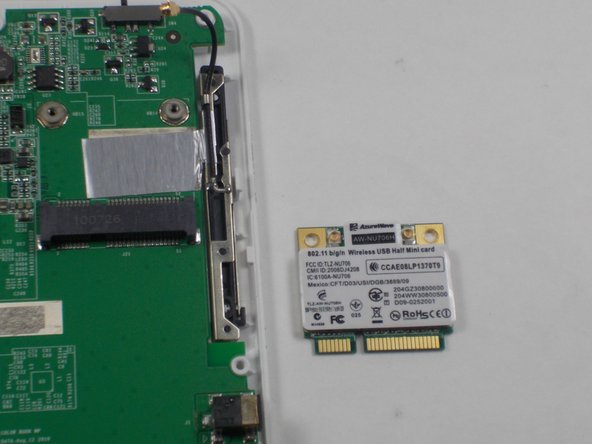
주요 콘텐츠로 건너뛰기

Pandigital Novel PRD07T10WWH7 Wireless Card Replacement

필요한 것

  1. Pandigital Novel PRD07T10WWH7 Wireless Card Replacement, Wireless Card: 1 단계, 이미지 1/1
    • Remove the back panel by sliding it downwards and pushing in slightly.

  2. Pandigital Novel PRD07T10WWH7 Wireless Card Replacement: 2 단계, 이미지 1/2 Pandigital Novel PRD07T10WWH7 Wireless Card Replacement: 2 단계, 이미지 2/2
    • Pry off the second white panel, removing two clips underneath.

    • Start from the middle, and then work on the sides. The sides may be difficult to remove, so try to focus on one side and work your way around.

  3. Pandigital Novel PRD07T10WWH7 Wireless Card Replacement: 3 단계, 이미지 1/1
    • Using a Phillips #0 bit, remove the 12 4mm screws.

  4. Pandigital Novel PRD07T10WWH7 Wireless Card Replacement: 4 단계, 이미지 1/3 Pandigital Novel PRD07T10WWH7 Wireless Card Replacement: 4 단계, 이미지 2/3 Pandigital Novel PRD07T10WWH7 Wireless Card Replacement: 4 단계, 이미지 3/3
    • Pry off the gray piece by removing the clips around it.

    • Then, unplug the battery and separate the gray piece from the motherboard

  5. Pandigital Novel PRD07T10WWH7 Wireless Card Replacement: 5 단계, 이미지 1/2 Pandigital Novel PRD07T10WWH7 Wireless Card Replacement: 5 단계, 이미지 2/2
    • Using a Phillips #0 bit, remove the two 3mm screws at the top of the wireless card.

  6. Pandigital Novel PRD07T10WWH7 Wireless Card Replacement: 6 단계, 이미지 1/2 Pandigital Novel PRD07T10WWH7 Wireless Card Replacement: 6 단계, 이미지 2/2
    • Unplug the wire from the wireless card.

    • Flip up the retaining flap, releasing the card.

결론

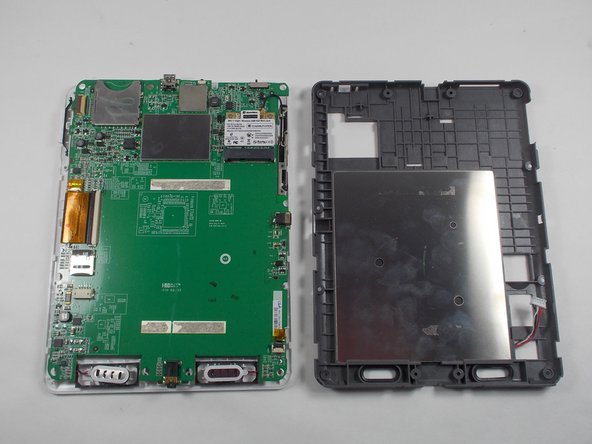
To reassemble your device, follow these instructions in reverse order.

Samuel Carey

회원 가입일: 10/19/16

401 평판

안내서 3개 작성하였습니다

UMass Dartmouth, Team 3-7, Isaacson Fall 2016 UMass Dartmouth, Team 3-7, Isaacson Fall 2016 회원

UMASSD-ISAACSON-F16S3G7

3 회원들

안내서 10개 작성하였습니다

댓글 0개

댓글 쓰기

조회 통계:

24 시간 전: 1

7일 전: 2

30일 전: 2

전체 시간: 164