주요 콘텐츠로 건너뛰기

Pandigital Super Nova Front Facing Camera Replacement

필요한 것

  1. Pandigital Super Nova Front Facing Camera Replacement, Battery: 1 단계, 이미지 1/1
    • Remove the screw covers from each corner of the back side of the device.

    • Set aside.

  2. Pandigital Super Nova Front Facing Camera Replacement: 2 단계, 이미지 1/2 Pandigital Super Nova Front Facing Camera Replacement: 2 단계, 이미지 2/2
    • Using a Philips screwdriver, remove all four .15 mm screws from each corner.

    • Set aside.

  3. Pandigital Super Nova Front Facing Camera Replacement: 3 단계, 이미지 1/1
    • Using the plastic opening tool, remove the back cover of the device.

  4. Pandigital Super Nova Front Facing Camera Replacement: 4 단계, 이미지 1/1
    • Remove the three .11 mm screws that hold the battery in place.

    • Set aside.

  5. Pandigital Super Nova Front Facing Camera Replacement: 5 단계, 이미지 1/2 Pandigital Super Nova Front Facing Camera Replacement: 5 단계, 이미지 2/2
    • Unplug the battery and remove from device.

    • Avoid touching the motherboard as it is fragile.

  6. Pandigital Super Nova Front Facing Camera Replacement, Front Facing Camera: 6 단계, 이미지 1/2 Pandigital Super Nova Front Facing Camera Replacement, Front Facing Camera: 6 단계, 이미지 2/2
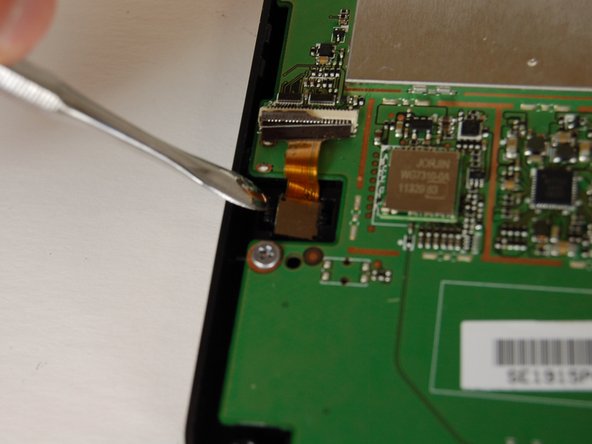
    • Use a metal pry tool to separate the camera and the small clip that holds it in place.

    • Do NOT touch the MotherBoard with your bare hands. There is risk of short circuiting the device. Use nitrile gloves to prevent this.

  7. Pandigital Super Nova Front Facing Camera Replacement: 7 단계, 이미지 1/2 Pandigital Super Nova Front Facing Camera Replacement: 7 단계, 이미지 2/2
    • Use a pair of small tweezers to gently pull the camera connector out of the motherboard.

결론

To reassemble your device, follow these instructions in reverse order.

sterling hannsz

회원 가입일: 10/10/16

267 평판

안내서 2개 작성하였습니다

Texas Tech, Team 1-2, Bennett Fall 2016 Texas Tech, Team 1-2, Bennett Fall 2016 회원

TTU-BENNETT-F16S1G2

4 회원들

안내서 6개 작성하였습니다

댓글 0개

댓글 쓰기

조회 통계:

24 시간 전: 0

7일 전: 1

30일 전: 1

전체 시간: 106