이 버전에는 잘못된 편집 사항이 있을 수 있습니다. 최신 확인된 스냅샷으로 전환하십시오.
필요한 것
-
이 단계는 번역되지 않았습니다. 번역을 도와주십시오
-
While holding onto the nose, gently pull the battery away from the nose.
-
-
이 단계는 번역되지 않았습니다. 번역을 도와주십시오
-
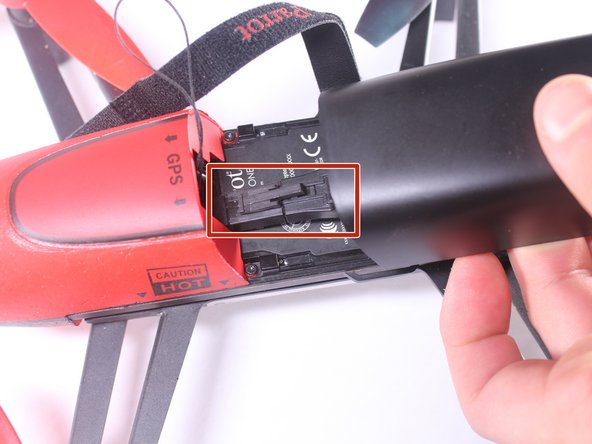
Once the battery is separated from the nose, push down on the connector and pull the battery away from the connector.
-
-
이 단계는 번역되지 않았습니다. 번역을 도와주십시오
-
Remove the two 7mm T5 torx screws using a screwdriver. There is one located on each side.
-
-
-
이 단계는 번역되지 않았습니다. 번역을 도와주십시오
-
Remove the styrofoam nose from over the drone's camera by sliding it towards the front of the drone at an angle.
-
-
이 단계는 번역되지 않았습니다. 번역을 도와주십시오
-
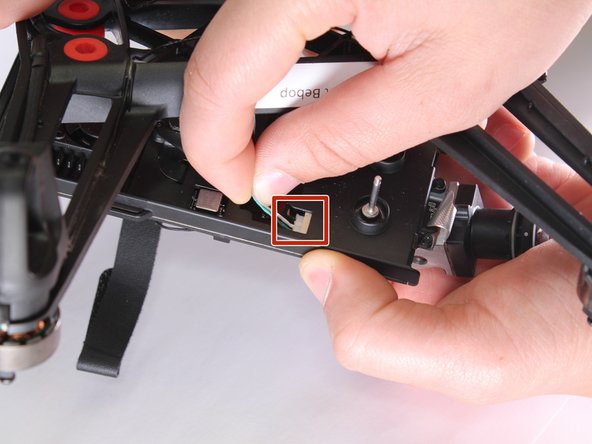
Disconnect the two connectors that are attached to the front of the motherboard by gently pulling on the three wires.
-
-
이 단계는 번역되지 않았습니다. 번역을 도와주십시오
-
Remove the four 5mm torx T5 screws on the bottom of the drone with a Torx Screwdriver.
-
-
이 단계는 번역되지 않았습니다. 번역을 도와주십시오
-
Lightly pull up using the plastic opening tool to remove the back cover.
-
-
이 단계는 번역되지 않았습니다. 번역을 도와주십시오
-
Using a small pair of tweezers remove the two antenna wires attached to the motherboard.
-
-
이 단계는 번역되지 않았습니다. 번역을 도와주십시오
-
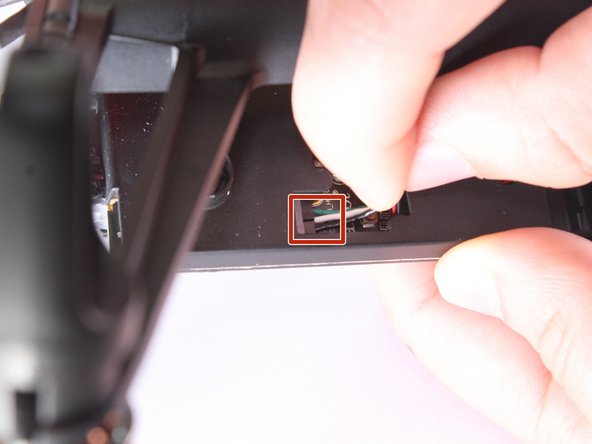
Using both hands gently pull the two pieces of the frame apart until you can see the connectors under the frame attached to the motherboard.
-
Remove both of the connectors from the motherboard. There is one connector on each side.
-
-
이 단계는 번역되지 않았습니다. 번역을 도와주십시오
-
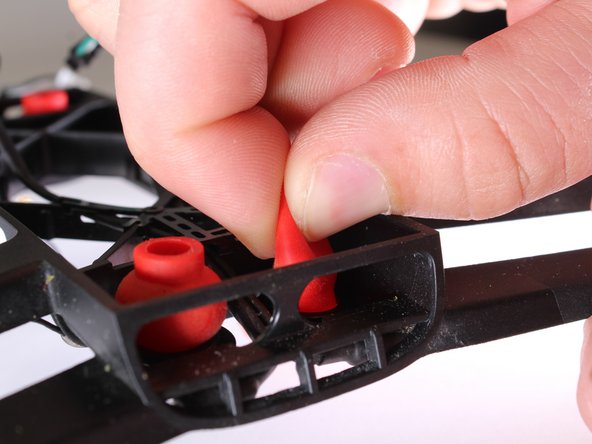
Remove the four rubber shock absorbers by squeezing and twisting them while also pulling up.
-


팀

UW Tacoma, Team 1-3, Rose Winter 2017 UW Tacoma, Team 1-3, Rose Winter 2017 회원
UWT-ROSE-W17S1G3
4 회원들
안내서 5개 작성하였습니다