주요 콘텐츠로 건너뛰기

Parrot FLYPAD Buttons Replacement

필요한 것

  1. Parrot FLYPAD Buttons Replacement, Buttons: 1 단계, 이미지 1/2 Parrot FLYPAD Buttons Replacement, Buttons: 1 단계, 이미지 2/2
    • Position the controller so the back is facing up.

    • Use a T6 screwdriver to remove the six screws on the back of the controller: four 0.9 mm screws and two 0.1 mm screws.

  2. Parrot FLYPAD Buttons Replacement: 2 단계, 이미지 1/2 Parrot FLYPAD Buttons Replacement: 2 단계, 이미지 2/2
    • Remove the foam adhesive that connects the front plate to the motherboard

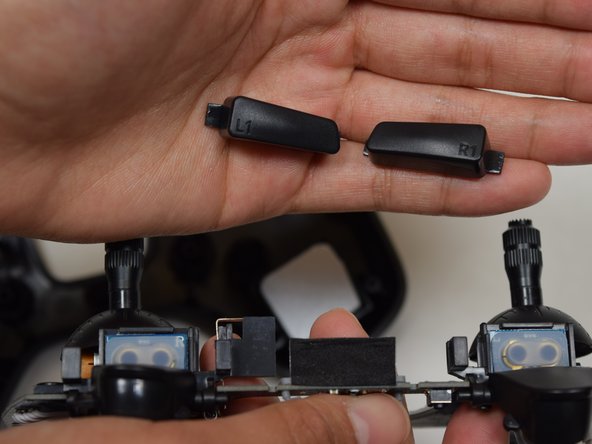
    • The buttons (L1,R1) may fall out. Set aside to replace during reassembly.

    • Use a Phillips #0 screwdriver to remove the two 0.7 mm screws.

    • Remove the motherboard from the front plate.

  3. Parrot FLYPAD Buttons Replacement: 3 단계, 이미지 1/3 Parrot FLYPAD Buttons Replacement: 3 단계, 이미지 2/3 Parrot FLYPAD Buttons Replacement: 3 단계, 이미지 3/3
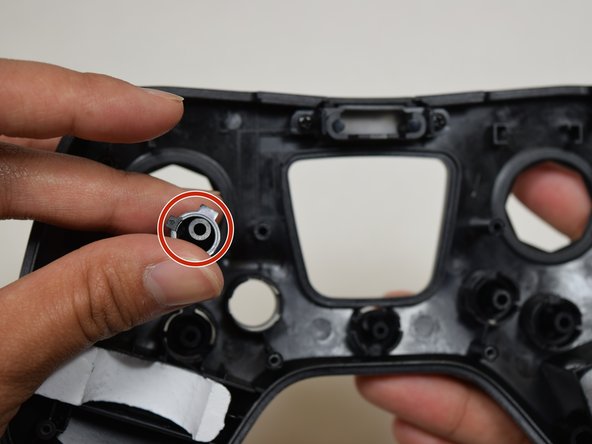
    • Remove the buttons from the front plate of the fly pad and replace as needed.

    • Hold the front plate of the fly pad facing downwards to prevent buttons from falling out.

    • Make sure the text on buttons L1 and R1 correctly line up with L2 and R2 when reassembling the device.

결론

To reassemble your device, follow these instructions in reverse order.

다른 2명이 해당 안내서를 완성하였습니다.

HUY NGUYEN

회원 가입일: 04/10/17

376 평판

안내서 3개 작성하였습니다

UW Tacoma, Team S3-G5, Liner Spring 2017 UW Tacoma, Team S3-G5, Liner Spring 2017 회원

UWT-LINER-S17S3G5

5 회원들

안내서 3개 작성하였습니다

댓글 0개

댓글 쓰기

조회 통계:

24 시간 전: 0

7일 전: 0

30일 전: 1

전체 시간: 541