소개
One common failure of the ZX-5n is the pop up flash. The pivot holding the spring can break relieving the tension on the spring. When this happens, the flash will no longer pop up to its proper position. It may be possible to repair the existing part with epoxy but you can also replace it with a donor part from another camera or with a 3D printed part. A model for the 3D printed part can be found in the Documents section of the Pentax ZX-5n page.
필요한 것
-
-
Push down on the screw to depress the spring loaded hinge and release the door.
-
-
-
Remove three 5.3 mm #00 screws (the bottom-most screw is not always present).
-
Remove one 7.3 mm #00 screw.
-
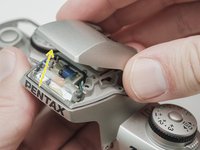
Remove the remote trigger cover.
-
-
-
-
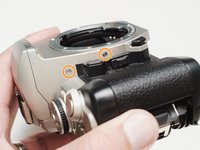
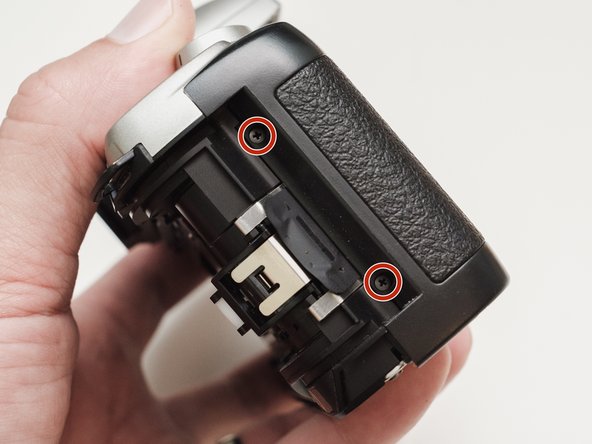
Remove two 5.3 mm #00 screws by the eyepiece.
-
Remove one 6.8 mm #00 screw in the battery compartment.
-
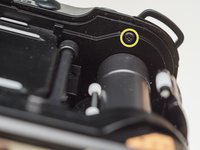
Remove one 7.0 mm #00 screw near the take up spool.
-
-
-
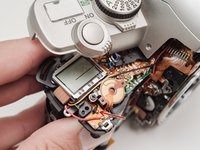
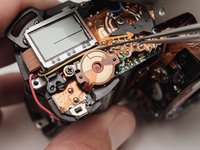
Lift the cover so it is just free of the body. It is still attached by several wires.
-
-
-
Use a 1kΩ-10kΩ resistor to discharge the capacitor. Place the resistor between the blue wire, exposed in the previous step, and ground.
-
-
-
Unsolder one green wire.
-
Unsolder one blue wire.
-
Unsolder one brown wire.
-
Unsolder one black wire.
-
-
-
Unsolder one black wire.
-
Pull black wire out from its routed location.
-
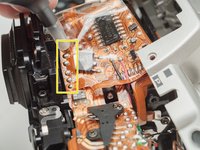
Unsolder flex connector
-
-
-
Remove two 2.9mm #000 screws.
-
Remove two 4.4 mm #00 screws.
-
Close the flash and lift off the top cover.
-
-
-
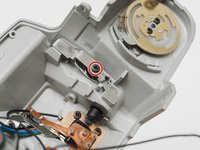
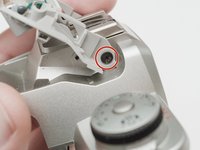
Remove one 3.4 mm #00 screw.
-
Remove the latch spring.
-
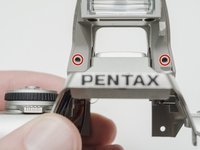
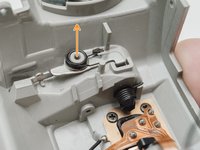
Remove the latch plate. The flash will try to pop up when it is removed.
-
-
-
When using the 3D printed part supplied on the device page, install a 4mm #00 screw in the end of the pivot to hold it together.
-


To reassemble your device, follow these instructions in reverse order.
To reassemble your device, follow these instructions in reverse order.
다른 2명이 해당 안내서를 완성하였습니다.