주요 콘텐츠로 건너뛰기

Philips DVP5992-F7 Screen Replacement

필요한 것

  1. Philips DVP5992-F7 Screen Replacement, Screen: 1 단계, 이미지 1/3 Philips DVP5992-F7 Screen Replacement, Screen: 1 단계, 이미지 2/3 Philips DVP5992-F7 Screen Replacement, Screen: 1 단계, 이미지 3/3
    • Remove the three 6.4 mm Phillips #1 screws on the back of the device with a Phillips head screwdriver.

    • Remove the 6.4 mm Phillips #1 screws on each side of the device.

  2. Philips DVP5992-F7 Screen Replacement: 2 단계, 이미지 1/2 Philips DVP5992-F7 Screen Replacement: 2 단계, 이미지 2/2
    • Remove the top plate of the DVD by firmly grasping the player on both sides.

    • Shift the top plate towards the backside of the player.

    • Lift the back half of the top plate up to remove it from the player.

  3. Philips DVP5992-F7 Screen Replacement: 3 단계, 이미지 1/3 Philips DVP5992-F7 Screen Replacement: 3 단계, 이미지 2/3 Philips DVP5992-F7 Screen Replacement: 3 단계, 이미지 3/3
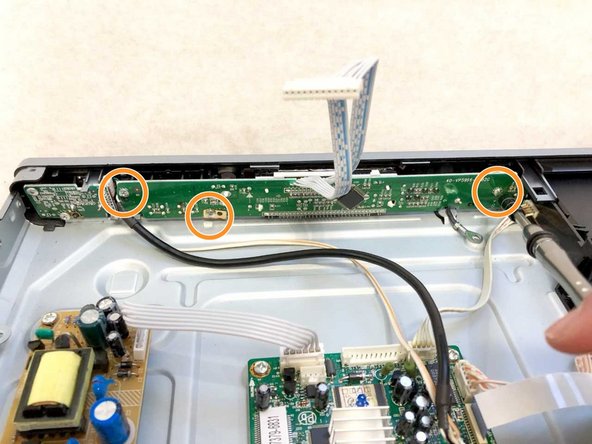
    • Unplug the bundled cable connector that attaches the screen to the motherboard.

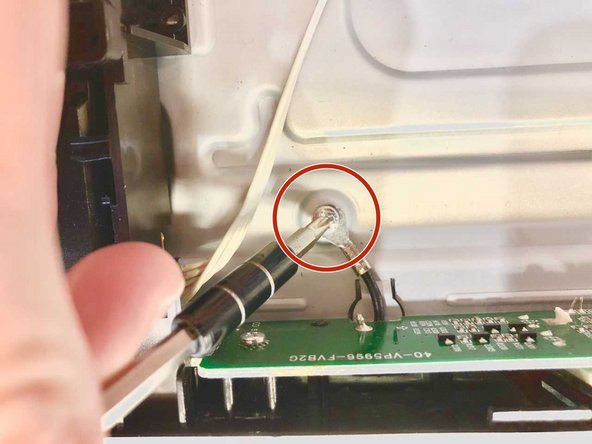
    • Remove the 3.175 mm Phillips #1 screw that connects the screen's ground wire to the shell of the DVD player.

    • Remove the three 6.35 mm Phillips #1 screws that attach the screen to the front cover of the DVD player.

  4. Philips DVP5992-F7 Screen Replacement: 4 단계, 이미지 1/2 Philips DVP5992-F7 Screen Replacement: 4 단계, 이미지 2/2
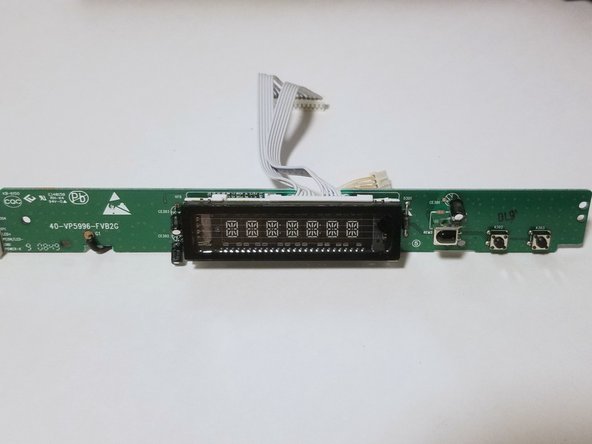
    • Slowly pull the screen backwards starting with the side farthest from the disc tray.

    • Unplug the bundled cable connector that is located close to the disc tray as you pull the screen out of the DVD player.

결론

To reassemble your device, follow these instructions in reverse order.

Hunter McCraw

회원 가입일: 08/31/18

186 평판

안내서 1개 작성함

댓글 0개

댓글 쓰기

조회 통계:

24 시간 전: 0

7일 전: 1

30일 전: 4

전체 시간: 221