주요 콘텐츠로 건너뛰기

Philips DVP642 Motherboard Replacement

필요한 것

  1. Philips DVP642 Motherboard Replacement, Top Panel: 1 단계, 이미지 1/2 Philips DVP642 Motherboard Replacement, Top Panel: 1 단계, 이미지 2/2
    • Remove four 7.5 mm Phillips screws on the both sides (2 on each side).

    • Remove five 7.5 mm Phillips screws on the back of the player.

  2. Philips DVP642 Motherboard Replacement: 2 단계, 이미지 1/2 Philips DVP642 Motherboard Replacement: 2 단계, 이미지 2/2
    • Lift the top panel from the back and remove. It should come off without being forced. There is a lip near the front so you many need to slide the top panel back slightly to remove it.

  3. Philips DVP642 Motherboard Replacement, Motherboard: 3 단계, 이미지 1/3 Philips DVP642 Motherboard Replacement, Motherboard: 3 단계, 이미지 2/3 Philips DVP642 Motherboard Replacement, Motherboard: 3 단계, 이미지 3/3
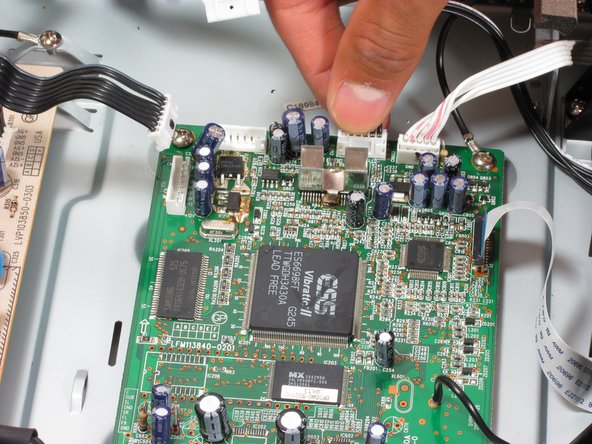
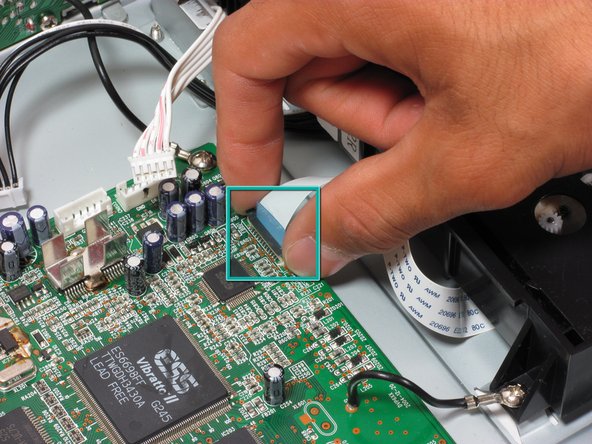
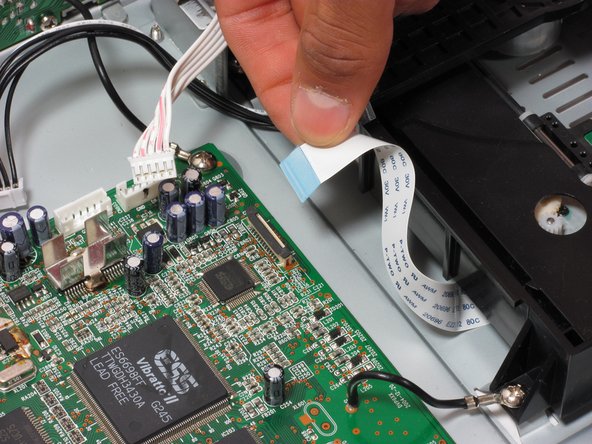
    • Locate the first three ribbon wires.

    • Remove the ribbon wires by grasping firmly as near to the plastic head as possible and pulling.

    • Be firm, but gentle when pulling to avoid pulling the wires off the head.

  4. Philips DVP642 Motherboard Replacement: 4 단계, 이미지 1/3 Philips DVP642 Motherboard Replacement: 4 단계, 이미지 2/3 Philips DVP642 Motherboard Replacement: 4 단계, 이미지 3/3
    • Remove the fourth ribbon wire as in step 2.

    • Remove the fifth ribbon wire by grasping both sides of the black clip and pulling up. When reinserting, pull black clip up, insert the ribbon wire, and push the black clip back down.

  5. Philips DVP642 Motherboard Replacement: 5 단계, 이미지 1/2 Philips DVP642 Motherboard Replacement: 5 단계, 이미지 2/2
    • Remove the following screws:

    • 7.5 mm Phillips screws (2) that secure the motherboard to the bottom panel. The screw on the top right will also be attached to a grounding wire, it is okay to remove this screw.

    • Remove the 7.5 mm Phillips screw on the bottom right that attaches the grounding wire to the disc tray.

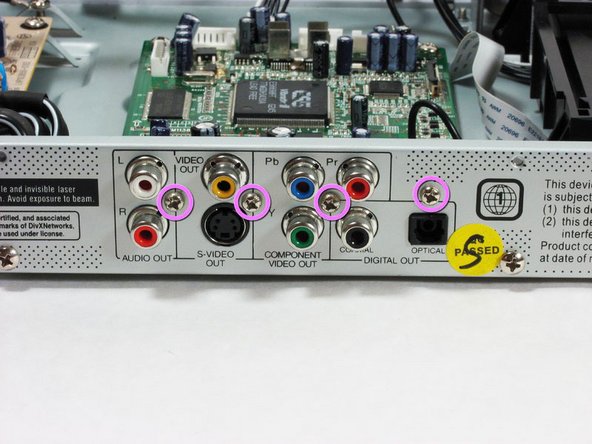
    • 7.5 mm Phillips screws (4) on outside of player near input/output plugs.

  6. Philips DVP642 Motherboard Replacement: 6 단계, 이미지 1/1
    • Remove the motherboard by pulling it back and then up gently.

    • The input/output plugs should slide out easily from the holes in the back panel.

결론

To reassemble your device, follow these instructions in reverse order.

다른 6명이 해당 안내서를 완성하였습니다.

Nathan Klammer

회원 가입일: 10/06/11

461 평판

안내서 3개 작성하였습니다

Cal Poly, Team 21-20, Maness Fall 2011 Cal Poly, Team 21-20, Maness Fall 2011 회원

CPSU-MANESS-F11S21G20

4 회원들

안내서 7개 작성하였습니다

댓글 한 개

Dvp3005/Ik mother bord .how much price

Md Younus - 답글

댓글 쓰기

조회 통계:

24 시간 전: 1

7일 전: 5

30일 전: 26

전체 시간: 11,361