주요 콘텐츠로 건너뛰기

Philips HD9252 Transformer Replacement

필요한 것

  1. Philips HD9252 Transformer Replacement, Top: 1 단계, 이미지 1개 중 1개
    • Insert a nylon spudger underneath the top of the device.

    • Leverage the tool and pop off each of the eight tabs holding the plastic cover in place.

  2. Philips HD9252 Transformer Replacement: 2 단계, 이미지 1개 중 1개
    • Remove the four 12.4 mm screws in each of the corners using a JIS #1 screwdriver.

  3. Philips HD9252 Transformer Replacement: 3 단계, 이미지 1개 중 1개
    • Remove the top by lifting it upwards and setting it down.

  4. Philips HD9252 Transformer Replacement, Transformer: 4 단계, 이미지 1개 중 1개
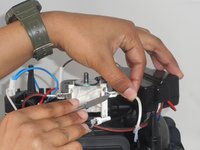
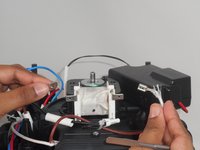
    • Remove the two 39.5 mm screws attached to the black piece of the transformer using a JIS #1 screwdriver.

  5. Philips HD9252 Transformer Replacement: 5 단계, 이미지 1개 중 1개
    • Remove the top piece, using a Phillips #2 screwdriver, to get the whole transformer.

  6. Philips HD9252 Transformer Replacement: 6 단계, 이미지 2개 중 1개 Philips HD9252 Transformer Replacement: 6 단계, 이미지 2개 중 2개
    • Remove the brown and white wire attached to the transformer using a spudger.

    • Disconnect both the brown and white cables.

  7. Philips HD9252 Transformer Replacement: 7 단계, 이미지 1개 중 1개
    • Replace the transformer.

결론

To reassemble your device, follow these instructions in reverse order.

작성자

2다른 기여자 명과 함께

Zach Person

회원 가입일: 02/14/24

442 평판

안내서 4개를 작성함

댓글 한 개

This is not the transformer, it is the coil of the shaded-pole motor.

Werner Hinzmann - 답글

댓글 쓰기

조회 통계:

지난 24시간: 1

지난 7일: 12

지난 30일: 47

전체 시간: 432