이 버전에는 잘못된 편집 사항이 있을 수 있습니다. 최신 확인된 스냅샷으로 전환하십시오.
필요한 것
-
이 단계는 번역되지 않았습니다. 번역을 도와주십시오
-
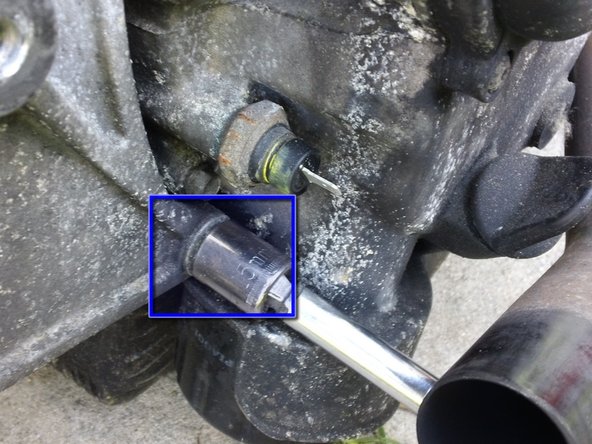
Loosen the exhaust strap:
-
Use an 12mm wrench to loosen the exhaust band lock nut.
-
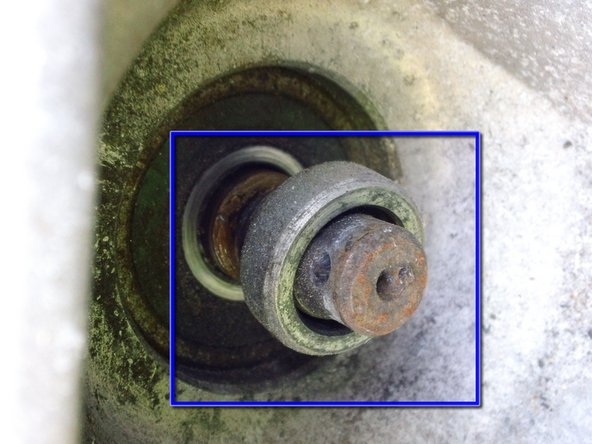
A 6mm Allen key is required to unscrew the bolt at the bottom of the band.
-
Once the bottom of the strap is loose, you can push it upward and slide the retaining pin that secures the top of the strap out to release it.
-
-
이 단계는 번역되지 않았습니다. 번역을 도와주십시오
-
Use a 13mm socket to loosen the clamp between the muffler and header pipe.
-
-
이 단계는 번역되지 않았습니다. 번역을 도와주십시오
-
A Torx T40 driver is required to remove the final bolt securing the exhaust.
-
The Exhaust assembly is now free. Pull and wiggle the muffler back (taking care not to damage your exhaust joint gasket) until the muffler comes free from the header pipe.
-
-
-
이 단계는 번역되지 않았습니다. 번역을 도와주십시오
-
Remove the 15mm nut securing the upper front corner of the swingarm.
-
Remove the 15mm nut securing the lower front corner of the swing arm.
-
-
이 단계는 번역되지 않았습니다. 번역을 도와주십시오
-
Straighten and remove the cotter pin securing the rear hub nut cover.
-
Remove the cover from the rear hub nut.
-
-
이 단계는 번역되지 않았습니다. 번역을 도와주십시오
-
Remove the 24mm rear hub nut. Having a friend hold the rear brake handle will help break it loose. You can also use an impact wrench to remove it if you cannot get enough torque with a hand ratchet.
-
There is a spacer behind the rear hub nut. It will slide off with little or no force.
-
There is a spacer behind the rear hub nut. It will slide off with little or no force.
-
-
이 단계는 번역되지 않았습니다. 번역을 도와주십시오
-
Grip the swingarm and pull it free of the 2 15mm studs and rear axle. You will now have access to the rear wheel.
-
and dont forget to remove 2 allen screws from shocks absorber and tilt it to remove swingers and tyre
-
-
이 단계는 번역되지 않았습니다. 번역을 도와주십시오
-
Remove the five 10mm bolts securing the rear wheel.
-
Pull the wheel towards you, sliding it free of the rear axle.
-


다른 5명이 해당 안내서를 완성하였습니다.


댓글 한 개
This is perhaps the best written diy that i have come across. As someone who has penned procedures for many items I take my hat off to you. Keep up the quality work. I would add to soak everything down with a “nutbuster spray and let soak before beginning. Sometimes things are a little too easily broken, especially cast items.
jhrichaiii@aol.com