주요 콘텐츠로 건너뛰기

PlayStation 2 Slimline Fan Replacement

필요한 것

  1. PlayStation 2 Slimline Fan Replacement, Outer Shell: 1 단계, 이미지 1/1
    • Disconnect all cables from the console and flip the unit over to reveal its base.

  2. PlayStation 2 Slimline Fan Replacement: 2 단계, 이미지 1/3 PlayStation 2 Slimline Fan Replacement: 2 단계, 이미지 2/3 PlayStation 2 Slimline Fan Replacement: 2 단계, 이미지 3/3
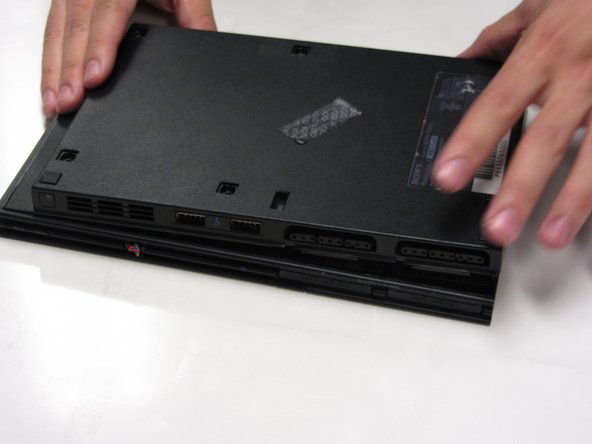
    • Locate the 6 feet on the base of the unit. Pry them off using a spudger to reveal the screws.

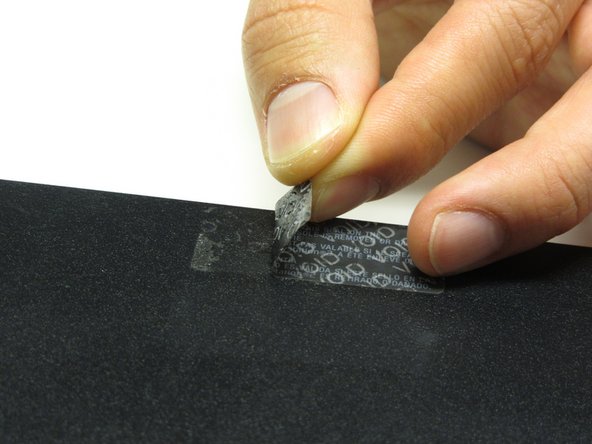
    • Note: One of the feet is located under the sticker shown in the photo. Removing this sticker will void any warranty with Sony.

  3. PlayStation 2 Slimline Fan Replacement: 3 단계, 이미지 1/3 PlayStation 2 Slimline Fan Replacement: 3 단계, 이미지 2/3 PlayStation 2 Slimline Fan Replacement: 3 단계, 이미지 3/3
    • Remove all six 4.0 mm screws from the base of the unit using a #1 Phillips screwdriver.

  4. PlayStation 2 Slimline Fan Replacement: 4 단계, 이미지 1/3 PlayStation 2 Slimline Fan Replacement: 4 단계, 이미지 2/3 PlayStation 2 Slimline Fan Replacement: 4 단계, 이미지 3/3
    • Starting at the corner at which the power and Ethernet ports are located, pry open the outer shell using a spudger and continue around the entire unit.

    • Note: You may use your hands for additional force to separate the two pieces of the outer shell.

  5. PlayStation 2 Slimline Fan Replacement, Fan: 5 단계, 이미지 1/2 PlayStation 2 Slimline Fan Replacement, Fan: 5 단계, 이미지 2/2
    • Locate the fan at the front, left section of the unit.

  6. PlayStation 2 Slimline Fan Replacement: 6 단계, 이미지 1/2 PlayStation 2 Slimline Fan Replacement: 6 단계, 이미지 2/2
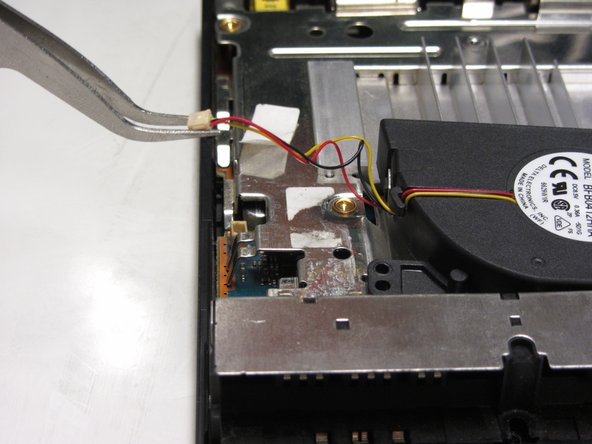
    • Peel off the sticker holding the power cords to the unit.

  7. PlayStation 2 Slimline Fan Replacement: 7 단계, 이미지 1/2 PlayStation 2 Slimline Fan Replacement: 7 단계, 이미지 2/2
    • Lift the connector from the motherboard with a pair of tweezers using a firm, upward force.

  8. PlayStation 2 Slimline Fan Replacement: 8 단계, 이미지 1/3 PlayStation 2 Slimline Fan Replacement: 8 단계, 이미지 2/3 PlayStation 2 Slimline Fan Replacement: 8 단계, 이미지 3/3
    • Remove all three 1.6 mm screws fastening the fan to the unit using a #1 Phillips screwdriver.

    • Gently lift and remove the fan from its compartment.

결론

To reassemble your device, follow these instructions in reverse order.

다른 10명이 해당 안내서를 완성하였습니다.

Thomas Sullivan

회원 가입일: 10/23/13

3,927 평판

안내서 6개 작성하였습니다

댓글 0개

댓글 쓰기

조회 통계:

24 시간 전: 4

7일 전: 30

30일 전: 98

전체 시간: 8,311