이 버전에는 잘못된 편집 사항이 있을 수 있습니다. 최신 확인된 스냅샷으로 전환하십시오.
필요한 것
-
이 단계는 번역되지 않았습니다. 번역을 도와주십시오
-
Use the tip of a spudger to remove the black rubber screw cover from the side of the PS3.
-
-
이 단계는 번역되지 않았습니다. 번역을 도와주십시오
-
Pull the smart plate toward the hard drive bay, then lift it off the body of the PS3.
-
-
이 단계는 번역되지 않았습니다. 번역을 도와주십시오
-
Remove the following seven screws:
-
Six 52 mm Phillips screws
-
One 30 mm Phillips screw
-
-
이 단계는 번역되지 않았습니다. 번역을 도와주십시오
-
Lift the top cover from its rear edge and rotate it toward the front of the PS3.
-
Remove the top cover.
-
There is a plastic hook located in a hole on the top back right hand side corner. Carefully push the plastic hook a bit from the rear of the machine with a spudger to release the rear right of the casing.
-
-
-
이 단계는 번역되지 않았습니다. 번역을 도와주십시오
-
Lift the Blu-ray drive from the edge nearest the power supply and rotate it away from the chassis enough to access its ribbon cable.
-
-
이 단계는 번역되지 않았습니다. 번역을 도와주십시오
-
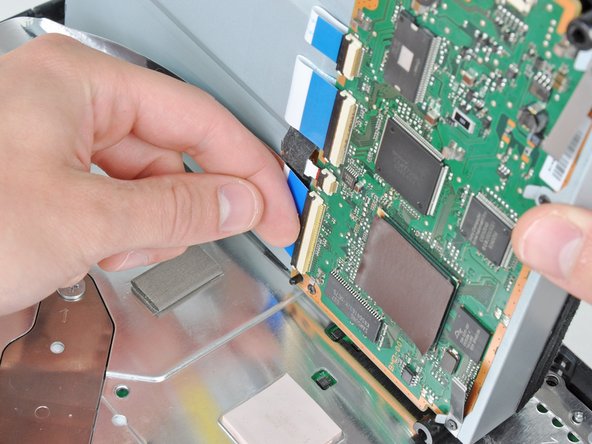
Use your fingernail to flip up the retaining flap on the Blu-ray ribbon cable socket.
-
Pull the ribbon cable out of its socket.
-
Remove the Blu-ray drive from the PS3.
-
-
이 단계는 번역되지 않았습니다. 번역을 도와주십시오
-
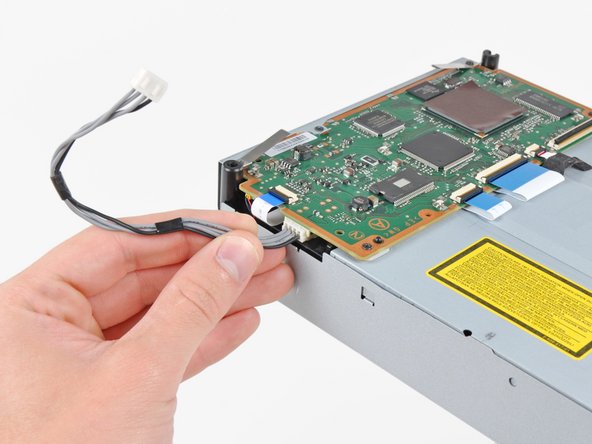
Pull the control board ribbon cable straight up and out of its socket on the motherboard.
-
-
이 단계는 번역되지 않았습니다. 번역을 도와주십시오
-
Remove the two 12 mm Phillips screws securing the control board to the lower case.
-
Remove the control board and its attached cable from the PS3.
-
-
이 단계는 번역되지 않았습니다. 번역을 도와주십시오
-
Remove the following eight screws securing the motherboard assembly to the lower case:
-
Seven 12 mm Phillips screws (ph2)
-
One 30 mm Phillips screw
-
-
이 단계는 번역되지 않았습니다. 번역을 도와주십시오
-
Use the flat end of a spudger to pry the hard drive bay cover away from the lower case.
-
Remove the hard drive bay cover.
-
-
이 단계는 번역되지 않았습니다. 번역을 도와주십시오
-
Remove the 7.7 mm Phillips screw securing the ground strap to the chassis.
-
-
이 단계는 번역되지 않았습니다. 번역을 도와주십시오
-
Pull the AC-In cables slightly away from the rear cover for clearance to access the AC-In connector.
-
While depressing its locking mechanism, pull the AC-In connector out of its socket on the power supply.
-
-
이 단계는 번역되지 않았습니다. 번역을 도와주십시오
-
Pull the AC inlet out from the bottom of the rear cover, minding any of its cables that may get caught.
-
다른 24명이 해당 안내서를 완성하였습니다.


