이 버전에는 잘못된 편집 사항이 있을 수 있습니다. 최신 확인된 스냅샷으로 전환하십시오.
필요한 것
-
-
이 단계는 번역되지 않았습니다. 번역을 도와주십시오
-
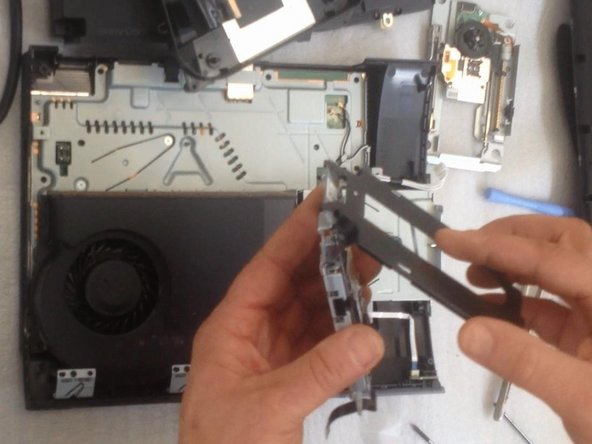
Disconnect two flex-cables and move the Laser Unit. Remove the two screws and the small cable and then take out the Power Supply Unit.
-
-
이 단계는 번역되지 않았습니다. 번역을 도와주십시오
-
Disconnect this flex-cable and attach it to the new spare part. Let's start assembling.
-


다른 10명이 해당 안내서를 완성하였습니다.

팀

댓글 5개
Very good job, kudos!
I have found that there are to types of lasers do you sell the second one that does not have the black screws on top but are silver. I have found the one with the silver screws has a smaller laser flex cable and plug. its for the cech-43xx
My only problem now is how to purchase the right Laser unit? Any specs for the right Laser unit? Thanks
I’ve done this but my ps3 still doesn’t read disks it spins it up 4 odd times but doesn’t read them and it sounds like the disk skims the top of the laser unit but it hasn't done any damage and it does it with both units, I’m so lost on what to do.
I am replacing the optical drive in my console. But didn't note where the drive ribbon was positioned!? Every video I have found, they just pop right in...my original and replacement drives, have larger receptacles than the ribbon it self. There are at least 5 pins, that don't have (potentially) anything connecting them, to the ribbon. I don't want to randomly place the ribbon in one of the possible (7?) positions and fry something in the process...so where do I connect the smaller ribbon?!