이 버전에는 잘못된 편집 사항이 있을 수 있습니다. 최신 확인된 스냅샷으로 전환하십시오.
필요한 것
-
이 단계는 번역되지 않았습니다. 번역을 도와주십시오
-
Turn the console upside down and remove the five 15.8 mm-long Phillips #1 screws.
-
-
이 단계는 번역되지 않았습니다. 번역을 도와주십시오
-
While holding the top and bottom halves of the console together, flip the console back over. Lift the top cover straight up to remove it.
-
-
이 단계는 번역되지 않았습니다. 번역을 도와주십시오
-
Remove five Phillips #1 screws securing the metal shield to the controller ports:
-
Two 14 mm screws
-
Three 8 mm screws
-
-
이 단계는 번역되지 않았습니다. 번역을 도와주십시오
-
Pull the controller port's ribbon cable straight up and out of its socket on the motherboard to disconnect it.
-
-
-
이 단계는 번역되지 않았습니다. 번역을 도와주십시오
-
Pull the optical drive power cable straight up and out of its socket on the motherboard to disconnect it.
-
-
이 단계는 번역되지 않았습니다. 번역을 도와주십시오
-
Use the flat end of a spudger to lift up and unlock one side of the data cable's connector on the motherboard. Repeat this step on the other side of the connector.
-
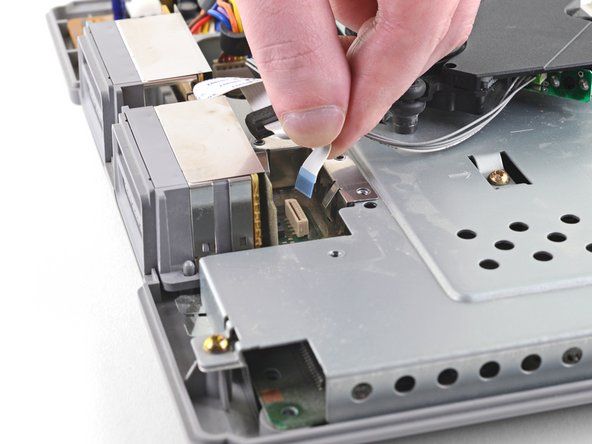
Gently pull the optical drive data cable straight up and out of its socket on the motherboard to disconnect it.
-
-
이 단계는 번역되지 않았습니다. 번역을 도와주십시오
-
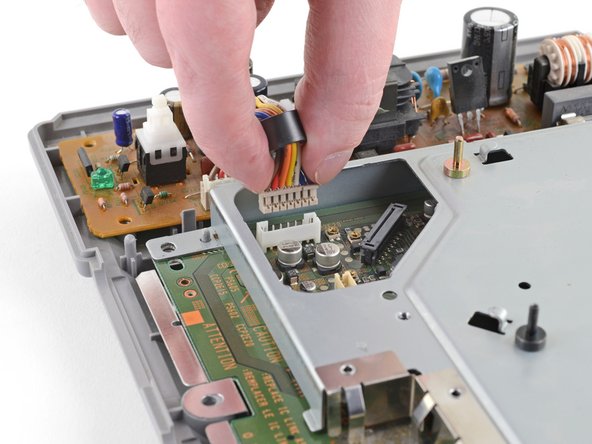
Pull the power supply cable straight up and out of its socket on the motherboard to disconnect it.
-
-
이 단계는 번역되지 않았습니다. 번역을 도와주십시오
-
Remove the five 14 mm-long Phillips #1 screws from the motherboard's metal shield.
-
-
이 단계는 번역되지 않았습니다. 번역을 도와주십시오
-
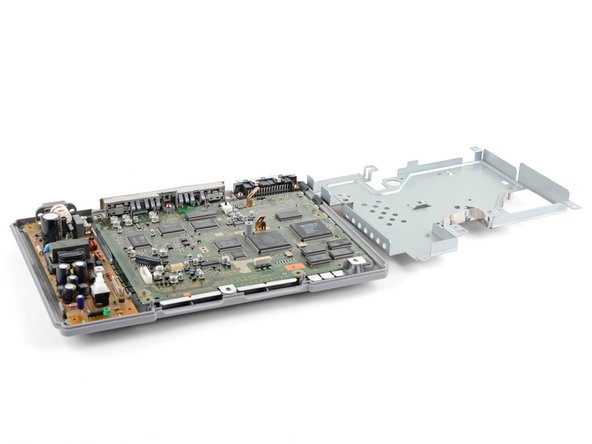
From the left side, lift up the metal shield and rotate it about its right edge, opening it like a book.
-
-
이 단계는 번역되지 않았습니다. 번역을 도와주십시오
-
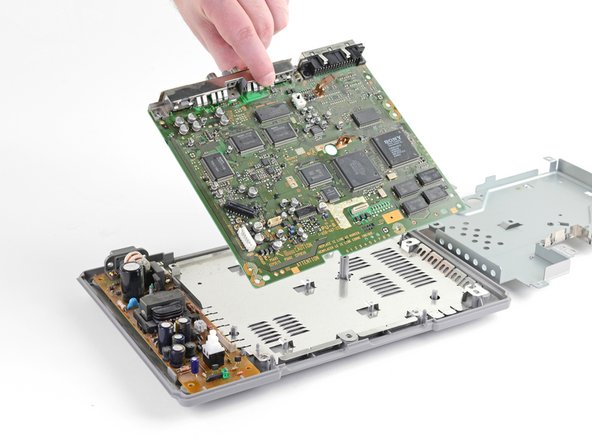
Remove the three 14 mm-long Phillips #1 screws securing the motherboard to the bottom case.
-


다른 27명이 해당 안내서를 완성하였습니다.

댓글 2개
Excelente guía, esto ayuda a muchos para aprender a reparar y no hacer gastos innecesarios.