주요 콘텐츠로 건너뛰기

Polaroid P902 Charging Port Replacement

필요한 것

  1. Polaroid P902 Charging Port Replacement, Charging Port: 1 단계, 이미지 1/1
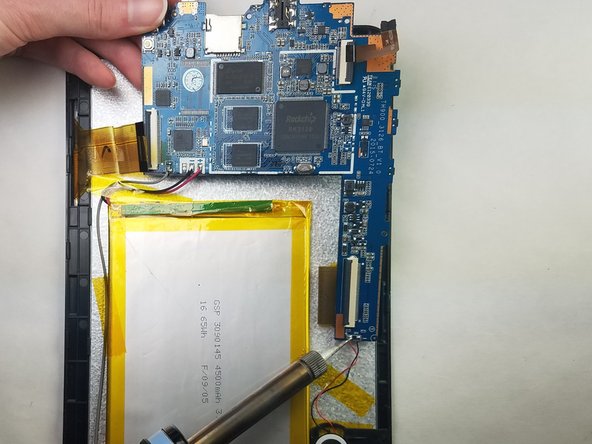
    • Using the PH00 screwdriver, remove the two 4mm screws located on both the left and right sides of the charging port on the bottom of the tablet.

  2. Polaroid P902 Charging Port Replacement: 2 단계, 이미지 1/1
    • Using the plastic opening tool, insert it into the crease where the glass screen meets the housing of the rest of the tablet. Once inserted, keep inserted and run along the edges to separate the plastic clips from each other to dislodge the back plastic away from the glass and internal components.

  3. Polaroid P902 Charging Port Replacement: 3 단계, 이미지 1/1
    • Using the PH00 screwdriver, unscrew the four 4.4 mm screws that are anchoring the circuit board down to the rest of the tablet.

  4. Polaroid P902 Charging Port Replacement: 4 단계, 이미지 1/1
    • Using your fingernail, gently lift up the connectors on the two tabs that are holding the ribbons in place to the circuit board.

    • Be careful when pulling out or reconnecting the ribbons, since if the ribbon or connectors break, they are hard to fix.

  5. Polaroid P902 Charging Port Replacement: 5 단계, 이미지 1/3 Polaroid P902 Charging Port Replacement: 5 단계, 이미지 2/3 Polaroid P902 Charging Port Replacement: 5 단계, 이미지 3/3
    • Using a soldering iron, desolder the points circled on the picture until the solder has liquefied enough to be able to remove the wires from the circuit board.

    • When using the soldering iron, be careful not to cause damage to the motherboard.

  6. Polaroid P902 Charging Port Replacement: 6 단계, 이미지 1/2 Polaroid P902 Charging Port Replacement: 6 단계, 이미지 2/2
    • Place the tip of the soldering iron on the four points circled in the image long enough to liquefy the surrounding solder.

  7. Polaroid P902 Charging Port Replacement: 7 단계, 이미지 1/1
    • Using tweezers, remove the charging port from the circuit board.

    • This should be done quickly as the solder will begin to solidify.

결론

To reassemble your device, follow these instructions in reverse order.

Trent Moskwinski

회원 가입일: 03/26/18

145 평판

안내서 1개 작성함

IUPUI, Team S2-G2, Harley Spring 2018 IUPUI, Team S2-G2, Harley Spring 2018 회원

IUPUI-HARLEY-S18S2G2

3 회원들

안내서 4개 작성하였습니다

댓글 0개

댓글 쓰기

조회 통계:

24 시간 전: 0

7일 전: 0

30일 전: 6

전체 시간: 720