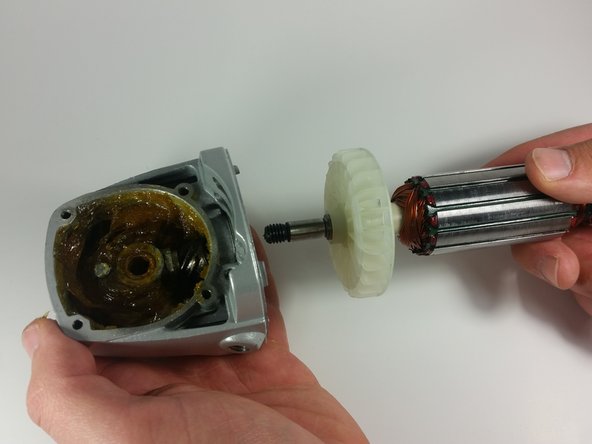
주요 콘텐츠로 건너뛰기

Porter-Cable PC60TAG Motor Assembly Replacement

필요한 것

  1. Porter-Cable PC60TAG Motor Assembly Replacement, Motor Assembly: 1 단계, 이미지 1/1
    • Using the Phillips #2 screwdriver, remove the 3/4" Phillips screw on the back cover.

  2. Porter-Cable PC60TAG Motor Assembly Replacement: 2 단계, 이미지 1/1
    • Holding the front of the device, carefully slide the back cover over the cord.

  3. Porter-Cable PC60TAG Motor Assembly Replacement: 3 단계, 이미지 1/1
    • Using the Phillips #2 screwdriver, remove the1/2" Phillips screw holding on the motor brush arm. Repeat on the other side.

  4. Porter-Cable PC60TAG Motor Assembly Replacement: 4 단계, 이미지 1/1
    • Carefully pull the motor brush arm away from the other device, you can leave the wire connected to device. Repeat on the other side.

  5. Porter-Cable PC60TAG Motor Assembly Replacement: 5 단계, 이미지 1/1
    • Using the Phillips #2 screwdriver, remove the 1 inch black retainer screw.

  6. Porter-Cable PC60TAG Motor Assembly Replacement: 6 단계, 이미지 1/1
    • Using the Phillips #2screwdriver, remove the 4, 1/2" Phillips screws around the head gear.

  7. Porter-Cable PC60TAG Motor Assembly Replacement: 7 단계, 이미지 1/1
    • Carefully pull the head gear away from the device, and set aside.

  8. Porter-Cable PC60TAG Motor Assembly Replacement: 8 단계, 이미지 1/1
    • Using the Phillips #2 screwdriver, remove the two, 1/2" screws holding the head to the body on the bottom side of the grinder.

  9. Porter-Cable PC60TAG Motor Assembly Replacement: 9 단계, 이미지 1/1
    • Using the Phillips #2 screwdriver, remove the other two 1/2" screws holding the head to the body on the top side of the grinder.

  10. Porter-Cable PC60TAG Motor Assembly Replacement: 10 단계, 이미지 1/1
    • Holding the head of the device, carefully pull the motor assembly out of the body of the device.

  11. Porter-Cable PC60TAG Motor Assembly Replacement: 11 단계, 이미지 1/1
    • Using a 9/16" wrench, loosen the spindle nut inside the head, from the motor assembly.

  12. Porter-Cable PC60TAG Motor Assembly Replacement: 12 단계, 이미지 1/1
    • Pull the motor assembly away from the head.

결론

To reassemble your device, follow these instructions in reverse order.

Mackenzie Fairbanks

회원 가입일: 03/24/16

564 평판

안내서 5개 작성하였습니다

UMass Dartmouth, Team 2-2, Isaacson Spring 2016 UMass Dartmouth, Team 2-2, Isaacson Spring 2016 회원

UMASSD-ISAACSON-S16S2G2

3 회원들

안내서 5개 작성하였습니다

댓글 0개

댓글 쓰기

조회 통계:

24 시간 전: 0

7일 전: 0

30일 전: 2

전체 시간: 495