이 안내서에는 최근 변경 사항이 더 있습니다. 최신 비검증 버전으로 전환하십시오.
소개
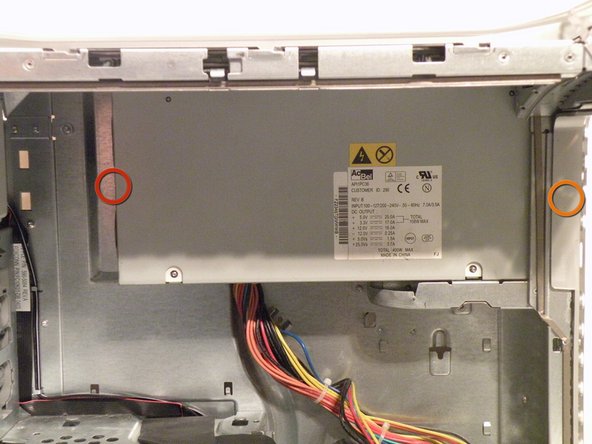
The Power Mac G4 MDD uses a uniquely shaped 344W or 400W AcBel or Samsung power supply. It has a 24-pin connector (not 24-pin ATX!). The original AcBel power supplies were notoriously loud, earning the Power Mac G4 MDD the nickname "WindTunnel".
필요한 것
-
-
The Power Mac G4 MDD: the last, and the fastest G4-based Mac. This computer boasted up to a Dual 1.42GHz PowerPC G4 CPU (though I have a single 1.25GHz).
-
Two USB 1.1 Ports
-
Assorted Audio
-
Video (ADC & DVI)
-
Networking (RJ-45 Ethernet/56k Modem)
-
Some later model MDD's (such as the dual 1.42GHz) Have a FireWire 800 Port Here:
-
-
-
-
Once the cables are free, set the drive cage aside.
-
To remove the hard drives from the cages, remove the four screws on the sides of the cage that are connected to the drives, then slide the drives out.
-
The two cages are cross compatible and can be put in either location.
-
The MDD does not have a 128GB drive limit like older Macs. My MDD has 3 drives (a 400GB Hitatchi Deskstar, 40GB Seagate Barracuda 7200.7, and a 30GB Quantum Fireball LCT).
-
Note the ID jumpers on the two drive set. One is set to Master, the other to slave. A single drive can be set to Cable Select.
-
-
-
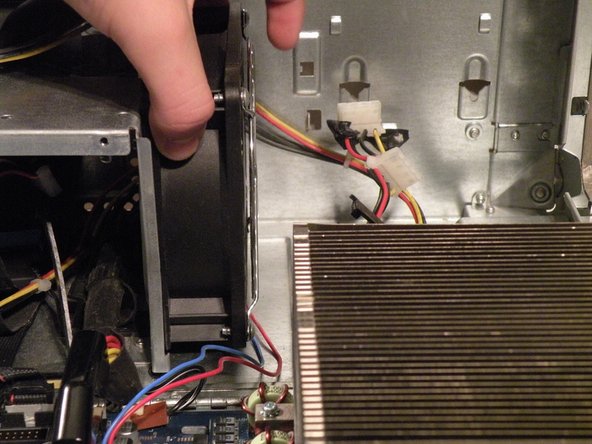
You may find removing the system fan is unnecessary to remove the power supply cable from behind it, but if you're unfamiliar with how the power supply cable is situated behind the fan, this step is useful in seeing this.
-
Disconnect the optical drive IDE/ATA-33 cable from the logic board.
-
Disconnect the system fan 2-wire power cable connector from the logic board.
-
-
-
To remove the power supply connector from the motherboard, push the top end of this clip towards the power supply connector, and pull the connector up and off the motherboard. If the connector seems to be stuck, rock it back and forth a tiny bit to loosen up the connection, then pull up again.
-
-
-
The power supply has a 24-pin connector with non-standard voltages, so dropping in a 24-pin ATX power supply without modification isn't a great idea.
-
The power supply connector has a 25V lead to drive Apple ADC displays, so though it is possible to modify an ATX power supply, it won't be able to drive ADC displays, just VGA, or DVI, though the computer will work fine (I've actually tried this).
-
It also has three 12V/5V rails to drive all six drives (four hard drives, two optical drives) simultaneously. This is the only Macintosh computer other than the Mac Pro to support six drives.
-


To reassemble your device, follow these instructions in reverse order.
To reassemble your device, follow these instructions in reverse order.
다른 46명이 해당 안내서를 완성하였습니다.

팀

댓글 9개
Agreed, fan removal totally unnecessary.
maccentric - 답글
Thank you. Used the guide to replace the power supply, in my G4 , with one from a dead G4 I had in the garage.
Great guide ... I didn't remove either of the fans and was able to remove Power Supply Unit. Now trying to decide how to get it fixed or to get a rebuilt or ....