소개
Removing the power supply of the Power Mac G4.
필요한 것
-
-
The handle to open your computer is located on top of the right side panel.
-
-
-
The optical drive is in the top left corner of the case.
-
-
-
-
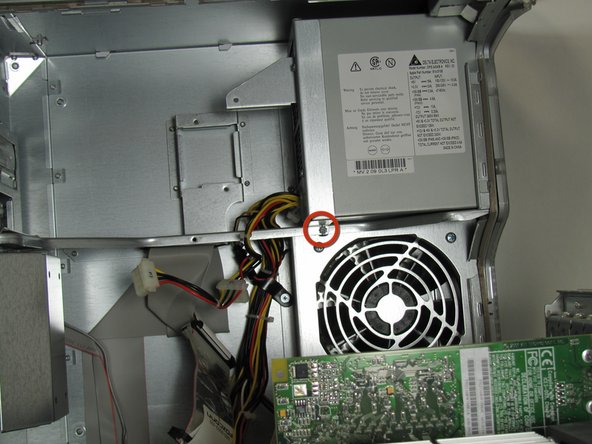
Before sliding out the power supply make sure to disconnect the cable to the big fan by pressing in the small black tab on the back of the black connector!
-
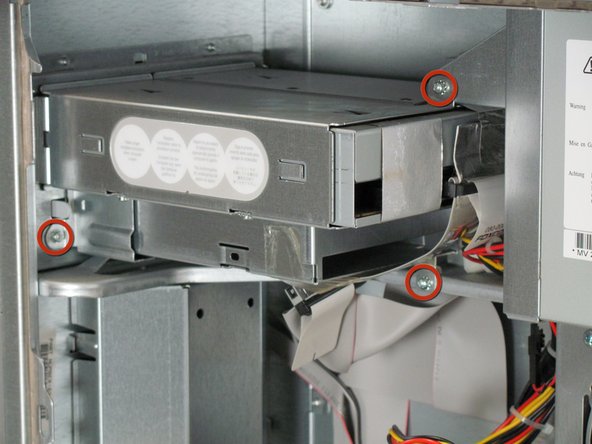
Slide the power supply away from the back of the computer and pull it out carefully stringing the cables through the hole in the metal support.
-


To reassemble your device, follow these instructions in reverse order.
To reassemble your device, follow these instructions in reverse order.
다른 24명이 해당 안내서를 완성하였습니다.
팀

Cal Poly, Team 14-41, Regan Winter 2010 Cal Poly, Team 14-41, Regan Winter 2010 회원
CPSU-REGAN-W10S14G41
4 회원들
안내서 17개 작성하였습니다
댓글 5개
I hate to say this, but that is not fixing the power supply but replacing the power supply with a new unit. i was hoping to fix it as mine blew and was hoping to revive it, but not luck on this end by the look of it. :(
Thanks for the clear instructions to replace the power supply. I got my part on eBay for $29 (other online stores are charging $100-200+ for it) to doctor up an old G4, and it works like a charm now.
Brenna Jue - 답글
Is it normal that after installing a replacement power supply for the PowerMac Quicksilver 733MHZ one of the fans is still running? Not sure which one, but once everything is shut down completely, I just pull the plug to avoid that fan from running for ever. Any feedback is appreciated. That unit still runs under OSX 10.4.11 and Classic.