이 버전에는 잘못된 편집 사항이 있을 수 있습니다. 최신 확인된 스냅샷으로 전환하십시오.
필요한 것
-
이 단계는 번역되지 않았습니다. 번역을 도와주십시오
-
Remove all the cables, including the power cables before opening the unit.
-
-
-
이 단계는 번역되지 않았습니다. 번역을 도와주십시오
-
Remove the air deflector (the clear plastic cover) by pulling on the handle.
-
-
이 단계는 번역되지 않았습니다. 번역을 도와주십시오
-
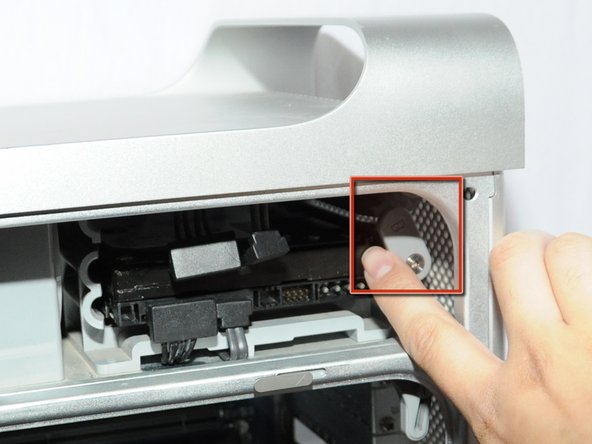
Rotate up plastic tab labeled "B" on the right hand side of hard drive.
-


다른 101명이 해당 안내서를 완성하였습니다.
팀

Cal Poly, Team 5-8, Forte Winter 2010 Cal Poly, Team 5-8, Forte Winter 2010 회원
CPSU-FORTE-W10S5G8
7 회원들
안내서 20개 작성하였습니다
댓글 8개
I've tried many times to remove this and my other misplaced comment duplicate, but here they'll stay apparently... you're free to delete them if you can.
Petteri -
REMOVE the plastic cover to avoid knocking it off in the process of working on the drive bays. (Just a precaution - kind of like not setting a glass of red wine on an elegant white table cloth.)
EyeSpye -
The Comments appended to these instructions are VERY helpful. If you read them you will save time, and avoid some of the mistakes I made - particularly with respect to the Drive mounting screws located to the left side of the drive installation bays, and the need to remove the bottom drive FIRST if you wish to access the top drive. THANKS for a great set of instructions.
This was helpful! Excellent photographs and clear, simple instructions. Thanks, Jessica and iFixit!
I used these instructions to remove an additional hard drive while leaving the original hard drive in place. I did not know which one to remove, as the hard drives do not have side labels, so I guessed: the original drive was on top, the additional drive on the bottom. It might be helpful for other viewers to know what to do in a similar situation.
Cheers.