주요 콘텐츠로 건너뛰기

PowerA Enhanced Wired Controller Disassembly

필요한 것

  1. PowerA Enhanced Wired Controller Disassembly, Start by flipping over the controller the controller to find 8 #0 phillips screws: 1 단계, 이미지 1/2 PowerA Enhanced Wired Controller Disassembly, Start by flipping over the controller the controller to find 8 #0 phillips screws: 1 단계, 이미지 2/2
    • Insert wisdom here.

  2. PowerA Enhanced Wired Controller Disassembly, The rear programmable buttons appear to be moulded into the shell so are not replaceable: 2 단계, 이미지 1/2 PowerA Enhanced Wired Controller Disassembly, The rear programmable buttons appear to be moulded into the shell so are not replaceable: 2 단계, 이미지 2/2
    • front shell is pretty standard fair with removable buttons

  3. PowerA Enhanced Wired Controller Disassembly, The front shell has mouldings for rumble motors but the motherboard does not have any apparent connections for them: 3 단계, 이미지 1/2 PowerA Enhanced Wired Controller Disassembly, The front shell has mouldings for rumble motors but the motherboard does not have any apparent connections for them: 3 단계, 이미지 2/2
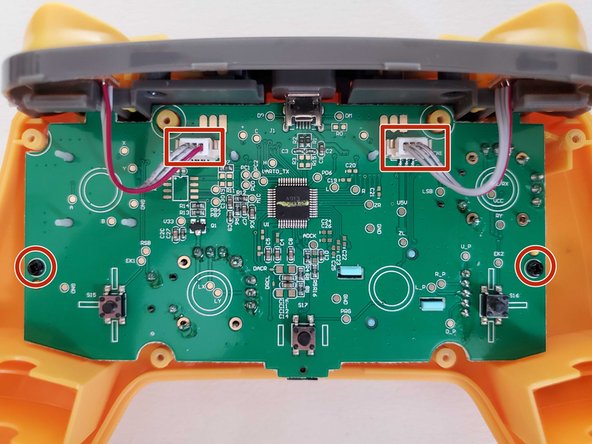
    • two screws hold the shell in place, but first we will remove the should button connections

  4. PowerA Enhanced Wired Controller Disassembly, removing the shoulder button assembly we find two more phillips screws holding the button assembly together: 4 단계, 이미지 1/2 PowerA Enhanced Wired Controller Disassembly, removing the shoulder button assembly we find two more phillips screws holding the button assembly together: 4 단계, 이미지 2/2
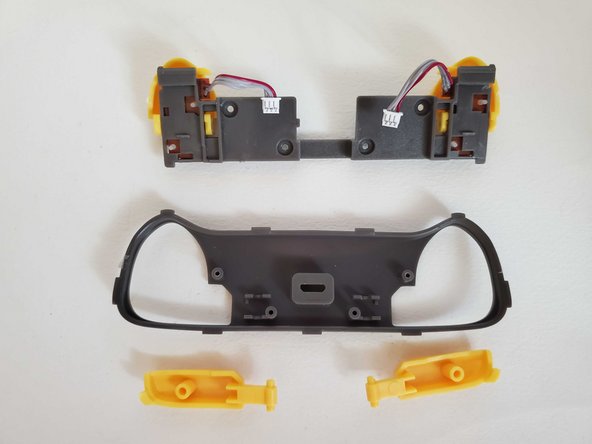
    • nothing holds the L and R bumpers but the ZL and ZR triggers are on a hinge

  5. PowerA Enhanced Wired Controller Disassembly, Remove the ZL and ZR triggers: 5 단계, 이미지 1/2 PowerA Enhanced Wired Controller Disassembly, Remove the ZL and ZR triggers: 5 단계, 이미지 2/2
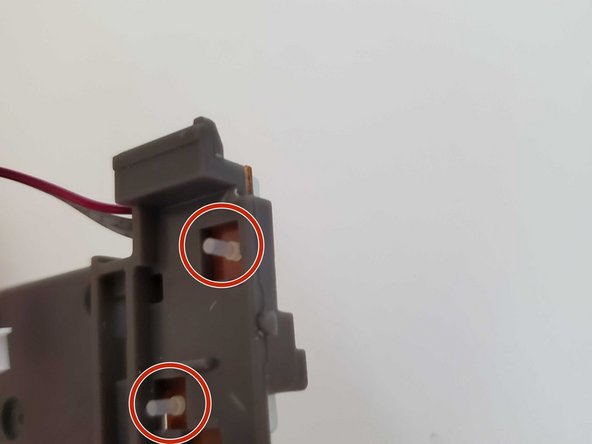
    • small plastic posts hold the triggers in place, gently pry the triggers off the posts using a flathead. These are easy to break so be gentle here. The elastomer underneath is held on by these little posts that stick through the plastic. Removing them is easy but pushing them back in is a challenge

  6. PowerA Enhanced Wired Controller Disassembly, Back to the main board: 6 단계, 이미지 1/2 PowerA Enhanced Wired Controller Disassembly, Back to the main board: 6 단계, 이미지 2/2
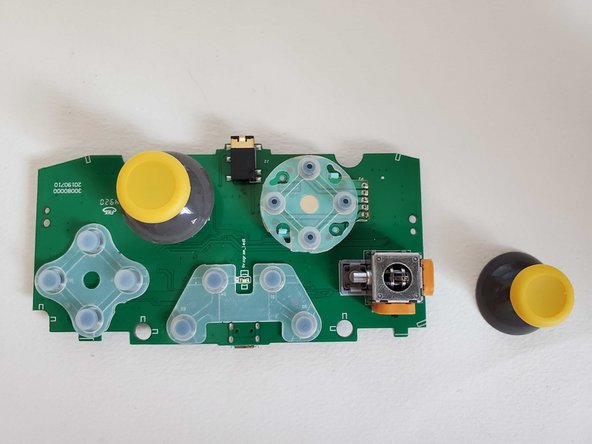
    • the elastomers are held in with little posts that go through the board. The sticks and d pad are soldered in so are not easy to remove

결론

To reassemble your device, follow these instructions in reverse order.

Ivan Sanaev

회원 가입일: 09/30/18

133 평판

안내서 1개 작성함

댓글 0개

댓글 쓰기

조회 통계:

24 시간 전: 2

7일 전: 29

30일 전: 125

전체 시간: 888