주요 콘텐츠로 건너뛰기

PowerBook 3400 M3553 Track Pad Replacement

필요한 것

  1. PowerBook 3400 M3553 Track Pad Replacement, Battery: 1 단계, 이미지 1/1
    • Close the screen and turn the PowerBook over, orienting the computer upside down, using the label to guide you.

  2. PowerBook 3400 M3553 Track Pad Replacement: 2 단계, 이미지 1/2 PowerBook 3400 M3553 Track Pad Replacement: 2 단계, 이미지 2/2
    • Hold the button on the front left side and slide the battery out.

  3. PowerBook 3400 M3553 Track Pad Replacement, Keyboard: 3 단계, 이미지 1/1
    • With a Torx T8 screwdriver, remove the three Torx 24mm screws along the center of the back panel.

  4. PowerBook 3400 M3553 Track Pad Replacement: 4 단계, 이미지 1/3 PowerBook 3400 M3553 Track Pad Replacement: 4 단계, 이미지 2/3 PowerBook 3400 M3553 Track Pad Replacement: 4 단계, 이미지 3/3
    • Turn the computer over and open the display. You should see that the keyboard is loose.

    • Before attempting to remove the keyboard, note that a ribbon cable connects the keyboard to the logic board. Improper removal may damage your keyboard.

    • Slightly lift the front of the keyboard up, and slide the keyboard towards yourself.

    • Carefully lift the top half of the keyboard and pull it towards yourself.

  5. PowerBook 3400 M3553 Track Pad Replacement: 5 단계, 이미지 1/2 PowerBook 3400 M3553 Track Pad Replacement: 5 단계, 이미지 2/2
    • Loosen the ribbon cables connecting the keyboard to the computer by using a plastic opening tool to lift the tabs on either side of the cable port.

    • Gently remove the ribbons from its tabs.

  6. PowerBook 3400 M3553 Track Pad Replacement, RAM: 6 단계, 이미지 1/2 PowerBook 3400 M3553 Track Pad Replacement, RAM: 6 단계, 이미지 2/2
    • Gently wiggle the RAM card to loosen the connection until it pulls free.

  7. PowerBook 3400 M3553 Track Pad Replacement, Track Pad Panel: 7 단계, 이미지 1/1
    • Push the display screen back to give yourself enough space to remove the side panels.

    • Before removing the side panels, note that removing the side panels hastily will damage the underlying panel screw. However, this will not affect the functionality of your PowerBook.

    • Remove the panels on either side by gently but firmly pulling up on them with both hands.

  8. PowerBook 3400 M3553 Track Pad Replacement: 8 단계, 이미지 1/2 PowerBook 3400 M3553 Track Pad Replacement: 8 단계, 이미지 2/2
    • Use the plastic opening tool to lift up the tabs on either side of the ribbon cable port and then gently pull the ribbon cable free.

  9. PowerBook 3400 M3553 Track Pad Replacement: 9 단계, 이미지 1/3 PowerBook 3400 M3553 Track Pad Replacement: 9 단계, 이미지 2/3 PowerBook 3400 M3553 Track Pad Replacement: 9 단계, 이미지 3/3
    • WARNING: There is a high risk of breaking the tabs that lock the panel to the casing. Remove the panel slowly and cautiously to avoid damage.

    • With your index finger and your thumb, squeeze the track pad panel to loosen the clamps. Then slide the panel towards yourself.

  10. PowerBook 3400 M3553 Track Pad Replacement, Track Pad: 10 단계, 이미지 1/3 PowerBook 3400 M3553 Track Pad Replacement, Track Pad: 10 단계, 이미지 2/3 PowerBook 3400 M3553 Track Pad Replacement, Track Pad: 10 단계, 이미지 3/3
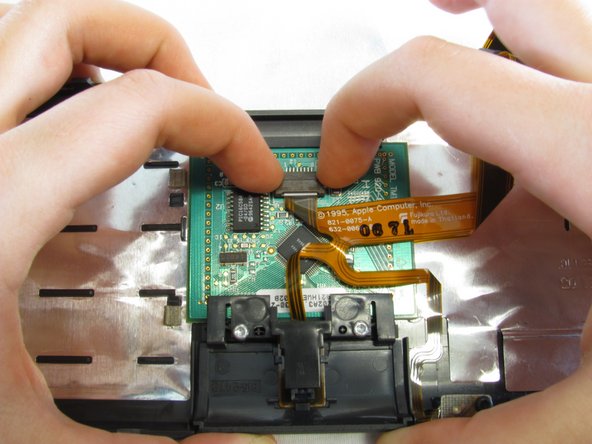
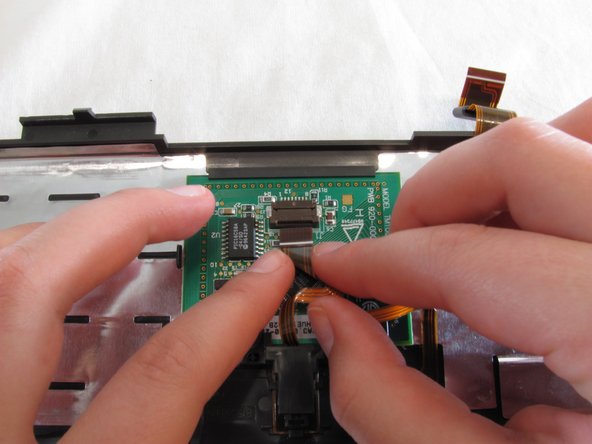
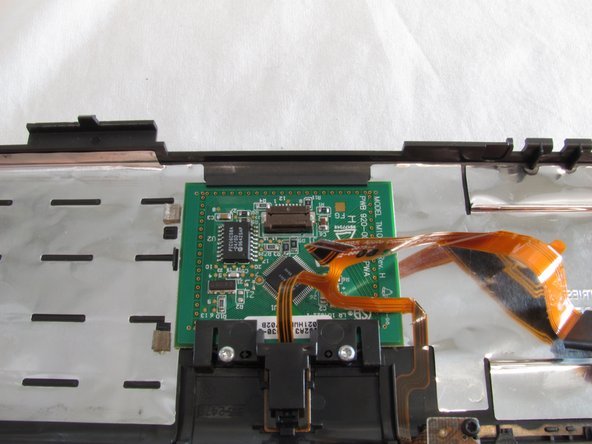
    • Push the buttons on the side of the ribbon cable port on the track pad to release the ribbon cable. Then gently pull the ribbon cable free.

  11. PowerBook 3400 M3553 Track Pad Replacement: 11 단계, 이미지 1/1
    • Remove two T8 7mm long torx screws from the bottom of the track pad panel.

  12. PowerBook 3400 M3553 Track Pad Replacement: 12 단계, 이미지 1/1
    • Slide the track pad button off of the track pad panel.

  13. PowerBook 3400 M3553 Track Pad Replacement: 13 단계, 이미지 1/1
    • Remove the track pad by gently lifting up.

결론

To reassemble your device, follow these instructions in reverse order.

Michael Mondragon

회원 가입일: 04/12/11

274 평판

안내서 9개 작성하였습니다

Cal Poly, Team 24-59, Amido Spring 2011 Cal Poly, Team 24-59, Amido Spring 2011 회원

CPSU-AMIDO-S11S24G59

4 회원들

안내서 9개 작성하였습니다

댓글 0개

댓글 쓰기

조회 통계:

24 시간 전: 2

7일 전: 2

30일 전: 3

전체 시간: 1,263