이 버전에는 잘못된 편집 사항이 있을 수 있습니다. 최신 확인된 스냅샷으로 전환하십시오.
필요한 것
-
이 단계는 번역되지 않았습니다. 번역을 도와주십시오
-
Use a coin to turn the battery locking screw 90 degrees clockwise.
-
Lift the battery out of the computer.
-
-
이 단계는 번역되지 않았습니다. 번역을 도와주십시오
-
Open the computer with the display facing you and rotate the display back as far as possible.
-
Remove the T6 Torx screw from the bottom left corner of the display assembly. The computer casing will not allow the screwdriver to be inserted directly into the screw, so be careful not to strip the screw.
-
-
이 단계는 번역되지 않았습니다. 번역을 도와주십시오
-
Remove the T6 Torx screw from the bottom right corner of the display assembly.
-
-
이 단계는 번역되지 않았습니다. 번역을 도와주십시오
-
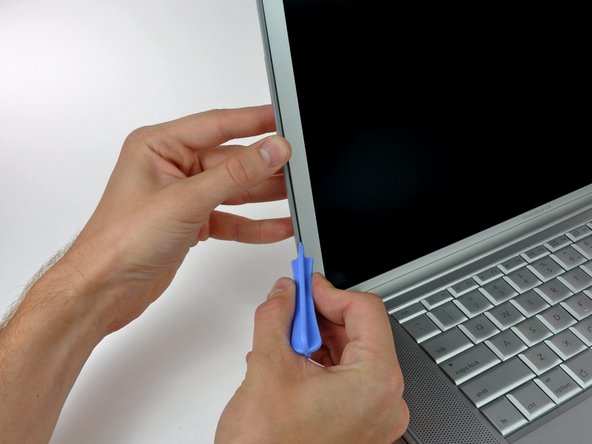
Insert a plastic opening tool between the left edge of the front display bezel and the plastic strip attached to the rear bezel, with the edge of the tool angled toward the LCD.
-
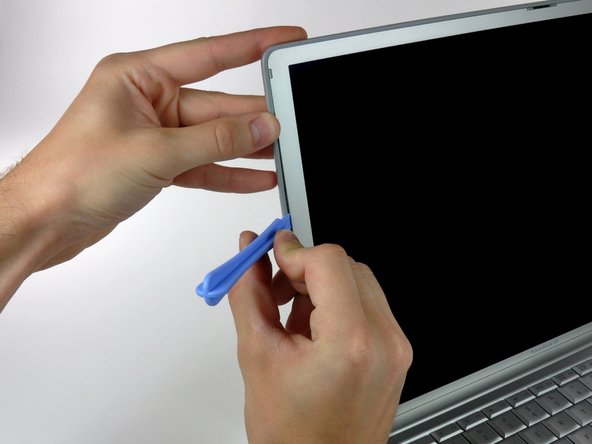
Rotate the tool away from the LCD to pop the rear bezel off the tabs on the front display bezel.
-
Work along the left edge of the display until the rear bezel is evenly separated from the front bezel.
-
-
-
이 단계는 번역되지 않았습니다. 번역을 도와주십시오
-
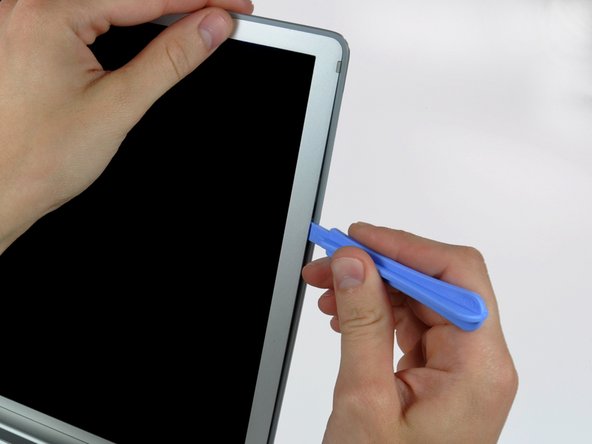
Insert a plastic opening tool between the right edge of the front display bezel and the plastic strip attached to the rear bezel, with the edge of the tool angled toward the LCD.
-
Rotate the tool away from the LCD to pop the rear bezel off the tabs on the front display bezel.
-
Work along the right edge of the display until the rear bezel is evenly separated from the front bezel.
-
-
이 단계는 번역되지 않았습니다. 번역을 도와주십시오
-
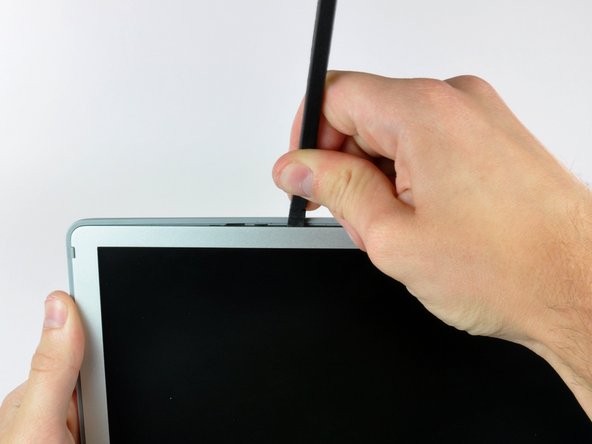
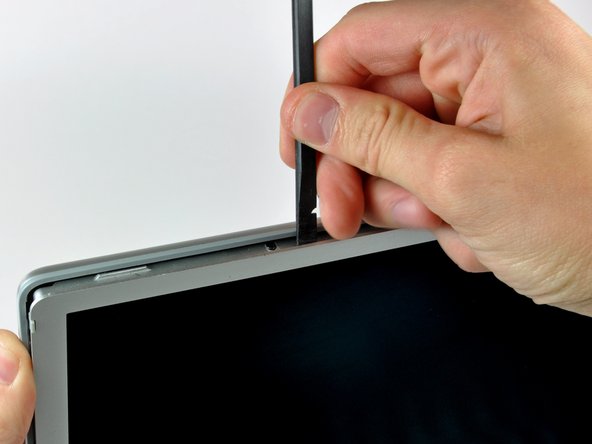
Insert a spudger just to the left of the hinge opening on the top edge of the display between the front display bezel and the plastic strip attached to the rear bezel.
-
Pry the rear bezel away from the front bezel along the top left half of the display.
-
-
이 단계는 번역되지 않았습니다. 번역을 도와주십시오
-
Insert a spudger just to the right of the hinge opening on the top edge of the display between the front display bezel and the plastic strip attached to the rear bezel.
-
Pry the rear bezel away from the front bezel along the top right half of the display.
-
-
이 단계는 번역되지 않았습니다. 번역을 도와주십시오
-
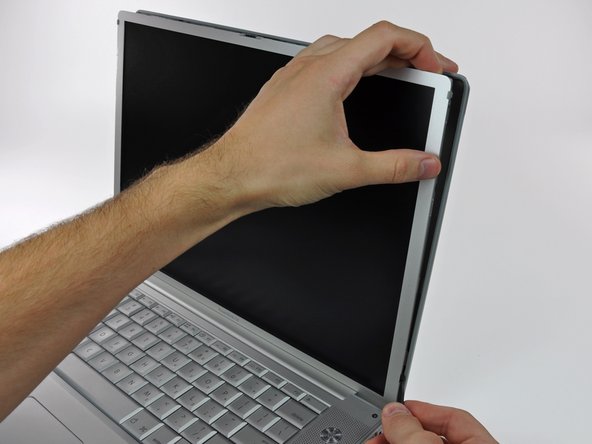
Now that the top edge is released, use a spudger to completely release the clips along the left edge of the display.
-
-
이 단계는 번역되지 않았습니다. 번역을 도와주십시오
-
Use a spudger to release the clips along the right edge of the display.
-
-
이 단계는 번역되지 않았습니다. 번역을 도와주십시오
-
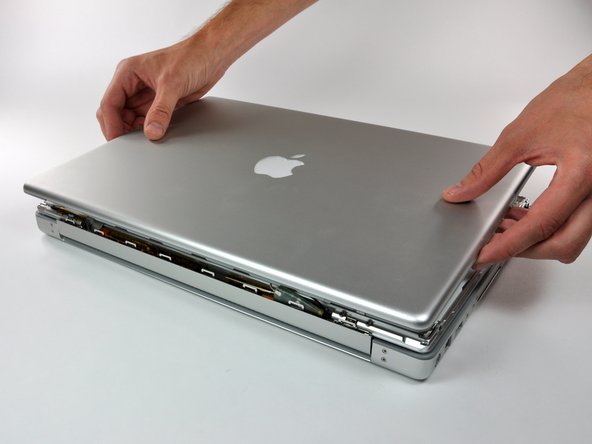
Close the display.
-
Rotate the top edge of the rear display bezel slightly away from the rest of the display, and then lift the lower edge of the rear bezel away from the clutch cover.
-
-
이 단계는 번역되지 않았습니다. 번역을 도와주십시오
-
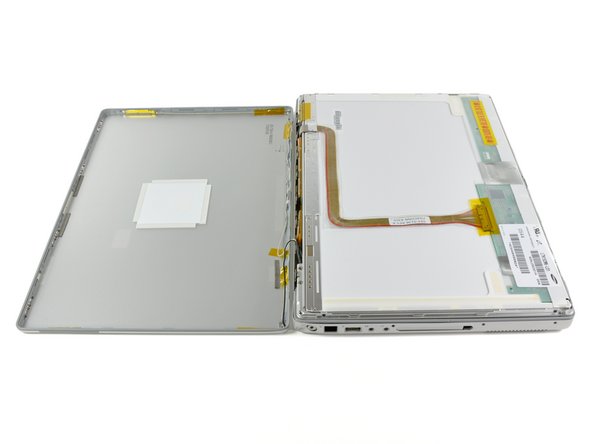
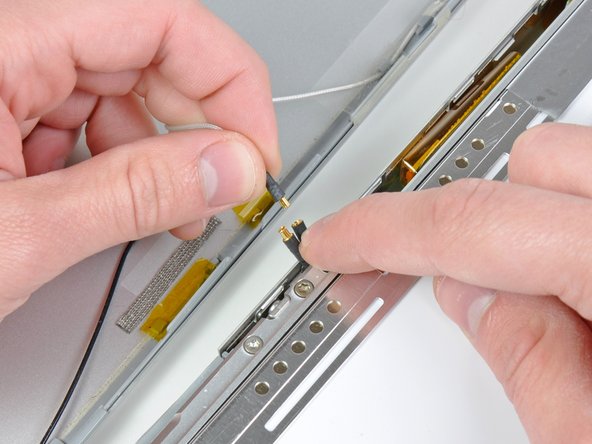
Disconnect both antenna cables from the rear display bezel.
-
Rear display bezel remains.
-