주요 콘텐츠로 건너뛰기

이 안내서에는 최근 변경 사항이 더 있습니다. 최신 비검증 버전으로 전환하십시오.

PowerBook G4 Aluminum 15" 1.67 GHz Rear Display Bezel Replacement

단지 전제 조건
이 안내서는 다른 가이드의 선행 작업으로 사용하기 위한 것입니다. 그 자체로는 불완전합니다.

필요한 것

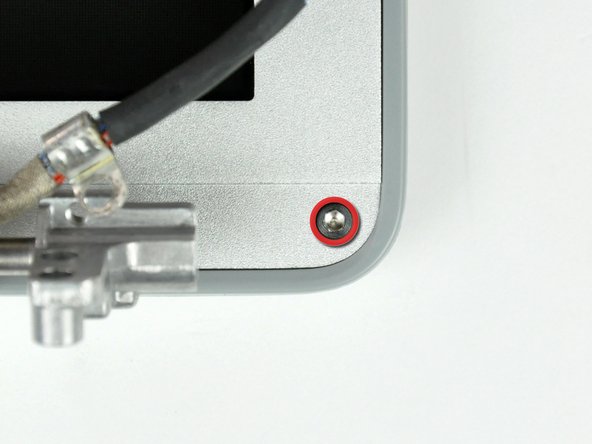
  1. PowerBook G4 Aluminum 15" 1.67 GHz Rear Display Bezel Replacement, Rear Display Bezel: 1 단계, 이미지 1/2 PowerBook G4 Aluminum 15" 1.67 GHz Rear Display Bezel Replacement, Rear Display Bezel: 1 단계, 이미지 2/2
    • Remove the two 6mm long, 1.5 mm hex screws near the lower left and right corners of the display.

    • A T6 Torx screwdriver works just fine.

  2. PowerBook G4 Aluminum 15" 1.67 GHz Rear Display Bezel Replacement: 2 단계, 이미지 1/1
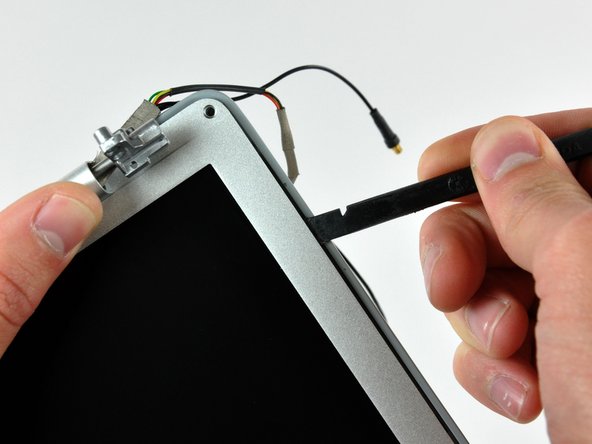
    • Insert the flat end of a spudger between the front display bezel and the plastic rim attached to the rear bezel near the lower left corner of the display.

    • Do not insert the spudger between the plastic rim of the rear display bezel and the aluminum rear display bezel plate.

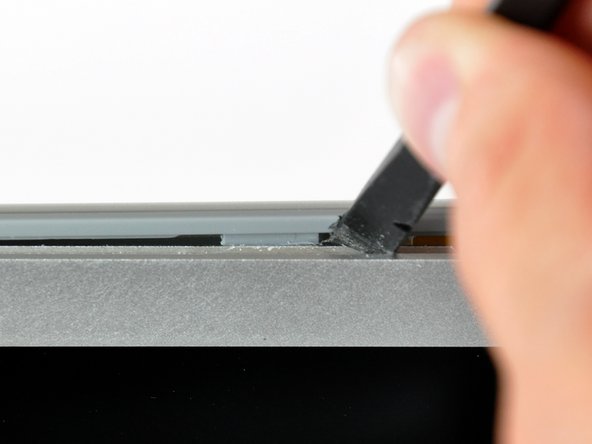
  3. PowerBook G4 Aluminum 15" 1.67 GHz Rear Display Bezel Replacement: 3 단계, 이미지 1/2 PowerBook G4 Aluminum 15" 1.67 GHz Rear Display Bezel Replacement: 3 단계, 이미지 2/2
    • With your spudger still inserted under the front display bezel, run it around the lower left corner of the display.

    • Rotate the spudger away from yourself to pry the rear display bezel off the aluminum tabs on the front display bezel.

    • Work your way down the side of the display until the rear display bezel has been separated from the front display bezel.

  4. PowerBook G4 Aluminum 15" 1.67 GHz Rear Display Bezel Replacement: 4 단계, 이미지 1/1
    • Insert the flat end of a spudger between the rear display bezel and the clutch cover.

    • Twist the spudger to unclip the rear bezel from the clutch cover.

  5. PowerBook G4 Aluminum 15" 1.67 GHz Rear Display Bezel Replacement: 5 단계, 이미지 1/2 PowerBook G4 Aluminum 15" 1.67 GHz Rear Display Bezel Replacement: 5 단계, 이미지 2/2
    • Repeat the previous steps to separate the right side of the rear display bezel from the display.

    • Use your spudger to pry the plastic retaining clips on the rear display bezel over the raised aluminum tabs on the front display bezel.

    • At this point, the clips on the left and right edges of the rear display bezel should be free from the raised aluminum tabs on the front display bezel. If they are not, use a spudger to pry them past the front display bezel.

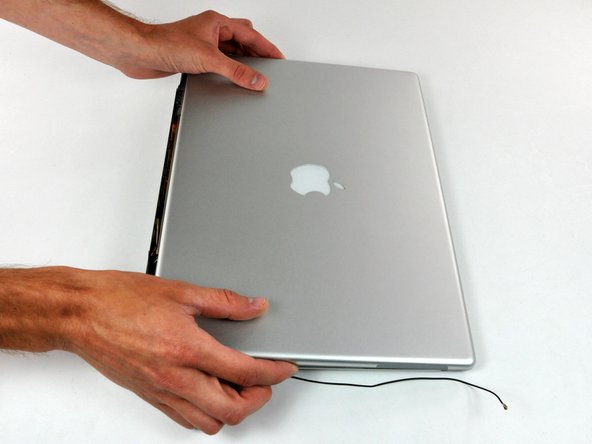
  6. PowerBook G4 Aluminum 15" 1.67 GHz Rear Display Bezel Replacement: 6 단계, 이미지 1/3 PowerBook G4 Aluminum 15" 1.67 GHz Rear Display Bezel Replacement: 6 단계, 이미지 2/3 PowerBook G4 Aluminum 15" 1.67 GHz Rear Display Bezel Replacement: 6 단계, 이미지 3/3
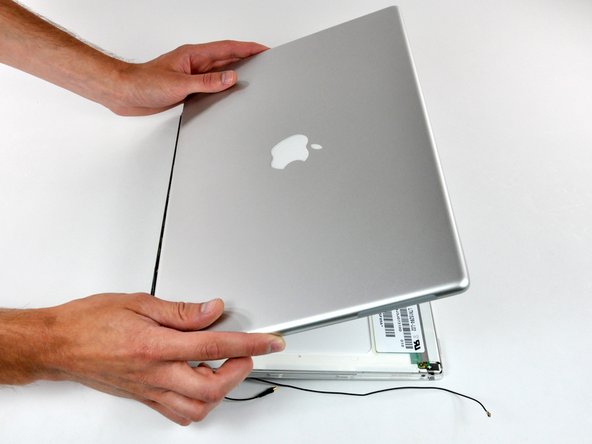
    • Slightly lift the lower edge of the rear display bezel and push it toward the top edge of the display, releasing the clips along the top edge of the rear display bezel.

    • Rotate the rear display bezel toward yourself and lay it flat on the table.

  7. PowerBook G4 Aluminum 15" 1.67 GHz Rear Display Bezel Replacement: 7 단계, 이미지 1/1
    • Disconnect both antenna cables from the rear display bezel.

    • Remove the rear display bezel and set it aside.

결론

To reassemble your device, follow these instructions in reverse order.

Walter Galan

694,561 평판

안내서 1,203개 작성하였습니다

댓글 0개

댓글 쓰기

조회 통계:

24 시간 전: 0

7일 전: 0

30일 전: 0

전체 시간: 1,416