이 버전에는 잘못된 편집 사항이 있을 수 있습니다. 최신 확인된 스냅샷으로 전환하십시오.
필요한 것
-
이 단계는 번역되지 않았습니다. 번역을 도와주십시오
-
Grip the black plastic lever nub firmly and carefully remove it from the metal lever. Use one hand to hold the toaster in place while you pull the lever nub with the other.
-
-
이 단계는 번역되지 않았습니다. 번역을 도와주십시오
-
Flipping the toaster upside down, use a T7 Torx Screwdriver to remove the four 10mm screws that keep the outer shell attached.
-
Flip the toaster back over and slide off the shell making sure to slip the toaster lever (now without the black plastic nub) through the lever opening in the shell.
-
-
-
이 단계는 번역되지 않았습니다. 번역을 도와주십시오
-
Locate and remove the two 8mm screws that attach the circuit board (located inside of the shell) from the shell itself using the Phillips #2 screwdriver.
-
-
이 단계는 번역되지 않았습니다. 번역을 도와주십시오
-
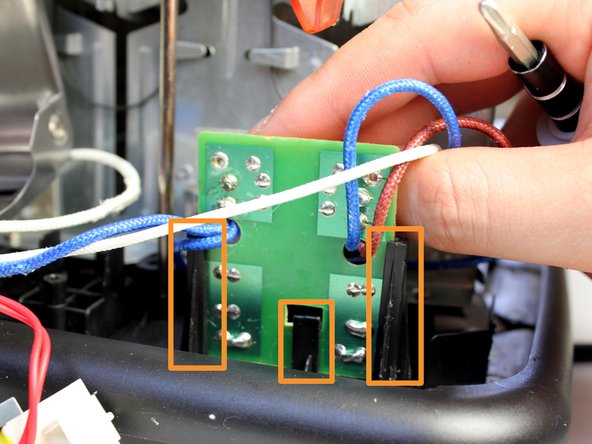
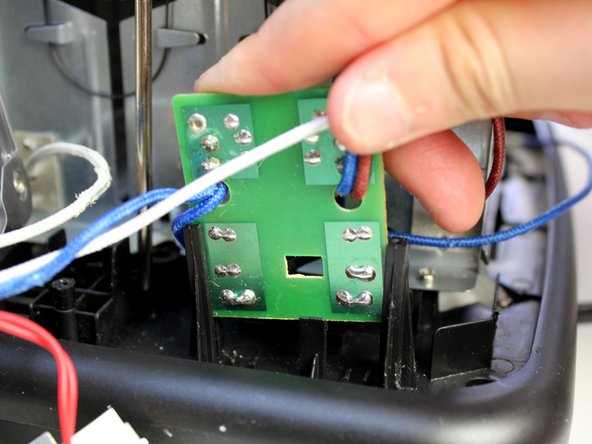
Locate the small circuit board attached to the base of the toaster.
-
To remove the circuit board, pull apart the two side tabs while releasing the middle tab simultaneously.
-
Pull the circuit board out of the slot.
-
-
이 단계는 번역되지 않았습니다. 번역을 도와주십시오
-
Using a Phillips #2 screwdriver, remove the front two 8mm screws attaching the chassis to the base.
-
Flip the toaster around and proceed to remove the two remaining 8mm screws.
-
The toaster chassis should now only be connected to the base via wiring.
-
-
이 단계는 번역되지 않았습니다. 번역을 도와주십시오
-
There are two phillips 8mm head screws holding the power cable to the base.
-
Remove these screws to release the power cable.
-
-
이 단계는 번역되지 않았습니다. 번역을 도와주십시오
-
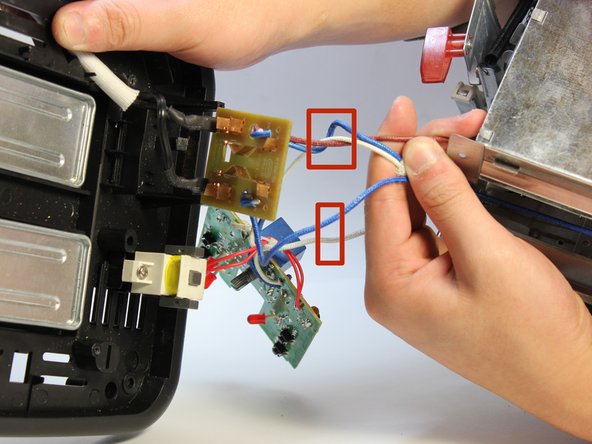
The following wires must be disconnected to be able to remove the chassis: Blue x2, White x2, Bronze x1
-


팀

Cal Poly, Team 10-36, Maness Winter 2014 Cal Poly, Team 10-36, Maness Winter 2014 회원
CPSU-MANESS-W14S10G36
4 회원들
안내서 5개 작성하였습니다