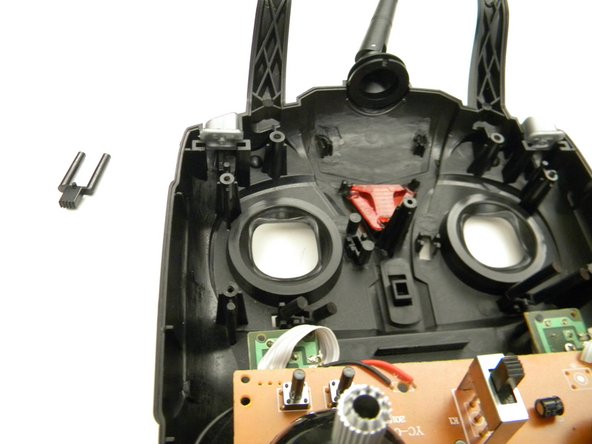
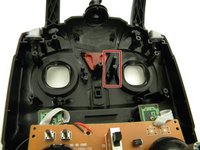
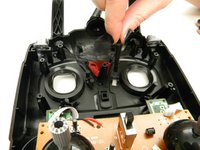
주요 콘텐츠로 건너뛰기

Protocol Dronium III AP Trim Rocker Switch Replacement

필요한 것

  1. Protocol Dronium III AP Trim Rocker Switch Replacement, Trim Rocker Switch: 1 단계, 이미지 1/3 Protocol Dronium III AP Trim Rocker Switch Replacement, Trim Rocker Switch: 1 단계, 이미지 2/3 Protocol Dronium III AP Trim Rocker Switch Replacement, Trim Rocker Switch: 1 단계, 이미지 3/3
    • Remove the four (4) 8.5mm screws from the body of the remote using a JIS #1 screwdriver.

    • Remove the two (2) 4mm screws from the handle using a JIS #1 screwdriver.

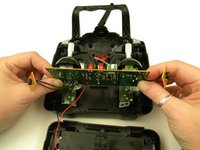
    • Open remote body lifting back a full 180 degrees from face.

  2. Protocol Dronium III AP Trim Rocker Switch Replacement: 2 단계, 이미지 1/3 Protocol Dronium III AP Trim Rocker Switch Replacement: 2 단계, 이미지 2/3 Protocol Dronium III AP Trim Rocker Switch Replacement: 2 단계, 이미지 3/3
    • Remove the four (4) 6mm screws attaching the motherboard to body of the controller using a JIS #1 screwdriver

    • Gently lift the motherboard backwards.

  3. Protocol Dronium III AP Trim Rocker Switch Replacement: 3 단계, 이미지 1/3 Protocol Dronium III AP Trim Rocker Switch Replacement: 3 단계, 이미지 2/3 Protocol Dronium III AP Trim Rocker Switch Replacement: 3 단계, 이미지 3/3
    • Remove the trim rocker switch from the controller.

결론

To reassemble your device, follow these instructions in reverse order.

Steven Mooers

회원 가입일: 10/18/17

401 평판

안내서 4개 작성하였습니다

UW Tacoma, Team S1-G1, Rose Fall 2017 UW Tacoma, Team S1-G1, Rose Fall 2017 회원

UWT-ROSE-F17S1G1

4 회원들

안내서 4개 작성하였습니다

댓글 0개

댓글 쓰기

조회 통계:

24 시간 전: 0

7일 전: 1

30일 전: 1

전체 시간: 261