이 버전에는 잘못된 편집 사항이 있을 수 있습니다. 최신 확인된 스냅샷으로 전환하십시오.
필요한 것
-
이 단계는 번역되지 않았습니다. 번역을 도와주십시오
-
Remove the six 7.9mm Phillips #0 screws on the back and bottom.
-
Remove the one 3.8mm Phillips #0 screw on the bottom.
-
Remove the two 7.5mm Phillips #0 screws on the back and bottom.
-
-
이 단계는 번역되지 않았습니다. 번역을 도와주십시오
-
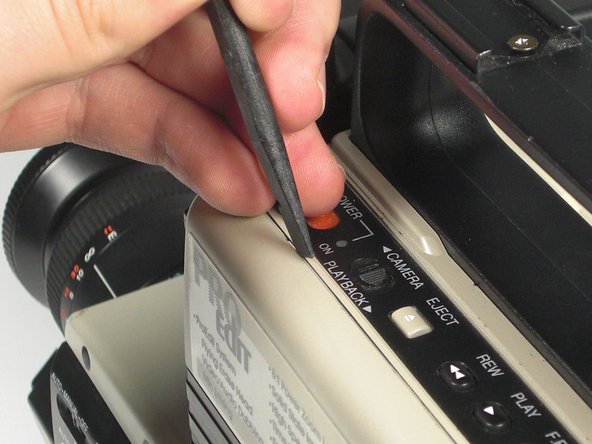
Remove 5.8mm Phillips #1 screw from the side button panel.
-
Slide the viewfinder all the way to the right and remove the 7.9mm Phillips #0 screw.
-
-
-
이 단계는 번역되지 않았습니다. 번역을 도와주십시오
-
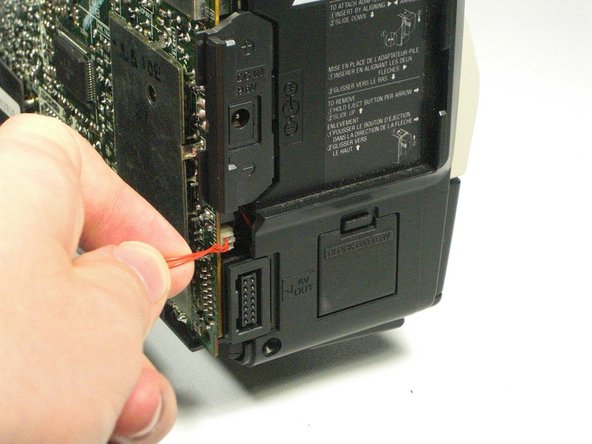
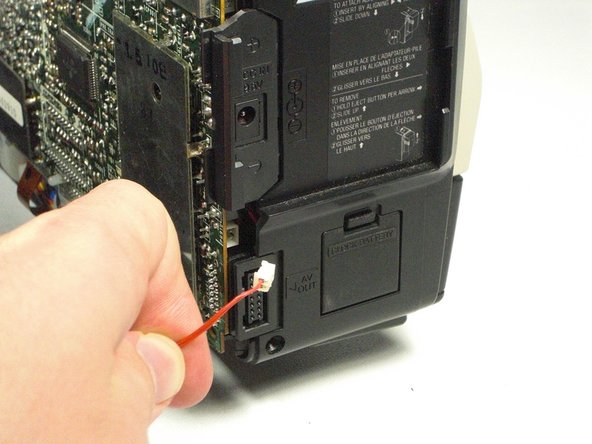
Pull the left panel away from the rest of the camcorder.
-
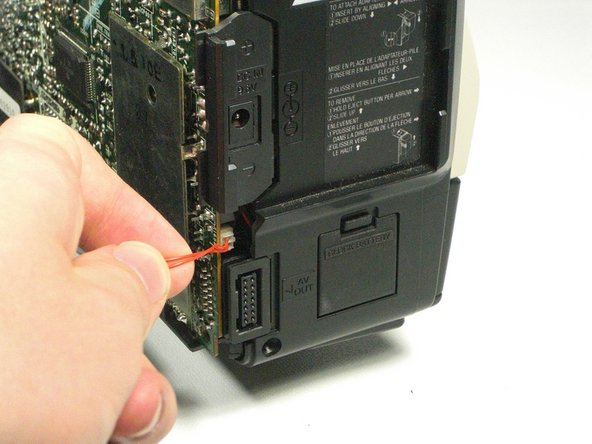
Unplug the red speaker cable located at the rear of the device.
-
-
이 단계는 번역되지 않았습니다. 번역을 도와주십시오
-
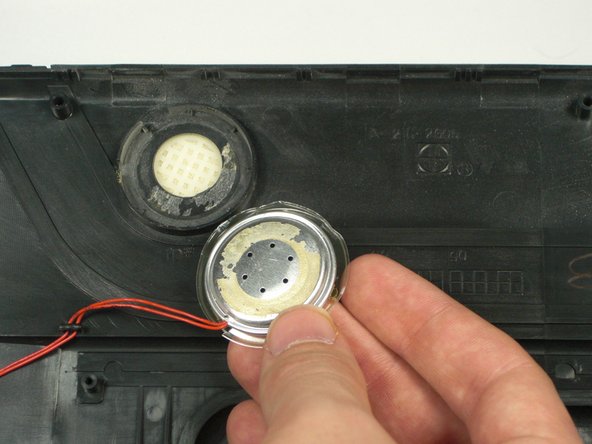
Locate the speaker on the removed panel. Find the groove on the top left side of the speaker.
-
Pry the plastic up with a spudger until the glue breaks and the speaker is detached.
-
-
이 단계는 번역되지 않았습니다. 번역을 도와주십시오
-
Glue the new speaker to the panel.
-
Plug the cable back into the motherboard.
-


팀

Cal Poly, Team 5-20, Amido Winter 2011 Cal Poly, Team 5-20, Amido Winter 2011 회원
CPSU-AMIDO-W11S5G20
4 회원들
안내서 7개 작성하였습니다