주요 콘텐츠로 건너뛰기

RCA Pro10 Edition Display Screen Replacement

필요한 것

  1. RCA Pro10 Edition Display Screen Replacement, Speaker: 1 단계, 이미지 1/2 RCA Pro10 Edition Display Screen Replacement, Speaker: 1 단계, 이미지 2/2
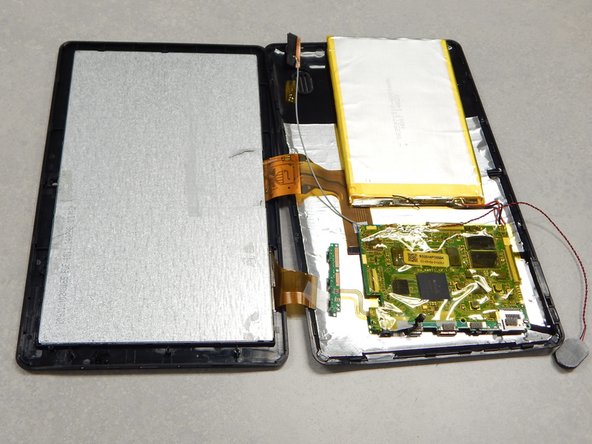
    • Using a separating tool, look for a seam in the plastic casing that looks most accessible.

    • Use the prying tool to separate the front and back casing, working your way around the perimeter.

    • Utilize a card tool or a pick to assist in keeping the case separated.

    • To reassemble the device simply align the two casing halves and pinch to snap together or press down on the edges while the device in on a table.

  2. RCA Pro10 Edition Display Screen Replacement: 2 단계, 이미지 1/1
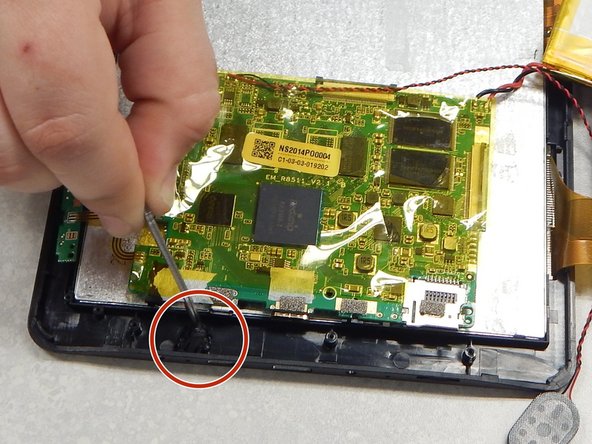
    • Flip over the back of the device while keeping it close to the front, the speaker is attached to it.

    • Remove the yellow tape securing the speaker to the back casing.

  3. RCA Pro10 Edition Display Screen Replacement: 3 단계, 이미지 1/2 RCA Pro10 Edition Display Screen Replacement: 3 단계, 이미지 2/2
    • Use the separating tool to pry the speaker from its surface.

    • Use caution when removing the speaker, you may damage the screen.

    • Cut or desolder the wires to replace or repair the speaker.

  4. RCA Pro10 Edition Display Screen Replacement, Camera: 4 단계, 이미지 1/3 RCA Pro10 Edition Display Screen Replacement, Camera: 4 단계, 이미지 2/3 RCA Pro10 Edition Display Screen Replacement, Camera: 4 단계, 이미지 3/3
    • Using a P00 Phillips screwdriver, remove the three screws securing the black plastic camera housing and remove it.

    • Peel back the beige tape while holding down the camera ribbon cable to prevent tears

  5. RCA Pro10 Edition Display Screen Replacement: 5 단계, 이미지 1/2 RCA Pro10 Edition Display Screen Replacement: 5 단계, 이미지 2/2
    • Lift the locking tab that is securing the camera ribbon cable.

    • Slide the ribbon cable out from the connector and remove from casing.

  6. RCA Pro10 Edition Display Screen Replacement, Power/Volume Buttons: 6 단계, 이미지 1/1
    • Use a P00 Phillips screwdriver to remove the three screws securing the button board.

    • Desolder the contacts on the button board to remove or replace it.

  7. RCA Pro10 Edition Display Screen Replacement, Battery: 7 단계, 이미지 1/2 RCA Pro10 Edition Display Screen Replacement, Battery: 7 단계, 이미지 2/2
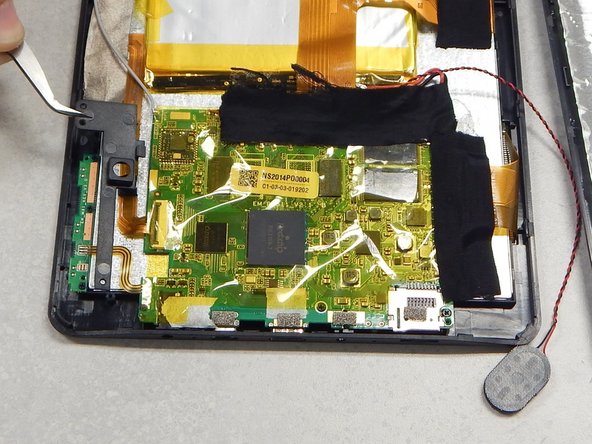
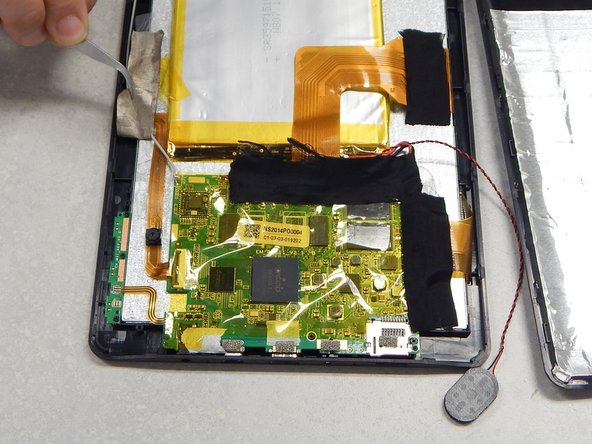
    • Peel off the black tape on the battery and main-board.

    • Peel off the black tape securing the screen ribbon cable to the back of the screen.

    • Use caution to avoid damaging either ribbon cable.

  8. RCA Pro10 Edition Display Screen Replacement: 8 단계, 이미지 1/2 RCA Pro10 Edition Display Screen Replacement: 8 단계, 이미지 2/2
    • Slide out the ribbon cable lock that is securing the screen ribbon cable.

    • Move the ribbon cable out of the way using tape if necessary.

  9. RCA Pro10 Edition Display Screen Replacement: 9 단계, 이미지 1/2 RCA Pro10 Edition Display Screen Replacement: 9 단계, 이미지 2/2
    이 단계에 사용된 도구:
    Plastic Cards
    $2.99
    구매
    • Remove the yellow tape securing the battery to the screen.

    • Use a plastic card or pick to separate the battery from the screen.

    • Do not bend or puncture battery, battery is difficult to separate from screen.

    • Cut or desolder the wires on the battery to remove or replace it.

  10. RCA Pro10 Edition Display Screen Replacement, Display Screen: 10 단계, 이미지 1/1
    • Peel the WiFi antenna off of the monitor and move out of the way.

  11. RCA Pro10 Edition Display Screen Replacement: 11 단계, 이미지 1/3 RCA Pro10 Edition Display Screen Replacement: 11 단계, 이미지 2/3 RCA Pro10 Edition Display Screen Replacement: 11 단계, 이미지 3/3
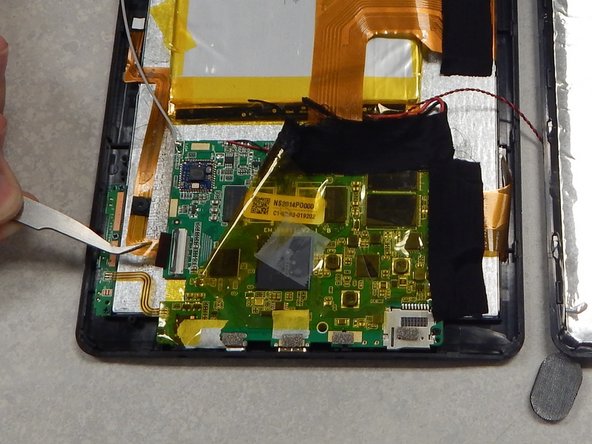
    • Remove the black tape on the screen and the main-board.

    • Lift the ribbon cable lock securing the digitizer ribbon cable.

    • Slide out the digitizer ribbon cable and move away from the device, use tape to secure if necessary.

  12. RCA Pro10 Edition Display Screen Replacement: 12 단계, 이미지 1/1
    • Use a P00 Phillips screwdriver to remove the three screws securing the main-board to the back casing.

  13. RCA Pro10 Edition Display Screen Replacement: 13 단계, 이미지 1/3 RCA Pro10 Edition Display Screen Replacement: 13 단계, 이미지 2/3 RCA Pro10 Edition Display Screen Replacement: 13 단계, 이미지 3/3
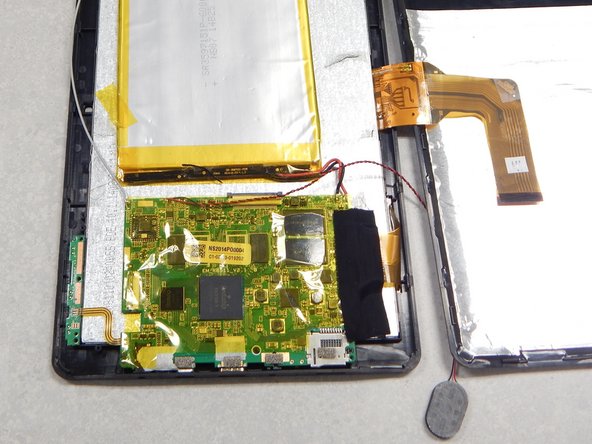
    • Lift the main-board up and away from the ports to reveal the microphone.

    • Use tweezers to remove the microphone from the black silicone.

    • Move the main-board off the screen.

  14. RCA Pro10 Edition Display Screen Replacement: 14 단계, 이미지 1/2 RCA Pro10 Edition Display Screen Replacement: 14 단계, 이미지 2/2
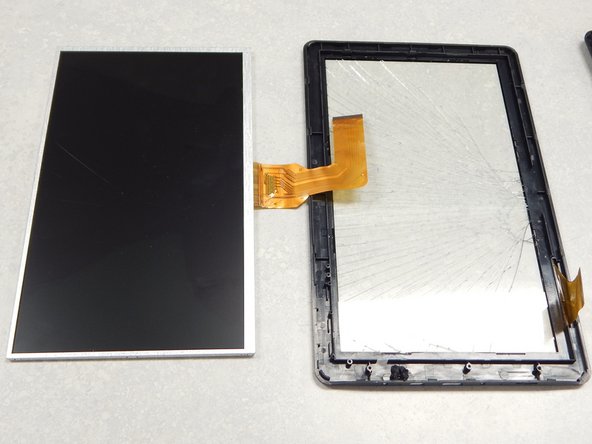
    • Use a separator tool to lift the screen from the port side of the casing and remove it.

    • To reassemble the device, follow these steps in reverse unless specified otherwise.

결론

To reassemble your device, follow these instructions in reverse order.

다른 9명이 해당 안내서를 완성하였습니다.

Tyler Schuster

회원 가입일: 01/27/15

476 평판

안내서 1개 작성함

Pasco Hernando, Team 1-1, Prince Winter 2015 Pasco Hernando, Team 1-1, Prince Winter 2015 회원

PHSC-PRINCE-W15S1G1

6 회원들

안내서 10개 작성하였습니다

댓글 4개

Gracias y ademas la buenas fotografias ayudaron una inmesidad.

Kl

Klaus laage - 답글

Nothing spectacular happened I just turned on my tablet today and voila! My display is crazed on part of the screen! I read these steps a couple times and I just don't understand how if this process is intended to replace the display screen a display screen isn't listed as a necessary part purchase. I have faith in reader generated sites so please help!

Denise Engle - 답글

Denise a new display screen would need to be purchased. Unless you absolutely have to have this particular tablet fixed I suggest buying a new one.

Chris Blackwell -

hola, podrás tener este repuesto de la pantalla lcd para la venta para ese modelo?

gracias

William Weygel

williamw666@hotmail.com

William Weygel - 답글

댓글 쓰기

조회 통계:

24 시간 전: 0

7일 전: 2

30일 전: 8

전체 시간: 6,237