주요 콘텐츠로 건너뛰기

RCA RCT6378W2 Screen Replacement

보관된 가이드
해당 안내서는 단지 역사적인 목적으로 보관됩니다. 최신 버전 안내서를 사용하여 수리 하십시오.

필요한 것

  1. RCA RCT6378W2 Screen Replacement, Screen Replacement: 1 단계, 이미지 1/1
    • Remove two 2.4mm x 4mm screws from bottom of the tablet with Phillips #00 Screwdriver.

  2. RCA RCT6378W2 Screen Replacement: 2 단계, 이미지 1/2 RCA RCT6378W2 Screen Replacement: 2 단계, 이미지 2/2
    • Remove back cover with lever tool, exposing the battery and motherboard.

  3. RCA RCT6378W2 Screen Replacement: 3 단계, 이미지 1/2 RCA RCT6378W2 Screen Replacement: 3 단계, 이미지 2/2
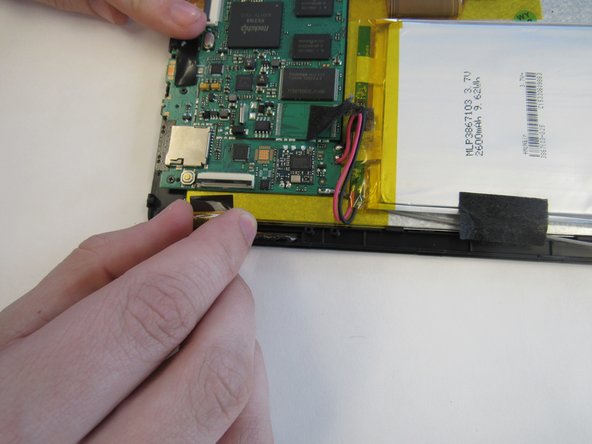
    • Using the tweezers, remove the black tape connecting the screen to the motherboard.

  4. RCA RCT6378W2 Screen Replacement: 4 단계, 이미지 1/2 RCA RCT6378W2 Screen Replacement: 4 단계, 이미지 2/2
    • Pull up the switch to remove the input connector.

  5. RCA RCT6378W2 Screen Replacement: 5 단계, 이미지 1/1
    • Heat the iOpener in the microwave, following the instructions provided with the tool. Lay the heated iOpener on the front screen for two minutes to soften the connection of the screen to the tablet.

  6. RCA RCT6378W2 Screen Replacement: 6 단계, 이미지 1/2 RCA RCT6378W2 Screen Replacement: 6 단계, 이미지 2/2
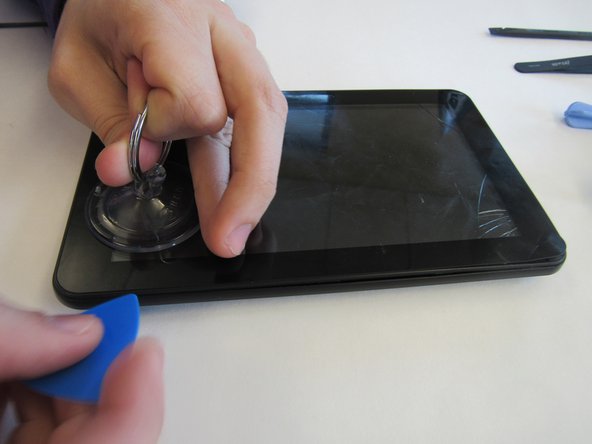
    • Use the suction cup and lever tool tool to pry the front screen from the tablet.

결론

To reassemble your device, follow these instructions in reverse order.

다른 2명이 해당 안내서를 완성하였습니다.

mikayla

회원 가입일: 01/29/15

408 평판

안내서 2개 작성하였습니다

Clemson, Team 14-4, Shirley Spring 2015 Clemson, Team 14-4, Shirley Spring 2015 회원

CLEM-SHIRLEY-S15S14G4

6 회원들

안내서 15개 작성하였습니다

댓글 0개

댓글 쓰기

조회 통계:

24 시간 전: 0

7일 전: 0

30일 전: 0

전체 시간: 1,189