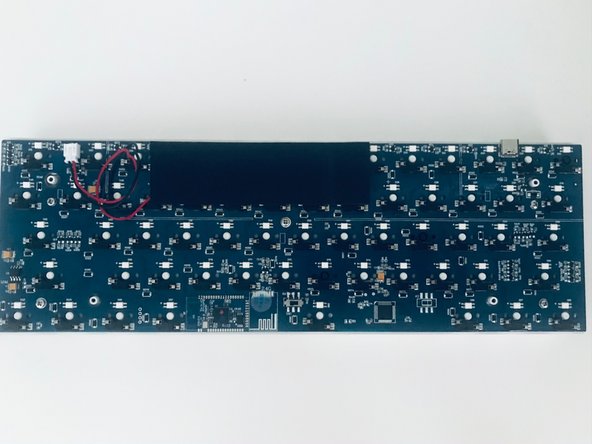
주요 콘텐츠로 건너뛰기

RK61 Battery Replacement

필요한 것

  1. RK61 Battery Replacement, Battery: 1 단계, 이미지 1/2 RK61 Battery Replacement, Battery: 1 단계, 이미지 2/2
    • Unplug the Type-C cable from the top left of the keyboard.

  2. RK61 Battery Replacement: 2 단계, 이미지 1/3 RK61 Battery Replacement: 2 단계, 이미지 2/3 RK61 Battery Replacement: 2 단계, 이미지 3/3
    • Flip the keyboard over so the bottom case is up.

    • Use a Philips #00 screwdriver to unscrew all four M2 5mm screws located on the back of the keyboard.

  3. RK61 Battery Replacement: 3 단계, 이미지 1/3 RK61 Battery Replacement: 3 단계, 이미지 2/3 RK61 Battery Replacement: 3 단계, 이미지 3/3
    • Carefully lift the keyboard case from the PCB (Printed Circuit Board).

  4. RK61 Battery Replacement: 4 단계, 이미지 1/3 RK61 Battery Replacement: 4 단계, 이미지 2/3 RK61 Battery Replacement: 4 단계, 이미지 3/3
    • Unplug the old 1450 mAh lithium-ion battery by gently pinching and pulling from the right and left sides of the connector.

    • Make sure to be extremely gentle when unplugging the old lithium-ion battery from the keyboard.

  5. RK61 Battery Replacement: 5 단계, 이미지 1/3 RK61 Battery Replacement: 5 단계, 이미지 2/3 RK61 Battery Replacement: 5 단계, 이미지 3/3
    • Plug in the new 1450 mAh lithium-ion battery by the connector.

  6. RK61 Battery Replacement: 6 단계, 이미지 1/3 RK61 Battery Replacement: 6 단계, 이미지 2/3 RK61 Battery Replacement: 6 단계, 이미지 3/3
    • Align the newly inserted 1450 mAh lithium-ion battery parallel to the edge of the PCB (Printed Circuit Board) and cover the PCB with the keyboard case.

  7. RK61 Battery Replacement: 7 단계, 이미지 1/3 RK61 Battery Replacement: 7 단계, 이미지 2/3 RK61 Battery Replacement: 7 단계, 이미지 3/3
    • Use a Philips #00 screwdriver to screw back the four M2 5mm screws on the back of the keyboard.

  8. RK61 Battery Replacement: 8 단계, 이미지 1/3 RK61 Battery Replacement: 8 단계, 이미지 2/3 RK61 Battery Replacement: 8 단계, 이미지 3/3
    • Plug in the Type-C cable on the top left of the keyboard.

결론

To reassemble your device, follow these instructions in reverse order.

다른 2명이 해당 안내서를 완성하였습니다.

Michelle Chen

회원 가입일: 05/10/21

211 평판

안내서 1개 작성함

York University, Team S1-G4, O'Regan Summer 2021 York University, Team S1-G4, O'Regan Summer 2021 회원

YORK-O'REGAN-SU21S1G4

1 회원

안내서 2개 작성하였습니다

댓글 10개

Is it possible to replace the standard battery with a larger one with no issues other then additional weight? say a 4000 mAh which will just be longer?

shon malka - 답글

There should be no issues with replacing the keyboard with a larger battery as long as the connector is the same size and the battery is small enough so that you can still cover the PCB entirely with the keyboard case.

Michelle Chen -

hey did u ever wind up doing the mod?

albert einstein -

yo. ty for the guide.

i am also interested in upgrading the battery but am unsure about:

which dimensions the new battery should be, or how to find out

if it is safe to further modify the kb with additional material through the usual mods ppl to

albert einstein - 답글

should be fine to mod it to your liking

to measure simply measure the length breadth and max height u can have inside the cover and get a battery accordingly

Ispeakforus -

댓글 쓰기

조회 통계:

24 시간 전: 10

7일 전: 64

30일 전: 292

전체 시간: 13,546