주요 콘텐츠로 건너뛰기

Razer DeathAdder Chroma Motherboard Replacement Guide

필요한 것

  1. Razer DeathAdder Chroma Motherboard Replacement Guide, Outer Casing: 1 단계, 이미지 1/1
    • Opening the mouse casing will void any warranty that exists for the mouse.

    • Turn the mouse over so the bottom is facing up.

  2. Razer DeathAdder Chroma Motherboard Replacement Guide: 2 단계, 이미지 1/2 Razer DeathAdder Chroma Motherboard Replacement Guide: 2 단계, 이미지 2/2
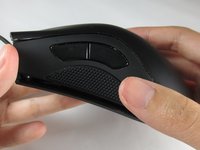
    • Use the blunt end of the spudger to pry the adhesive rubber pads from the top left and right edges.

  3. Razer DeathAdder Chroma Motherboard Replacement Guide: 3 단계, 이미지 1/2 Razer DeathAdder Chroma Motherboard Replacement Guide: 3 단계, 이미지 2/2
    • Use a Phillips #0 screwdriver to remove two 6.7 mm screws.

  4. Razer DeathAdder Chroma Motherboard Replacement Guide: 4 단계, 이미지 1/1
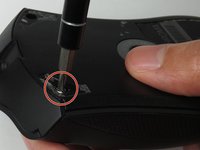
    • Use your fingers to identify the location of the screw under the bottom label.

  5. Razer DeathAdder Chroma Motherboard Replacement Guide: 5 단계, 이미지 1/1
    • Use a Phillips #0 screwdriver to remove one 6.7 mm screw.

    • Clear the label away from around the screw for easier removal.

  6. Razer DeathAdder Chroma Motherboard Replacement Guide: 6 단계, 이미지 1/3 Razer DeathAdder Chroma Motherboard Replacement Guide: 6 단계, 이미지 2/3 Razer DeathAdder Chroma Motherboard Replacement Guide: 6 단계, 이미지 3/3
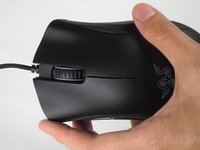
    • Turn the mouse over so the bottom is facing down.

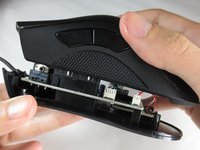
    • Separate the top casing from the bottom base by pulling the top casing upwards.

    • Separating the casing too quickly could damage the ribbon connector between the motherboard and the LED lights.

  7. Razer DeathAdder Chroma Motherboard Replacement Guide: 7 단계, 이미지 1/2 Razer DeathAdder Chroma Motherboard Replacement Guide: 7 단계, 이미지 2/2
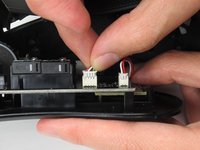
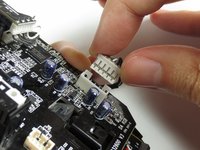
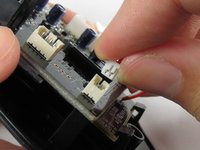
    • Disconnect the ribbon connector between the motherboard and the LED lights by pulling upward.

    • Pulling too hard could damage the wire connections.

  8. Razer DeathAdder Chroma Motherboard Replacement Guide, Motherboard: 8 단계, 이미지 1/2 Razer DeathAdder Chroma Motherboard Replacement Guide, Motherboard: 8 단계, 이미지 2/2
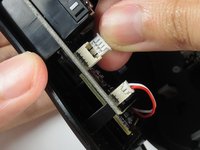
    • Disconnect the ribbon connector between the motherboard and the USB cable by pulling upward.

  9. Razer DeathAdder Chroma Motherboard Replacement Guide: 9 단계, 이미지 1/1
    • Use a Phillips #0 screwdriver to remove three 5.5 mm screws.

  10. Razer DeathAdder Chroma Motherboard Replacement Guide: 10 단계, 이미지 1/2 Razer DeathAdder Chroma Motherboard Replacement Guide: 10 단계, 이미지 2/2
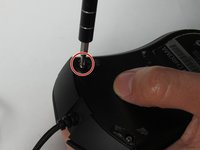
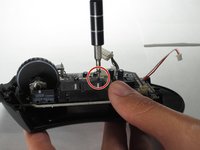
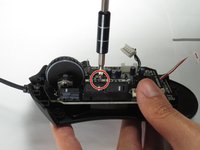
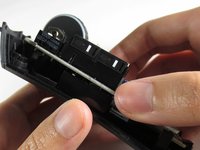
    • Use a Phillips #0 screwdriver to remove two 11.5 mm screws on the side buttons.

  11. Razer DeathAdder Chroma Motherboard Replacement Guide: 11 단계, 이미지 1/1
    • Use a Phillips #000 screwdriver to remove one 5.0 mm screw.

  12. Razer DeathAdder Chroma Motherboard Replacement Guide: 12 단계, 이미지 1/2 Razer DeathAdder Chroma Motherboard Replacement Guide: 12 단계, 이미지 2/2
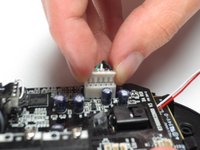
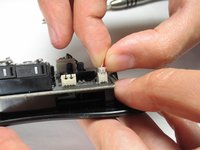
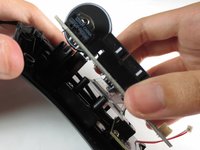
    • Disconnect the ribbon connector between the motherboard and the optical sensor.

  13. Razer DeathAdder Chroma Motherboard Replacement Guide: 13 단계, 이미지 1/2 Razer DeathAdder Chroma Motherboard Replacement Guide: 13 단계, 이미지 2/2
    • Remove the motherboard by grasping the sides and gently pulling upward.

결론

To reassemble your device, follow these instructions in reverse order.

다른 5명이 해당 안내서를 완성하였습니다.

Nathan D. Kappler

회원 가입일: 03/27/17

343 평판

안내서 2개 작성하였습니다

Baylor, Team S5-G2, Williams Spring 2017 Baylor, Team S5-G2, Williams Spring 2017 회원

BU-WILLIAMS-S17S5G2

3 회원들

안내서 6개 작성하였습니다

댓글 0개

댓글 쓰기

조회 통계:

24 시간 전: 2

7일 전: 9

30일 전: 53

전체 시간: 9,835