이 버전에는 잘못된 편집 사항이 있을 수 있습니다. 최신 확인된 스냅샷으로 전환하십시오.
필요한 것
-
이 단계는 번역되지 않았습니다. 번역을 도와주십시오
-
Turn the laptop so that the bottom is facing up.
-
Locate the panel that has an M on it and two air vents.
-
-
-
이 단계는 번역되지 않았습니다. 번역을 도와주십시오
-
Take the screw driver and carefully unscrew the screw that is located above the M in order to remove the panel.
-
Remove the panel.
-
-
이 단계는 번역되지 않았습니다. 번역을 도와주십시오
-
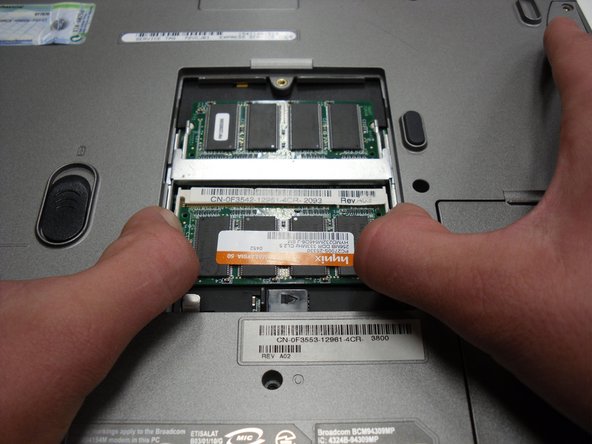
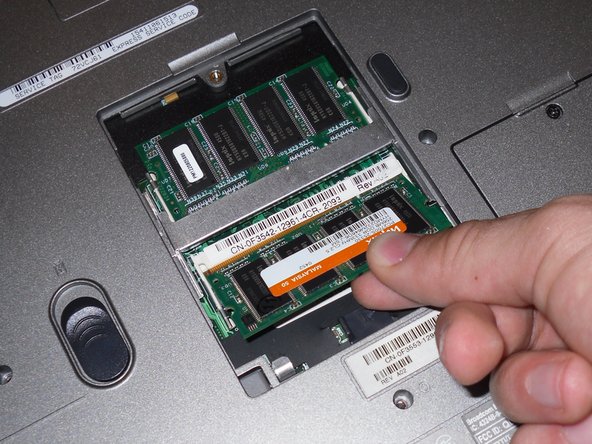
After removing the panel, you will see two memory modules.
-
Locate the four spring clips that are holding the memory modules in place.
-
Place your thumb on each of the two spring clips for each memory module and push outward until the memory module pops up.
-
Gently raise the memory module and lift it out of its socket.
-


팀

Cal Poly, Team 16-2, Maness Spring 2010 Cal Poly, Team 16-2, Maness Spring 2010 회원
CPSU-MANESS-S10S16G2
4 회원들
안내서 9개 작성하였습니다