주요 콘텐츠로 건너뛰기

이 안내서에는 최근 변경 사항이 더 있습니다. 최신 비검증 버전으로 전환하십시오.

Removing Olympus FE-210 Front Casing

필요한 것

  1. Removing Olympus FE-210 Front Casing, Battery: 1 단계, 이미지 1/2 Removing Olympus FE-210 Front Casing, Battery: 1 단계, 이미지 2/2
    • The battery compartment is located on the bottom side of the camera. Push the button in, and slide the cover to get access to the batteries.

  2. Removing Olympus FE-210 Front Casing: 2 단계, 이미지 1/2 Removing Olympus FE-210 Front Casing: 2 단계, 이미지 2/2
    • The batteries will slide right out.

    • When putting new batteries in, make sure they are pointing the right direction.

  3. Removing Olympus FE-210 Front Casing, Front Casing: 3 단계, 이미지 1/3 Removing Olympus FE-210 Front Casing, Front Casing: 3 단계, 이미지 2/3 Removing Olympus FE-210 Front Casing, Front Casing: 3 단계, 이미지 3/3
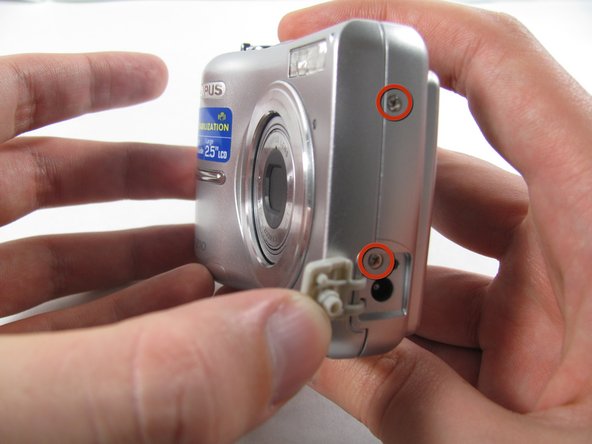
    • Remove the 7 screws holding the front case in place, with a #00 screwdriver.

    • Six screws are 3.6 mm.

    • The seventh screw is 3.2 mm.

  4. Removing Olympus FE-210 Front Casing: 4 단계, 이미지 1/3 Removing Olympus FE-210 Front Casing: 4 단계, 이미지 2/3 Removing Olympus FE-210 Front Casing: 4 단계, 이미지 3/3
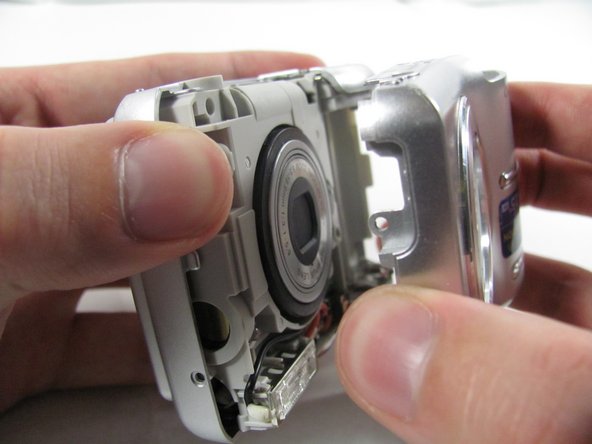
    • Pulling the front case off, requires applying enough strength in the right areas.

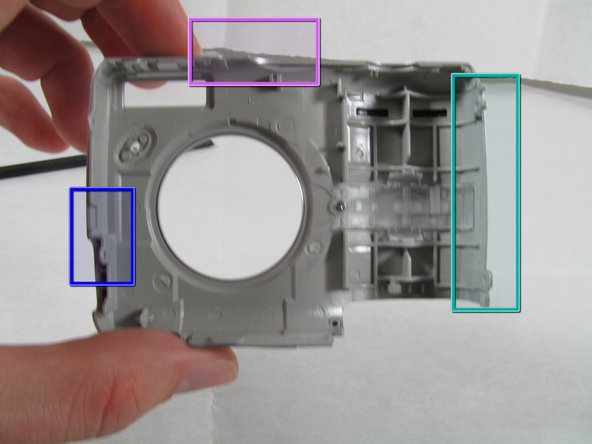
    • The front case snaps into place in three places:

    • At the top and bottom of the battery side (opposite of side pictured) of the case.

    • Right in the middle of the DC-in side (side pictured) of the case.

    • Top of the camera, to the left of the power button.

    • Once those places are disconnected, the front case will pop right off.

    • The camera in the first two pictures is upside down. This is the best position to place your thumbs to remove the case.

결론

To reassemble your device, follow these instructions in reverse order.

Matt

회원 가입일: 01/25/11

811 평판

안내서 6개 작성하였습니다

Cal Poly, Team 4-36, Regan Winter 2011 Cal Poly, Team 4-36, Regan Winter 2011 회원

CPSU-REGAN-W11S4G36

3 회원들

안내서 14개 작성하였습니다

댓글 0개

댓글 쓰기

조회 통계:

24 시간 전: 0

7일 전: 2

30일 전: 7

전체 시간: 1,621