주요 콘텐츠로 건너뛰기

Sony Ericsson W350a Keypad Replacement

필요한 것

  1. Sony Ericsson W350a Keypad Replacement, Flip Cover: 1 단계, 이미지 1/1
    • Place the plastic opening tool in the bottom corner of the phone in the crevice between the flap to remove the cover.

  2. Sony Ericsson W350a Keypad Replacement: 2 단계, 이미지 1/1
    • Remove the cover with a slight twisting motion.

  3. Sony Ericsson W350a Keypad Replacement, Battery: 3 단계, 이미지 1/2 Sony Ericsson W350a Keypad Replacement, Battery: 3 단계, 이미지 2/2
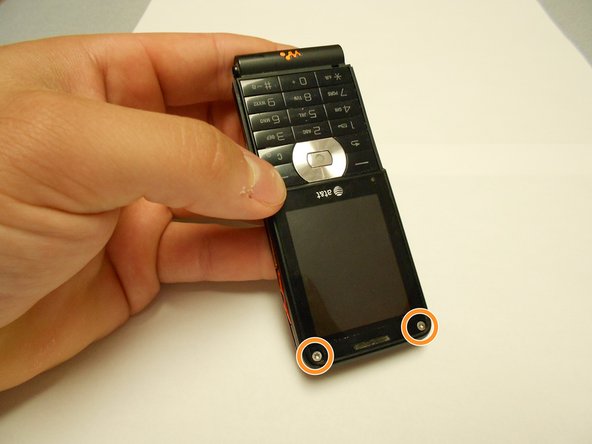
    • Place the phone face down on a flat smooth surface so that the camera, logos, and speaker face up.

    • Using the provided notch on the bottom of the back cover, insert a plastic opening tool and lift upwards to remove the back cover of the phone.

  4. Sony Ericsson W350a Keypad Replacement: 4 단계, 이미지 1/3 Sony Ericsson W350a Keypad Replacement: 4 단계, 이미지 2/3 Sony Ericsson W350a Keypad Replacement: 4 단계, 이미지 3/3
    • Set the cover to the side upon removal.

    • Insert the plastic opening tool into the crevice between the camera and the battery of the phone. Using a gentle prying motion, lift the end of the battery and remove.

    • After removal, recycle the defective battery appropriately.

  5. Sony Ericsson W350a Keypad Replacement, Speaker: 5 단계, 이미지 1/2 Sony Ericsson W350a Keypad Replacement, Speaker: 5 단계, 이미지 2/2
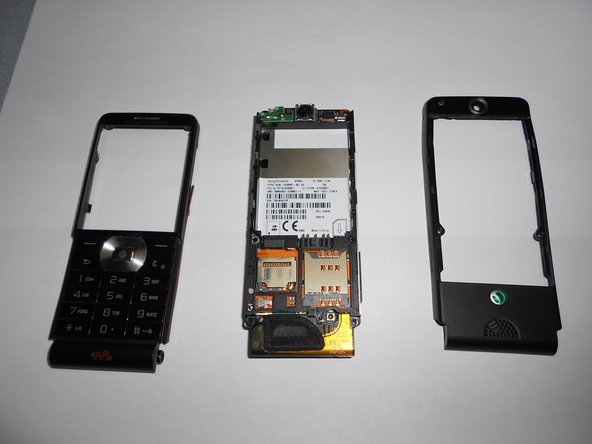
    • Flip the phone over and remove the Sony Ericsson sticker that is over the phone's ear speaker.

    • Using a T5 screwdriver, loosen and remove the two screws under the Sony Ericsson sticker by turning them counterclockwise.

  6. Sony Ericsson W350a Keypad Replacement: 6 단계, 이미지 1/1
    • Using a mini Phillips screwdriver, remove two screws by turning them counterclockwise.

  7. Sony Ericsson W350a Keypad Replacement: 7 단계, 이미지 1/1
    • Insert an opening tool in the bottom crack between the front and back plates and use a gentle upward pull to separate the back case from the front case.

    • Side buttons/controls may fall from their place in between the back and front casings.

  8. Sony Ericsson W350a Keypad Replacement: 8 단계, 이미지 1/1
    • Using a T5 screwdriver, remove the two screws by turning them counterclockwise.

  9. Sony Ericsson W350a Keypad Replacement: 9 단계, 이미지 1/2 Sony Ericsson W350a Keypad Replacement: 9 단계, 이미지 2/2
    • Using an opening tool and a gentle outward motion, separate the front plate from the inner phone workings.

  10. Sony Ericsson W350a Keypad Replacement: 10 단계, 이미지 1/2 Sony Ericsson W350a Keypad Replacement: 10 단계, 이미지 2/2
    • Using a Phillips head screwdriver, remove the screw from the front number pad by turning it counterclockwise.

    • Remove the speaker from the phone.

  11. Sony Ericsson W350a Keypad Replacement, Keypad: 11 단계, 이미지 1/3 Sony Ericsson W350a Keypad Replacement, Keypad: 11 단계, 이미지 2/3 Sony Ericsson W350a Keypad Replacement, Keypad: 11 단계, 이미지 3/3
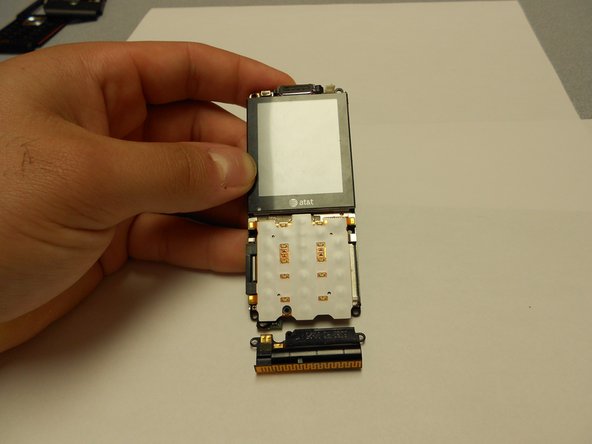
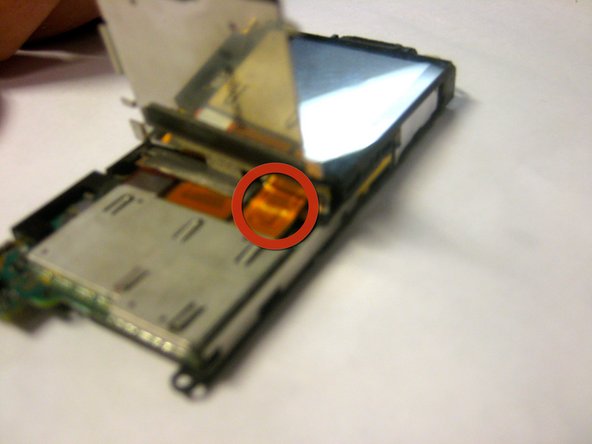
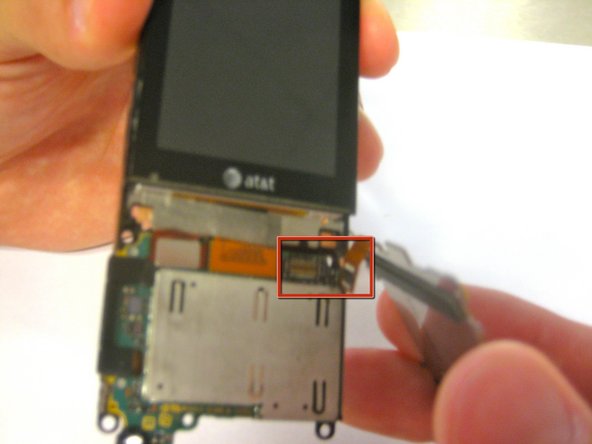
    • Disconnect the ribbon cable from its connection until the keypad "pops" off.

    • Remove the keypad from the phone.

결론

To reassemble your device, follow these instructions in reverse order.

다른 한 분이 해당 안내서를 완성하였습니다.

Ldellos

회원 가입일: 03/12/12

112 평판

안내서 3개 작성하였습니다

Clemson, Team 1-4, Benson Spring 2012 Clemson, Team 1-4, Benson Spring 2012 회원

CLEM-BENSON-S12S1G4

4 회원들

안내서 14개 작성하였습니다

댓글 0개

댓글 쓰기

조회 통계:

24 시간 전: 0

7일 전: 0

30일 전: 2

전체 시간: 1,251