주요 콘텐츠로 건너뛰기

Removing the Dell Inspiron 1150 Keyboard

필요한 것

  1. Removing the Dell Inspiron 1150 Keyboard, Removing Dell Inspiron 1150 Battery: 1 단계, 이미지 1/3 Removing the Dell Inspiron 1150 Keyboard, Removing Dell Inspiron 1150 Battery: 1 단계, 이미지 2/3 Removing the Dell Inspiron 1150 Keyboard, Removing Dell Inspiron 1150 Battery: 1 단계, 이미지 3/3
    • Place the laptop upside down on a clean, flat surface.

    • Locate the battery release button with the padlock symbol above it.

    • Slide the battery release button towards the padlock symbol and hold it there. Note that the button is spring loaded and will return if released.

    • The battery is now released from the battery compartment.

    • Gently remove the battery from the side of the laptop.

  2. Removing the Dell Inspiron 1150 Keyboard, Keyboard: 2 단계, 이미지 1/3 Removing the Dell Inspiron 1150 Keyboard, Keyboard: 2 단계, 이미지 2/3 Removing the Dell Inspiron 1150 Keyboard, Keyboard: 2 단계, 이미지 3/3
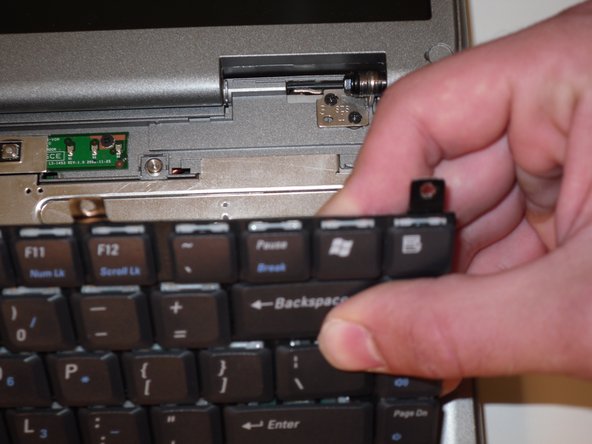
    • Use a spudger to lift the notched right edge of the hinge cover, and pry it loose

    • You need to lay the LCD screen down flat to allow the hinge cover to be lifted off

    • Lift the hinge cover off and set aside

  3. Removing the Dell Inspiron 1150 Keyboard: 3 단계, 이미지 1/3 Removing the Dell Inspiron 1150 Keyboard: 3 단계, 이미지 2/3 Removing the Dell Inspiron 1150 Keyboard: 3 단계, 이미지 3/3
    • Remove 4ea M2 x 3mm keyboard screws

    • Lift up keyboard from the rear to expose the connector below

    • Disconnect the keyboard ribbon cable from the mother board

결론

To reassemble your device, follow these instructions in reverse order.

다른 한 분이 해당 안내서를 완성하였습니다.

Richdave

회원 가입일: 04/09/10

32,063 평판

안내서 30개 작성하였습니다

Master Techs Master Techs 회원

Community

322 회원들

안내서 2,535개 작성하였습니다

댓글 0개

댓글 쓰기

조회 통계:

24 시간 전: 0

7일 전: 1

30일 전: 4

전체 시간: 867