주요 콘텐츠로 건너뛰기

Repair a Hole in Patagonia Waders

필요한 것

  1. Repair a Hole in Patagonia Waders, Testing Patagonia Waders For Leaks: 1 단계, 이미지 1/3 Repair a Hole in Patagonia Waders, Testing Patagonia Waders For Leaks: 1 단계, 이미지 2/3 Repair a Hole in Patagonia Waders, Testing Patagonia Waders For Leaks: 1 단계, 이미지 3/3
    • Set up a ladder in a level place outside that you don't mind getting wet.

    • Turn the waders inside out.

    • Clip the waders to the ladder.

  2. Repair a Hole in Patagonia Waders: 2 단계, 이미지 1/3 Repair a Hole in Patagonia Waders: 2 단계, 이미지 2/3 Repair a Hole in Patagonia Waders: 2 단계, 이미지 3/3
    • Put the hose into the waders.

    • Slide the hose into one leg of the waders.

  3. Repair a Hole in Patagonia Waders: 3 단계, 이미지 1/2 Repair a Hole in Patagonia Waders: 3 단계, 이미지 2/2
    • Turn on the hose and begin to fill the waders.

    • Be sure to pay attention because the large amount of water may tip the ladder. If needed, weigh the back side of the ladder down to prevent it from tipping.

  4. Repair a Hole in Patagonia Waders: 4 단계, 이미지 1/3 Repair a Hole in Patagonia Waders: 4 단계, 이미지 2/3 Repair a Hole in Patagonia Waders: 4 단계, 이미지 3/3
    • Watch for leaks. When you find a leak, mark it with a permanent marker.

    • Repeat this process for the other leg, marking all the leaks you find.

    • Dump the water out and allow the waders to dry completely before you continue.

  5. Repair a Hole in Patagonia Waders, Repair a Hole in Patagonia Waders: 5 단계, 이미지 1/3 Repair a Hole in Patagonia Waders, Repair a Hole in Patagonia Waders: 5 단계, 이미지 2/3 Repair a Hole in Patagonia Waders, Repair a Hole in Patagonia Waders: 5 단계, 이미지 3/3
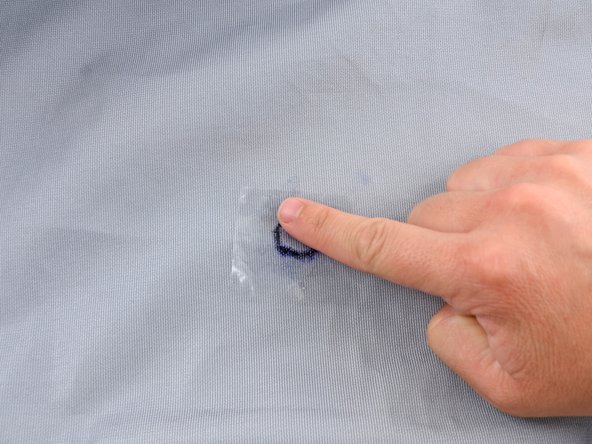
    • Wipe your marked areas down with an alcohol wipe to clean them.

    • Wait for the area to completely dry before continuing.

  6. Repair a Hole in Patagonia Waders: 6 단계, 이미지 1/1
    • Add a drop of Seam Grip to the marked area.

    • You need enough Seam Grip to thinly cover a one-inch square.

  7. Repair a Hole in Patagonia Waders: 7 단계, 이미지 1/2 Repair a Hole in Patagonia Waders: 7 단계, 이미지 2/2
    • Use the paintbrush to spread the Seam Grip thinly and evenly over the area.

  8. Repair a Hole in Patagonia Waders: 8 단계, 이미지 1/2 Repair a Hole in Patagonia Waders: 8 단계, 이미지 2/2
    • Rotate your brush 90 degrees and spread the glue evenly over the area.

  9. Repair a Hole in Patagonia Waders: 9 단계, 이미지 1/3 Repair a Hole in Patagonia Waders: 9 단계, 이미지 2/3 Repair a Hole in Patagonia Waders: 9 단계, 이미지 3/3
    • Apply the thin film (included in your wader repair kit) on top of the Seam Grip.

    • Smooth out the film with your finger, pushing out any air bubbles.

    • Allow the waders to sit undisturbed for 12 hours.

  10. Repair a Hole in Patagonia Waders: 10 단계, 이미지 1/3 Repair a Hole in Patagonia Waders: 10 단계, 이미지 2/3 Repair a Hole in Patagonia Waders: 10 단계, 이미지 3/3
    • Peel the thin film off of the waders.

결론

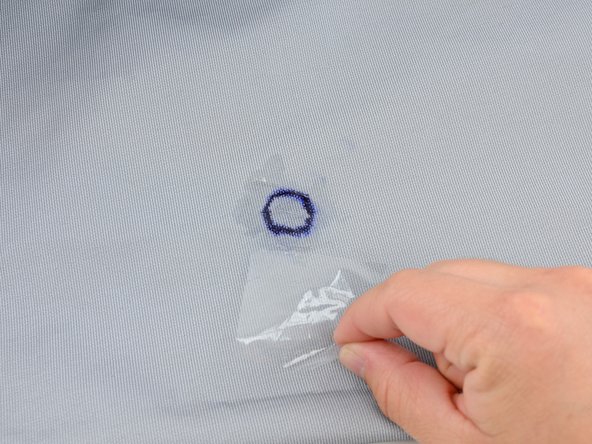
You should now have an invisible, but watertight patch. Repeat this for all of the leaks you marked.

다른 8명이 해당 안내서를 완성하였습니다.

Brittany McCrigler

회원 가입일: 03/05/12

89,017 평판

안내서 131개 작성하였습니다

iFixit iFixit 회원

Staff

135 회원들

안내서 16,817개 작성하였습니다

댓글 6개

Ho riparato i wader seguendo le indicazioni, ed e stato un trionfo, lavoro perfettamente riuscito. Ora devo provare la tenuta andando a pescare.

Unico problema e il pennarello, che bagnandosi con l’acqua sbava e tende a cancellarsi pur essendo indelebile…. Quando si i Wader si asciugano si rischia di non vedere bene i buchi da riparare se sono di piccola entità.

loris vitali - 답글

Ciao Loris, puoi utilizzare un Markal B Paint Stick per contrassegnare le perdite. Puoi acquistarli su Amazon.

Marty Chapman -

My waders have a nice, round hole about 1/4" in diameter, an inch above the top of the gravel guard. Since Seam Grip can't be applied where there isn't any fabric, a patch is evidently needed, but what to use? LDPE? Tenacious Tape? Other? This is a recent pair of Swiftcurrent waders.

AMG - 답글

Hi AMG, you can actually fix a hole using Seam Grip by either using LDPE on one side or a TPU patch before applying Seam Grip. Because of the location it would be easier to use a TPU patch, the adhesive would keep it in place while applying Seam Grip. Next apply seam grip to the other side liberally, extending past the hole by a 1/2" in all directions. Cover that with either another TPU patch or LDPE film with a flat weighted object to flatten out the repair while it cures. I hope that helps with future DIY endeavors.

Marty Chapman -

How about the seam in the crotch of the waders?

Steve Kyle - 답글

댓글 쓰기

조회 통계:

24 시간 전: 5

7일 전: 89

30일 전: 375

전체 시간: 19,306