필요한 것
동영상 개요
-
-
The iPad Pro was water-damaged and then won't turn on. Press the power button. The iPad Pro won't turn on. Connect the iPad Pro to power and the iPad Pro still won't turn on.
-
-
-
Then we remove screws on the shielding cover with a Screwdriver. Detach the shielding cover. Disconnect the flex cables.
-
Continue to remove screws on the shielding cover of motherboard and then the shielding cover.
-
Insert a Pry Piece between the battery and motherboard. Disconnect the battery.
-
-
-
-
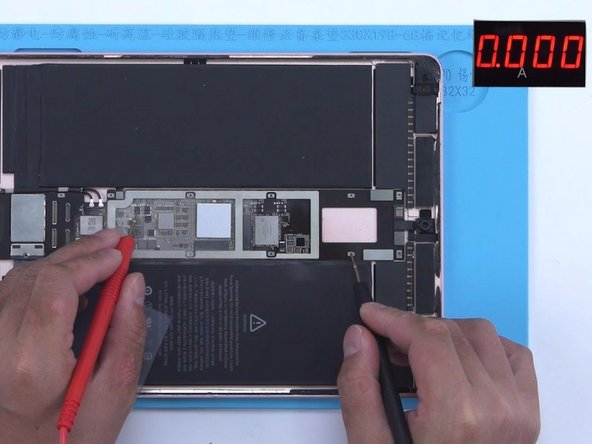
Then we check if the boot current of the motherboard is normal. Power up the motherboard with a Direct Current Supply. When the probes touch the main power supply circuit of the motherboard and the boot-up hasn't been triggered, the current directly jumps to 2.7 A.
-
We can confirm that the main power supply circuit of the motherboard is short-circuited, leading to the not turning on issue. Then we measure the diode values of the main power supply circuit with diode mode of the multimeter. The diode value is 534, which is normal.
-
When measuring a nearby capacitor, the diode value is 0. It indicates that the circuit is shorted.
-
-
-
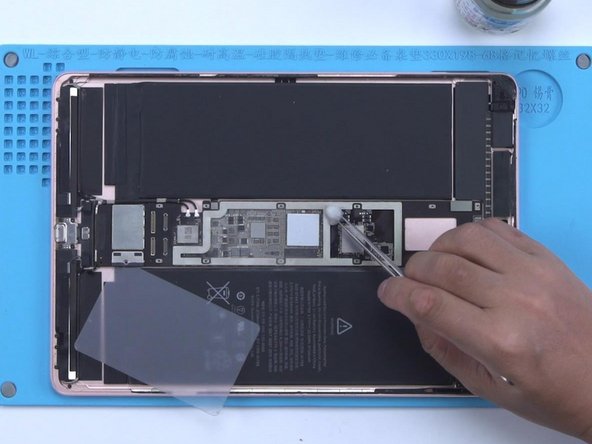
Since there are too many related components on the circuit, we use rosin detecting to find the short-circuited component. The Rosin Dispenser is used to dispense rosin this time. Compared to the traditional soldering iron, the operation is easier with better effect.
-
Then we apply a voltage of 3 V to the motherboard. It can be seen under the microscope that rosin on a capacitor has melted. We can judge that the capacitor is damaged.
-
The next thing we need to do is to remove the capacitor. Remove the capacitor with Hot Air Gun at 340 °C and airflow 3. Please protect the surrounding battery while heating to avoid damage.
-
-
-
After the motherboard has cooled, measure with multimeter again. The diode value returns to a normal value of 156.
-
Because the main power supply circuit of the motherboard is short-circuited, the battery is protected.
-
Then we use the Direct Current Supply to activate the battery Firstly, clean the motherboard with PCB Cleaner.
-
-
-
Remove the Pry Piece. Apply a voltage of 4.2 V to the main power supply circuit to activate the battery.
-
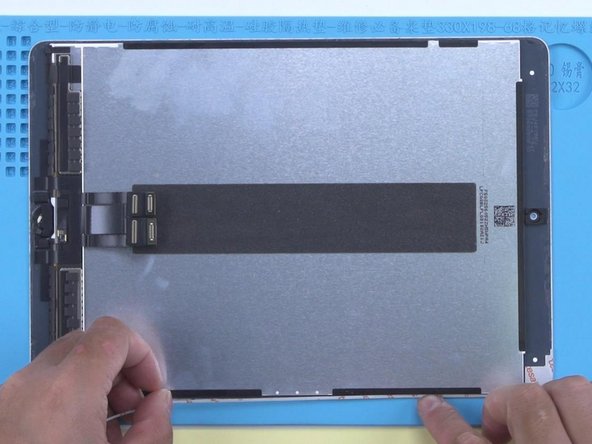
Next, we assemble the iPad Pro for testing. Install the screws and shielding cover. Before installing the screen, we need to remove the double-sided tape on the screen and rear cover housing.
-
Then we apply new double-sided tape. Install the display.
-


To reassemble your device, follow these instructions in reverse order.
To reassemble your device, follow these instructions in reverse order.

댓글 한 개
Pretty good, thanks for the steps. However, a person can't follow these directions without being able to identify what the flex cables, motherboard, main circuit on the motherboard, battery, diodes or capacitor are and look like. There are no pics to show which are which. We also need an explanation as to what a pry piece, Direct Current Supply, multimeter, rosin and PCB cleaner are. There's no explanation of what size screwdriver to use, what angle or direction to pry off the screen to prevent flex cables damage, how to place the probes on the components, what kind of heating pad to use, or how long to let the motherboard cool after the hot air gun. Lastly, it would be helpful to provide a general idea as to where one might buy/rent this heating pad, a Direct Current Supply, a multimeter, tiny screwdrivers, rosin and/or a rosin dispenser and a hot air gun.
Also, I am not sure, but you mentioned removing the bad capacitor, but there is no mention of putting a new one in. How can it be repaired without that?