주요 콘텐츠로 건너뛰기

Repairing 2006 Iron Horse Warrior Wheel

필요한 것

  1. Repairing 2006 Iron Horse Warrior Wheel, Rear Wheel: 1 단계, 이미지 1/2 Repairing 2006 Iron Horse Warrior Wheel, Rear Wheel: 1 단계, 이미지 2/2
    • Turn the bike upside down if you don't have a bike stand. This will make it easier to remove the tire.

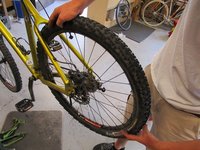
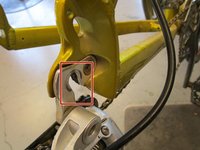
    • Unfasten the left side of the wheel by pulling the black "L" shaped lever up with your hands.

  2. Repairing 2006 Iron Horse Warrior Wheel: 2 단계, 이미지 1/2 Repairing 2006 Iron Horse Warrior Wheel: 2 단계, 이미지 2/2
    • On the right side, use your hands to unscrew the cap of the axle counterclockwise until it is loose.

  3. Repairing 2006 Iron Horse Warrior Wheel: 3 단계, 이미지 1/2 Repairing 2006 Iron Horse Warrior Wheel: 3 단계, 이미지 2/2
    • Push down on the the tire with your hands to remove it from the frame of the bike.

    • Sometimes the axle will get caught in the boxed area. Use both of your hands to cautiously push it down harder until the tire comes loose. This may require a fair amount of force.

  4. Repairing 2006 Iron Horse Warrior Wheel, Tire/Tube: 4 단계, 이미지 1/3 Repairing 2006 Iron Horse Warrior Wheel, Tire/Tube: 4 단계, 이미지 2/3 Repairing 2006 Iron Horse Warrior Wheel, Tire/Tube: 4 단계, 이미지 3/3
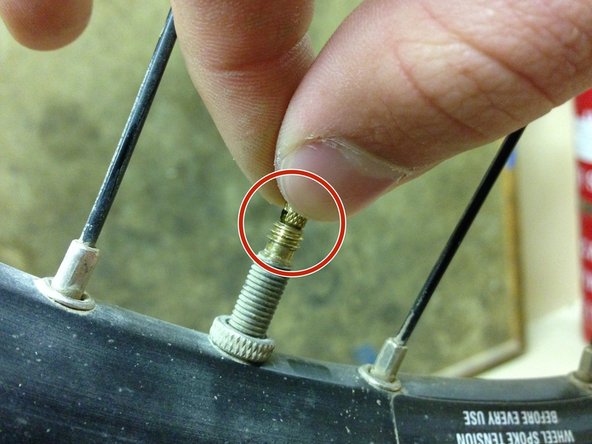
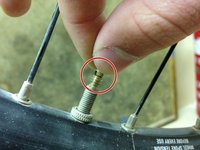
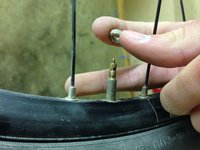
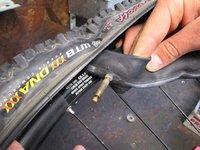
    • Slightly loosen the valve bolt counterclockwise with your thumb and index finger.

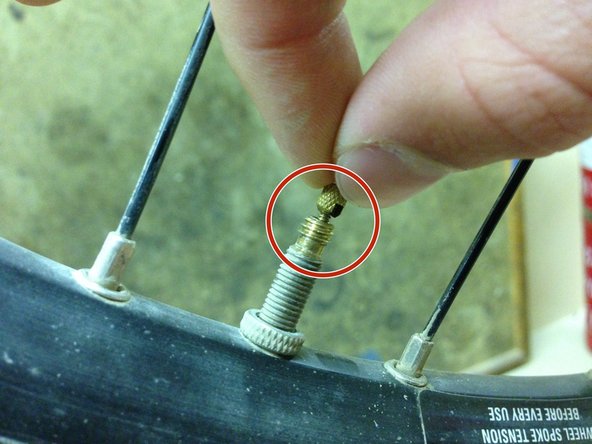
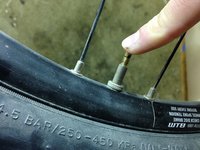
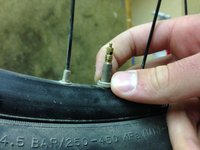
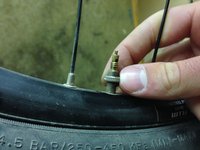
    • Deflate the tire by pressing down the air valve tip with your finger. Use as much pressure as needed to hear the air flowing out of the tube.

  5. Repairing 2006 Iron Horse Warrior Wheel: 5 단계, 이미지 1/3 Repairing 2006 Iron Horse Warrior Wheel: 5 단계, 이미지 2/3 Repairing 2006 Iron Horse Warrior Wheel: 5 단계, 이미지 3/3
    • Use you thumb and index finger to unscrew the valve nut by rotating it counterclockwise.

  6. Repairing 2006 Iron Horse Warrior Wheel: 6 단계, 이미지 1/3 Repairing 2006 Iron Horse Warrior Wheel: 6 단계, 이미지 2/3 Repairing 2006 Iron Horse Warrior Wheel: 6 단계, 이미지 3/3
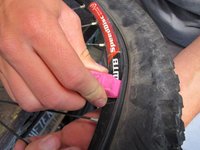
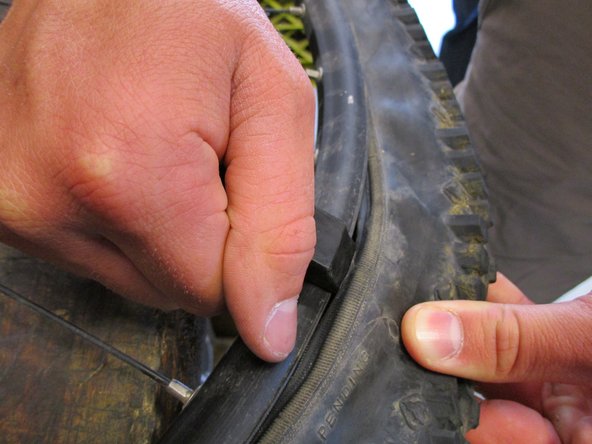
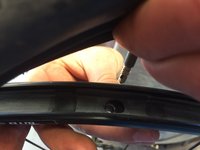
    • Hold the tire lever firmly in your hands and look for the boundary between the tire and the wheel rim. Apply great force to the lever until you pry the rim and the tire apart.

    • You can do this step anywhere along the circumference of the wheel.

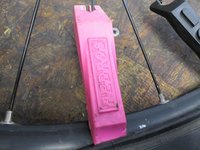
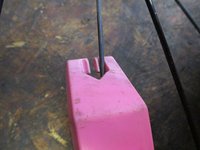
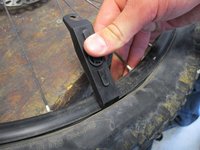
    • With the tip of the lever inserted between the rim and the tire, rotate the lever 90° counterclockwise and fix the lever to the metal spokes using the arrow shaped slot located on the top of the lever.

  7. Repairing 2006 Iron Horse Warrior Wheel: 7 단계, 이미지 1/2 Repairing 2006 Iron Horse Warrior Wheel: 7 단계, 이미지 2/2
    • Insert an extra tire lever between the tire and the rim.

    • Move the lever along the circumference of the rim to pry the tire apart.

    • You may attach as many tire levers on the spokes as you feel necessary to make this step easier.

  8. Repairing 2006 Iron Horse Warrior Wheel: 8 단계, 이미지 1/3 Repairing 2006 Iron Horse Warrior Wheel: 8 단계, 이미지 2/3 Repairing 2006 Iron Horse Warrior Wheel: 8 단계, 이미지 3/3
    • Start removing the tire by unplugging the valve from the rim slot.

    • Remove the rest of the tire and the tube from the rim.

  9. Repairing 2006 Iron Horse Warrior Wheel, Repairing 2006 Iron Horse Warrior Wheel: 9 단계, 이미지 1/2 Repairing 2006 Iron Horse Warrior Wheel, Repairing 2006 Iron Horse Warrior Wheel: 9 단계, 이미지 2/2
    • Once you have the tire removed from the rim, place the rim on the truing stand and tighten the stand on the axle using the knob on the side of the stand to make sure the rim is secured on the stand.

    • Raise the calipers on the stand so they are the same height as the rim. You can adjust the height of the calipers using knob on the base of the stand.

  10. Repairing 2006 Iron Horse Warrior Wheel: 10 단계, 이미지 1/2 Repairing 2006 Iron Horse Warrior Wheel: 10 단계, 이미지 2/2
    • Adjust the calipers by using the knob directly below them so there is a about a 1/2 inch gap between the calipers and the walls of the rim.

  11. Repairing 2006 Iron Horse Warrior Wheel: 11 단계, 이미지 1/1
    • Spin the rim. As the rim is spinning, slowly rotate the knob to move the calipers towards the rim in small increments until one of them begins to make contact with the rim.

    • Take note of the contact spot on the rim. This is where you will make adjustments.

  12. Repairing 2006 Iron Horse Warrior Wheel: 12 단계, 이미지 1/1
    • Add a lubricant to the spoke nipples to allow them to turn easier and make the spoke tighter.

    • This step is not always necessary; however, if you are having trouble turning the spoke wrench, it is a good idea to apply the lubricant.

  13. Repairing 2006 Iron Horse Warrior Wheel: 13 단계, 이미지 1/2 Repairing 2006 Iron Horse Warrior Wheel: 13 단계, 이미지 2/2
    • Loosen the spokes on the side of the tire slightly using the spoke wrench. Adjust the spoke directly where the bend was along with 2 or 3 spokes on each side of it. Try to keep each adjustment around 1/4 to 1/2 of a turn to avoid tightening or loosening a spoke too much.

    • The nut you are tightening is screwing onto the spoke, so if you turn it counter-clockwise as you are looking down on it, you are tightening the spoke.

    • Go back and tighten the spokes that connect to the opposite side of the tire using the same technique.

    • As you complete this step, you should see the rim moving in the direction that you are tightening the spokes; however, you may have to repeat this step many times before the rim is perfectly straight.

결론

To reassemble your device, follow these instructions in reverse order.

다른 한 분이 해당 안내서를 완성하였습니다.

Scott Kaufman

회원 가입일: 04/20/15

619 평판

안내서 3개 작성하였습니다

Cal Poly, Team 15-2, Amido Spring 2015 Cal Poly, Team 15-2, Amido Spring 2015 회원

CPSU-AMIDO-S15S15G2

4 회원들

안내서 12개 작성하였습니다

댓글 0개

댓글 쓰기

조회 통계:

24 시간 전: 0

7일 전: 1

30일 전: 6

전체 시간: 300