이 버전에는 잘못된 편집 사항이 있을 수 있습니다. 최신 확인된 스냅샷으로 전환하십시오.
필요한 것
-
이 단계는 번역되지 않았습니다. 번역을 도와주십시오
-
Thread your needle and tie a knot in the end of the thread.
-
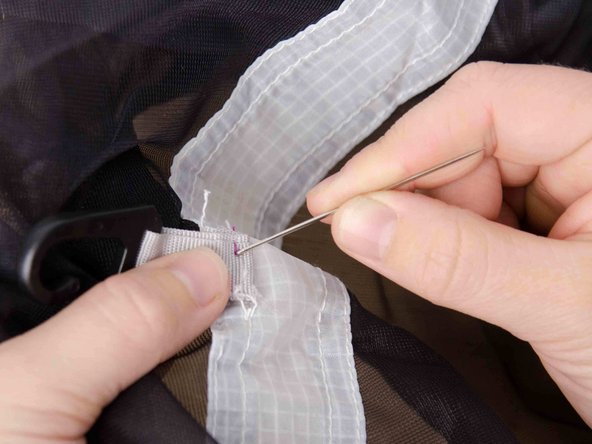
Drive the needle through the back of the bottom material.
-
Pull the thread taut.
-
-
이 단계는 번역되지 않았습니다. 번역을 도와주십시오
-
Drive the needle through the back side of the top material.
-
Pull the thread taut.
-
Align the two materials in their final position.
-
-
-
이 단계는 번역되지 않았습니다. 번역을 도와주십시오
-
Drive the needle down through both layers of material, coming out on the back side of the bottom material. Push the needle out of the material.
-
Pull the thread taut.
-
-
이 단계는 번역되지 않았습니다. 번역을 도와주십시오
-
Ensure the two layers are correctly aligned.
-
Drive the needle through both layers of fabric from the back side of the bottom material, coming up on the top side of the top material.
-
Pull the thread taut.
-
-
이 단계는 번역되지 않았습니다. 번역을 도와주십시오
-
Continue sewing through both layers, going down from the top and up from the bottom, as described in steps 3 and 4 of this guide.
-
When you come to the end of your material, draw the needle in between the two layers of material, under the thread of the closest stitch.
-
Slowly start to pull the thread taut. As you pull a loop will form.
-
Draw the needle through the loop and pull the thread taut.
-
Repeat the process of drawing the needle between the layers, creating a loop, and drawing the needle through the loop as described in this step.
-


다른 한 분이 해당 안내서를 완성하였습니다.


댓글 한 개
I've found that small bungee cords (or the poor-boy version, an old bicycle inner tube cut with a scissors into very many tough rubber bands just as thick or thin as you wish) is a great add-on to tent and tarp guy lines. When those big gusts of wind arrive, the elasticity of the added-on stretchy thing allows the wind to buffet the tent or tarp about, but prevents tent stakes from being dislodged, or tarps from becoming shredded. No stitches are needed when the elastic, instead of the fabric, takes the strain.