소개
If your DVD tray won't open when empty, but seems to work fine with a game in it, chances are good the belt is slipping or it is dirty inside (or both). This guide walks through fixing this issue.
필요한 것
-
-
The first step is to remove the hard drive if one is installed. Push the button at the front of the hard drive and lift the hard drive up to remove it.
 FixBot에 문의하기
-
-
-
The next step is to remove the face plate. Pull out on the right side of it (by the USB cover). There are clips that hold it in place, you just need to pop it loose.
-
-
-
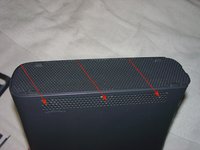
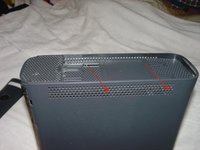
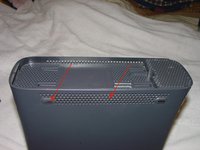
Next we will remove the bottom vent cover. There are three tabs on each side, use the finger of the xbox tool or the pointed end of a spudger to release them one at a time, and pull up from the front as shown in the third pic.
-
-
-
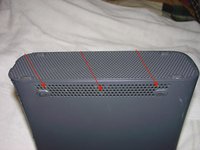
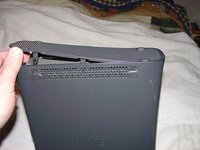
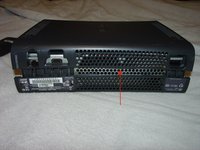
The other vent has two holes towards the front of the xbox. Slide the finger of the xbox tool or the pointed end of the spudger into these holes to release the front two clips. There are two additional clips that are release from the sides, lift from the front as you release those clips. The back clip on the bottom is under the rubber "foot".
-
-
-
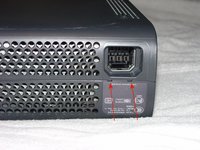
To open the front you will need to cut or peel back the Microsoft sticker. THIS WILL VOID ANY WARRANTY ON THE XBOX. Turn xbox upside down, release the four clips shown, and lift the front of the bottom cover.
-
-
-
-
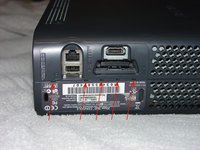
Use the xbox tool to release the five points under the serial number label and start to lift the cover from that side. There is a clip in the middle you also may need to release. Then use the xbox tool to release the last two points at the power connection. Lift the bottom cover off the xbox.
-
-
-
Remove the DVD eject button by releasing the clip and lifting the assembly off the front of the xbox. It has a pin to the right that it slides onto, so you may need to coax it a little bit.
-
-
-
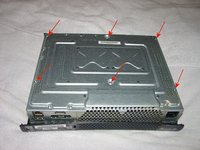
There are six #10 Torx screws that hold the upper case on. Remove these, turn the xbox over, and lift the top cover off.
-
-
-
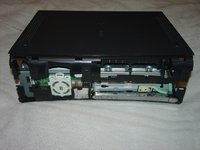
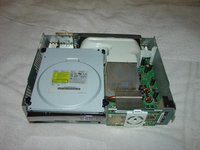
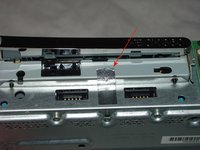
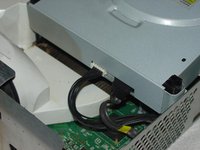
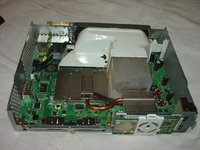
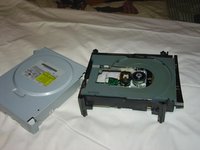
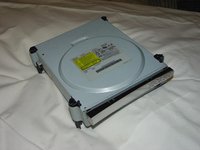
At the front of the DVD drive, peel back the end of the tape shown first, then lift the DVD drive part way so that you can access the connections in the back. Unplug the power and data connections at the back of the DVD drive, then lift it straight up.
-
-
-
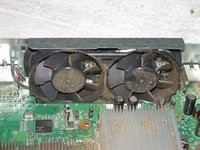
Now is a good time to blow the dirt out. The fan shroud has a clip in the center, you can release that with the finger of the xbox tool and lift it straight up. The fans have two clips, one above each fan, lift up on the metal lip to release them. Don't forget to unplug the electrical connector also. Clean it out and re-assemble these parts.
-
-
-
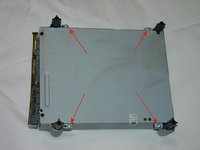
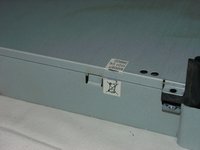
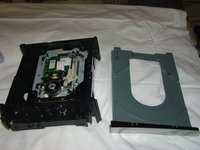
Remove the screws and cut or peel the security sticker on the side of the DVD drive (also voids the warranty). Lift off the bottom and top metal case.
-
-
-
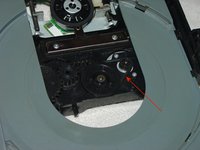
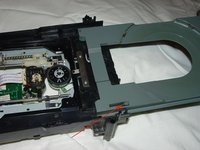
To open your tray, look under the front of it. There is a small wheel that you can use the finger of the xbox tool to rotate by pulling from right to left. (In other words, rotate clockwise as seen from above.) This will lower the laser assembly and allow you to slide the tray. Clean the rubber belt with rubbing alcohol, or replace if necessary.
-
-
-
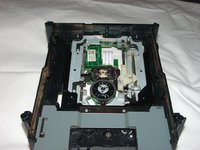
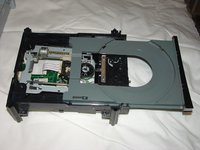
Clean the runners where the tray slides with rubbing alcohol as well. If it is really filthy like this one, you may want to remove the tray for a more thorough cleaning. Release the tab shown and pull the tray out and to the side.
-
-
-
After cleaning, reinsert the tray into the DVD drive and make sure it slides smoothly. When you push it the whole way in, it should lock in place again. Re-assemble the DVD drive, now it is ready to go back in the xbox. Re-assemble the xbox in the reverse order, and you're ready to go!
-


To reassemble, follow the steps in the reverse order.
다른 66명이 해당 안내서를 완성하였습니다.

16가이드 댓글
I started down this process when the drive would not read a game disc or a regular music CD. Cleaning the drive out did not help, but it was good to figure out how the laser lens assembly works and how one can get the drive to eject. In my case, the laser assembly needed adjustment (by decreasing the resistance of one of the two potentiometers).
How did you fix this issue
avickers902 - 답글 공유