소개
This CPU doesn't have the same graphics card as the disassembly tutorial. In the latter, the graphics card is a reduced format. However, full-size graphics cards are usually accompanied by a guide to prevent physical damage to the card or motherboard port.
This guide, screwed to the graphics card, makes installing or removing a graphics card more delicate. That's why this replacement tutorial will also include steps for reinstalling such a graphics card.
There's also a step-by-step guide to show which graphics cards are compatible with this model in terms of size.
-
-
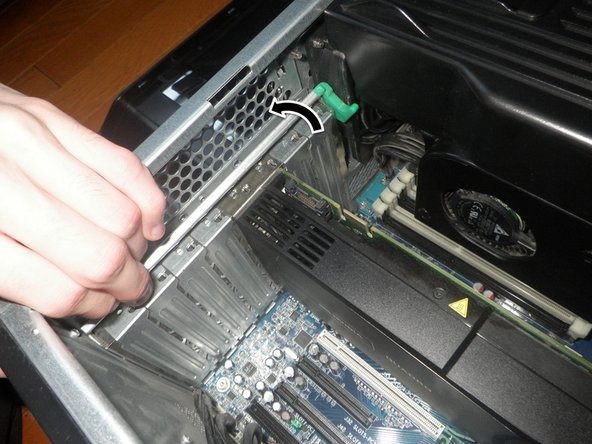
First, pull the handle and raise the upper part of the case.
-
After taking the upper part off, you'll see the covers of the different pieces of the PC.
-
-
-
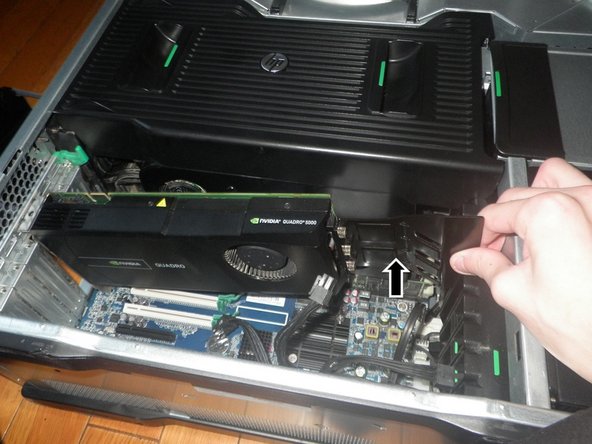
The GPU has a guide. It's necessary to pay attention and don't forget about it while taking the GPU off.
-
-
-
-
Disconnect the power connector from the GPU.
-
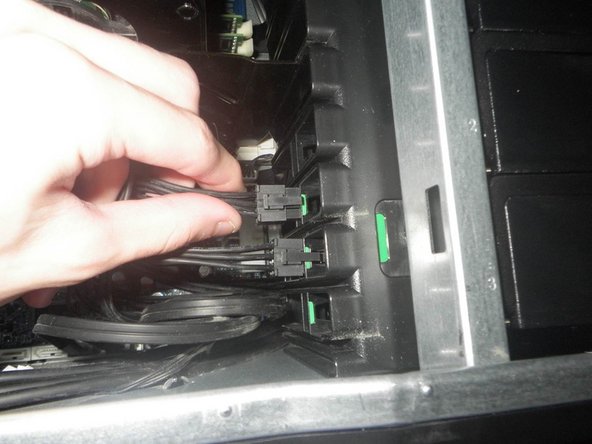
You can clip the connectors in a specifically designed place.
-
Raise the rod that maintains the PCI GPU in place.
-
-
-
Raise the tab that maintains the GPU in its port.
-
Raise the GPU slowly from the side of the guide until the GPU partially comes out of its port.
-
Raise the GPU from its other side.
-
-
-
Introduce the new GPU at 45º from the motherboard.
-
Place the guide in front of the appropriate slot and push the graphics card into it, making sure it fits into its PCI slot.
-
To check that your graphics card is correctly installed, check that the tab is properly locked in place.
-
-
-
Insert the graphics card into the PCI bracket until it clicks into place.
-
Don't forget to connect the power supply connectors to the GPU if it's necessary.
-
-
-
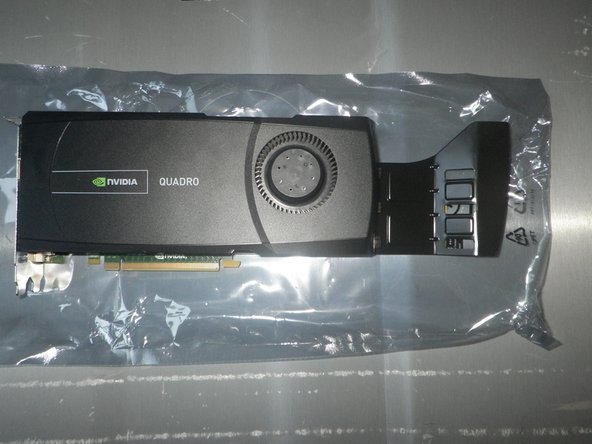
The Sapphire RX 5700XT GPU is the largest card that fits in the case without problems.
-
As it's already explained, the case has special spots for clipping the unused power supply ports.
-


The reinstallation stages are included in the tutorial.
다른 한 분이 해당 안내서를 완성하였습니다.
다음 번역가들에게 특별히 감사 드립니다:
100%


이 번역인들은 저희가 세상을 수리하는 데 도움을 주고 있어요! 기여하시겠습니까?
번역 시작하기 ›
