소개
This guide will show you how to replace the sponge rubber on the feed breakers in your printer. This is necessary if the text appears too far up or down on the paper when printing. If your printer does not feed the paper correctly or if it only empties a blank sheet despite full toner and correct settings, this fix may fix the problem.
It is recommended to replace the foam rubber directly with all feed breakers. Otherwise it may be that you have to repair again in the near future or the repair is not successful.
필요한 것
-
-
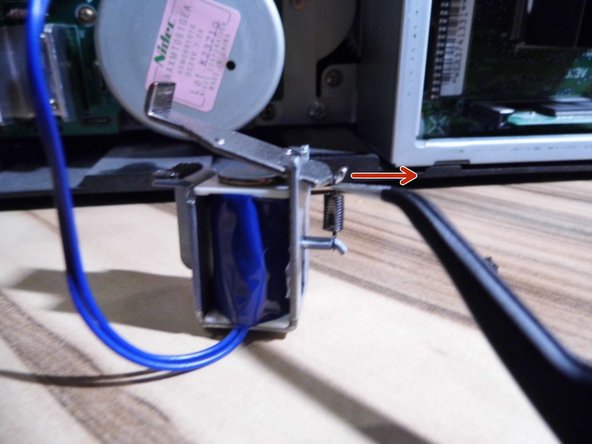
Before you start, turn off the printer and remove all cables
-
In order to work better, it is recommended to remove the paper from the rear and front paper feed.
-
-
-
Use a Phillips screwdriver to remove the Philips screw that holds the memory cover on the right side of the printer in place.
-
Remove the memory cover.
-
-
-
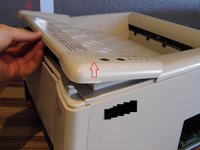
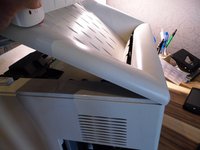
Open the cover to change the toner
-
Remove the two Phillips screws that connect the top cover to the chassis.
-
-
-
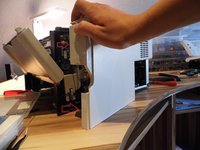
To remove the side cover, the front paper feed must be opened. In addition, the front paper cassette must be removed by pulling out to release one of the clips.
-
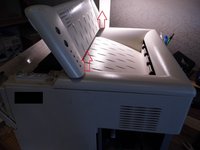
Using a spudger or a flat-head screwdriver you can easily loosen the clips (see picture 2). There are several clips around the cover. Only when all are solved, the side cover can be removed.
-
Once all the clips have been released, you can fold the cover out of the front of the paper feeder (see picture 3).
-
-
-
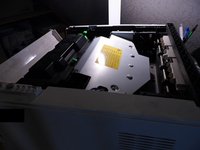
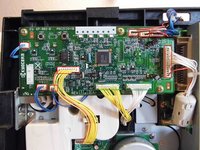
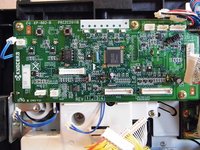
Remove all cables from the board.
-
The green marked cables are very tight and difficult to loosen. Take your time and do not exercise too much violence.
-
-
-
-
Remove the three Philips screws securing the board
-
Remove the board from the printer
-
The board is additionally held in place with a small hook. When you remove the board, you need to unhinge it.
-
-
-
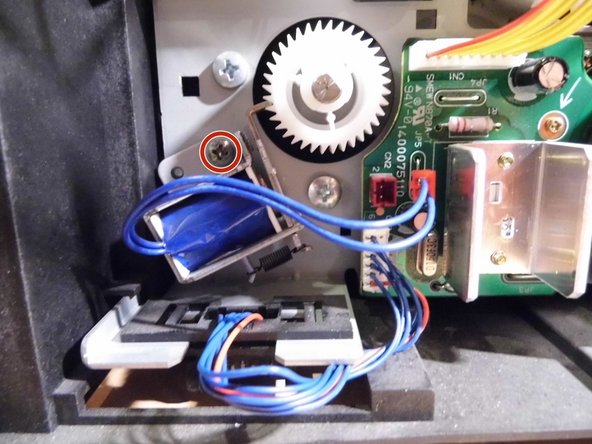
Remove the Phillips screw that secures the gear cover.
-
Remove the gear cover.
-
-
-
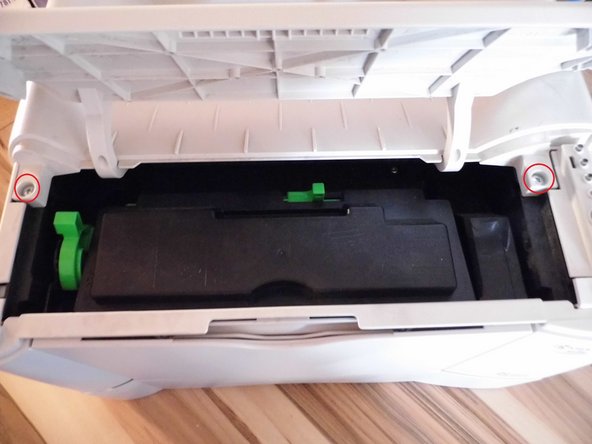
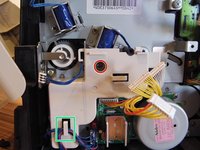
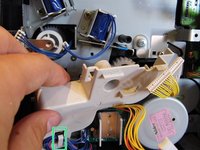
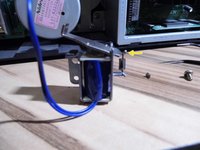
Here are the three intake breakers to work on in the next steps.
-
At the red marked areas usually sits black foam rubber. This causes the problem - over time, it becomes sticky, which causes the interruption of the indentation only delayed. Thus, the paper is fed too short / too far before the printing starts. This will move the text up or down.
-
-
-
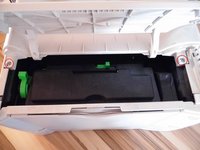
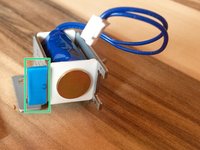
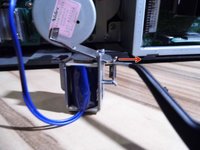
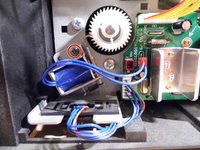
On the photo you can already see the fixed parts. In the green marked spots normally sits black foam rubber.
-
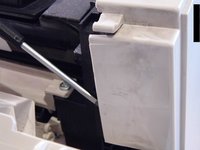
Use a Philips screwdriver to remove the screw securing the feed breaker to the main frame.
-
Remove the feed breaker.
-
Remove the bracket afterwards by removing the small spring with tweezers.
-
-
-
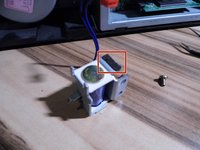
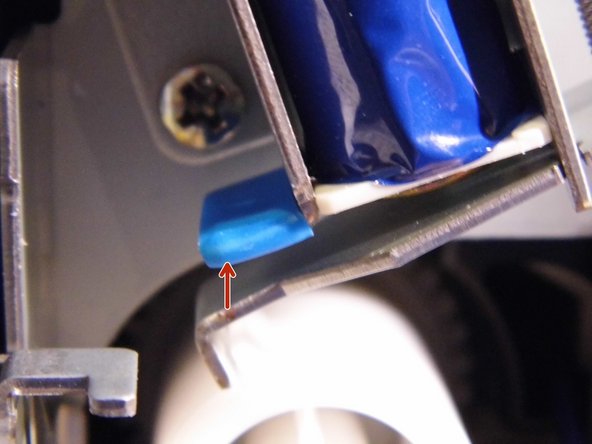
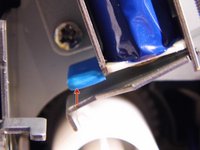
The green marked area usually contains black sponge rubber.
-
Use a slotted screwdriver, a spudger or something similar to remove the sponge rubber. .
-
Then clean the place to remove the glue residue. For cleaning, e.g. Brake cleaner or silicone spray can be used.
-
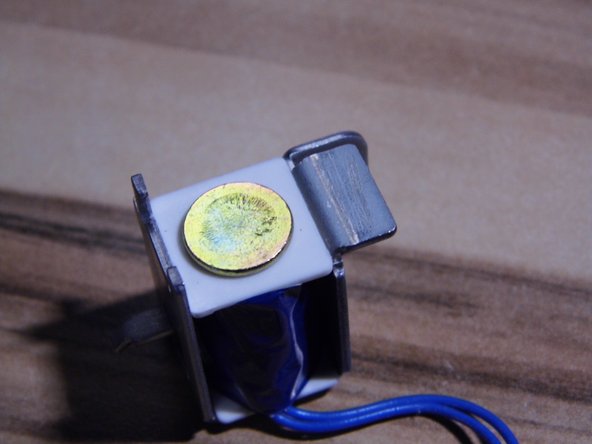
After the spot has been cleaned, new sponge rubber or something similar (e.g., felt or shrink tubing as shown in the picture) may be applied.
-
-
-
The green marked area usually contains black sponge rubber.
-
Use a slotted screwdriver, a spudger or something similar to remove the sponge rubber.
-
Then clean the place to remove the glue residue. For cleaning, e.g. Brake cleaner or silicone spray can be used.
-
After the spot has been cleaned, new sponge rubber or something similar (e.g., felt or shrink tubing as shown in the picture) may be applied.
-
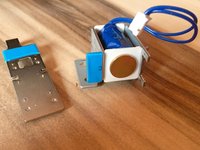
In picture 2 you can see the two repaired parts side by side.
-
To reinstall the parts, follow step 10 in reverse order.
-
-
-
Use tweezers or forceps to remove the spring that connects the metal fork to the feed breaker.
-
Then remove the metal fork.
-
-
-
Use a slotted screwdriver, a spudger or something similar to remove the sponge rubber.
-
Then clean the place to remove the glue residue. For cleaning, e.g. Brake cleaner or silicone spray can be used.
-
After the site has been cleaned, new sponge rubber or something similar (e.g., felt or shrink tubing as shown in Figure 3) can be applied.
-
After cleaning and replacing the sponge rubber, the metal fork can be re-attached to the retraction breaker. To do this, follow step 14 in reverse order.
-
Then the feed breaker can be re-installed in the printer. To do this, follow step 13 in reverse order.
-
-
-
Remove the plug that connects the feed breaker to the board.
-
Then remove the Philips screw and remove the feed breaker.
-
Then follow steps 14 and 15 to remove the metal fork and old sponge rubber. To reinstall the metal fork, follow step 14 in reverse order. To reinstall the feed breaker in the printer, follow this step in reverse order.
-
-
-
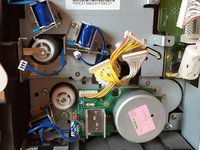
Here is the finished result. On all four intake breakers, the old sponge rubber was removed and replaced.
-
To check whether the repair was successful, you can press the metal fork against the feed breaker by hand. If you then let go off the metal fork, it should immediately jump back on the gear.
-
On the other hand, if the metal fork lingers briefly after being released and only returns with a delay, either the material that was used as a replacement is unsuitable or the area has not yet been completely cleaned of all adhesive residues. In this case, steps 10, 11 and 12 or 13, 14 and 15 or 16 should be repeated again.
-


To reassemble your device, follow the steps in reverse order.
다른 10명이 해당 안내서를 완성하였습니다.


11가이드 댓글
Thank you so much for writing this! My FS-1010 which I could not bring myself to throw out is now working perfectly! Many thanks!
Thanks for your comment, I’m really happy that the guide helped you to repair your printer.
I updated the guide today, since I realized I forgot to mention one spot where you also need to replace the sponge rubber. Please have a look at step 12, if you didn’t clean away the sponge rubber there, it is advisable to open the printer once again to clean the spot.
At the moment the new step isn’t translated into Englisch, but I will add the translation shortly.
Wish you happy printing!
Beerwema -
Dear Beerwema. Thanks for this guide. It just saved my 15 year old printer from going to landfill - may it and its original toner cartridge go for another 15 years! I salute you :-)
Just a quick note -In step 6 I could not remove the green marked cables - I just left them attached and removed the board - there was enough slack in the cables to let me complete all the other steps no problem with the board still attached to the two cables.
Thanks again.
Thanks for your comment, I’m really happy that my guide helped you to repair your printer.
The FS-1010 is a really reliable printer, aside from the issue with the foam rubber. The toner cartridge really lasts forever, so it may be possible to print with it for the next 15 years :-).
According to your suggestion I added a note to step 6. Thanks for your advice!
I wish you happy printing!
Beerwema -
Vielen herzlichen Dank für diese Anleitung. Sie hat mir sehr geholfen. War schon am Verzweifeln….
Aber nun läuft er wieder richtig. Allerdings habe ich die Metallplättchen “blank” gelassen.
Sollte es nicht auf Dauer funktionieren, dann nehme ich ihn nochmal auseinander und mache Schrumpfschlauch drüber.
Nun funzt er aber erstmal.
Danke Danke Danke
D.K.