주요 콘텐츠로 건너뛰기

Replacing Strings on Floating Tremolo Bridge Guitar

필요한 것

  1. Replacing Strings on Floating Tremolo Bridge Guitar, Strings: 1 단계, 이미지 1/3 Replacing Strings on Floating Tremolo Bridge Guitar, Strings: 1 단계, 이미지 2/3 Replacing Strings on Floating Tremolo Bridge Guitar, Strings: 1 단계, 이미지 3/3
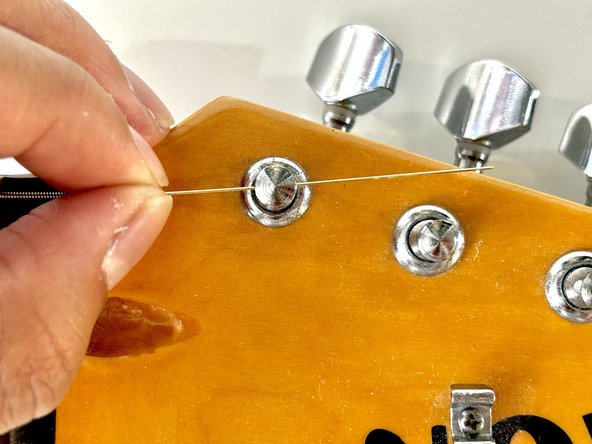
    • Use a string winder to loosen each string by turning the peg counter-clockwise.

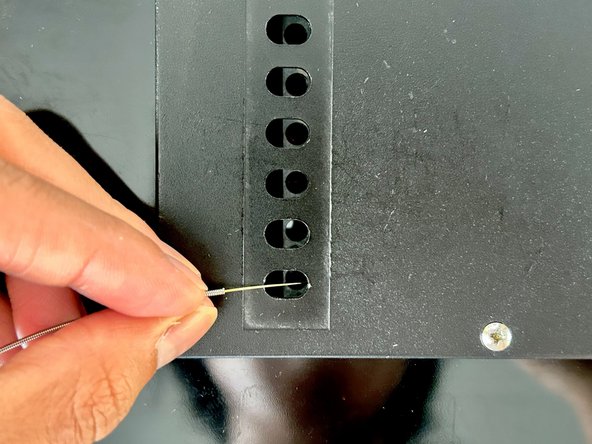
    • Once loosened, pull the string out of the tuning peg.

  2. Replacing Strings on Floating Tremolo Bridge Guitar: 2 단계, 이미지 1/3 Replacing Strings on Floating Tremolo Bridge Guitar: 2 단계, 이미지 2/3 Replacing Strings on Floating Tremolo Bridge Guitar: 2 단계, 이미지 3/3
    • Move to the bridge of the guitar and push the strings through.

    • Flip the guitar around and pull the string out of the hole in the back.

  3. Replacing Strings on Floating Tremolo Bridge Guitar: 3 단계, 이미지 1/2 Replacing Strings on Floating Tremolo Bridge Guitar: 3 단계, 이미지 2/2
    • Insert the new strings through the holes in the back.

    • Many strings will be color coded or have guides so you'll know which holes to put each string through.

    • Feed the string through to the other end and pull until the end of the string is reached.

    • You will know if you reached the end of the string if you can't pull any further.

  4. Replacing Strings on Floating Tremolo Bridge Guitar: 4 단계, 이미지 1/1
    • Turn each tuning peg until the holes are perpendicular to the nut.

    • The nut is the piece of wood with grooves that hold the strings.

  5. Replacing Strings on Floating Tremolo Bridge Guitar: 5 단계, 이미지 1/3 Replacing Strings on Floating Tremolo Bridge Guitar: 5 단계, 이미지 2/3 Replacing Strings on Floating Tremolo Bridge Guitar: 5 단계, 이미지 3/3
    • Align each string to the groove in the nut.

    • Insert the strings into the corresponding tuning peg.

    • Leave about an inch or 2 of slack.

  6. Replacing Strings on Floating Tremolo Bridge Guitar: 6 단계, 이미지 1/3 Replacing Strings on Floating Tremolo Bridge Guitar: 6 단계, 이미지 2/3 Replacing Strings on Floating Tremolo Bridge Guitar: 6 단계, 이미지 3/3
    • To tie the knot, begin by looping the string around and then under.

    • Pull up on the string until you can feel tension.

    • Loop the string over and pull.

  7. Replacing Strings on Floating Tremolo Bridge Guitar: 7 단계, 이미지 1/1
    • Tighten the string using the string winder.

    • One or two rotations should do the trick.

    • Be careful not to tighten the stings too much, the strings may snap under excessive tension.

  8. Replacing Strings on Floating Tremolo Bridge Guitar: 8 단계, 이미지 1/1
    • Snip off the excess string at the end.

    • Keep a safe distance when cutting each string. It can snap and hit your face or skin. Be extra careful to protect your eyes.

결론

All that's left to do is tune your guitar and then it will be ready for playing!

PATRICK B COLORINA

회원 가입일: 09/10/23

157 평판

안내서 1개 작성함

York University, Team 1-9, O'Regan Fall 2023 York University, Team 1-9, O'Regan Fall 2023 회원

YORK-O'REGAN-F23S1G9

1 회원

안내서 1개 작성하였습니다

댓글 0개

댓글 쓰기

조회 통계:

24 시간 전: 0

7일 전: 4

30일 전: 10

전체 시간: 103