주요 콘텐츠로 건너뛰기

Retro-Bit Retro Duo Controller Button and Pad Replacement.

필요한 것

  1. Retro-Bit Retro Duo Controller Button and Pad Replacement., Buttons and Pads in Controller(s): 1 단계, 이미지 1/3 Retro-Bit Retro Duo Controller Button and Pad Replacement., Buttons and Pads in Controller(s): 1 단계, 이미지 2/3 Retro-Bit Retro Duo Controller Button and Pad Replacement., Buttons and Pads in Controller(s): 1 단계, 이미지 3/3
    • With the controller on its face, remove the five 6 mm Phillips #1 screws.

    • After screw removal, carefully lift the controller casing.

  2. Retro-Bit Retro Duo Controller Button and Pad Replacement.: 2 단계, 이미지 1/3 Retro-Bit Retro Duo Controller Button and Pad Replacement.: 2 단계, 이미지 2/3 Retro-Bit Retro Duo Controller Button and Pad Replacement.: 2 단계, 이미지 3/3
    • Pinch the top and bottom of the shoulder pads, then lift out.

    • There are small elastic pads below each shoulder pad. Replace these if they are not functioning correctly.

  3. Retro-Bit Retro Duo Controller Button and Pad Replacement.: 3 단계, 이미지 1/3 Retro-Bit Retro Duo Controller Button and Pad Replacement.: 3 단계, 이미지 2/3 Retro-Bit Retro Duo Controller Button and Pad Replacement.: 3 단계, 이미지 3/3
    • Carefully lift the circuit board from the controller case.

  4. Retro-Bit Retro Duo Controller Button and Pad Replacement.: 4 단계, 이미지 1/3 Retro-Bit Retro Duo Controller Button and Pad Replacement.: 4 단계, 이미지 2/3 Retro-Bit Retro Duo Controller Button and Pad Replacement.: 4 단계, 이미지 3/3
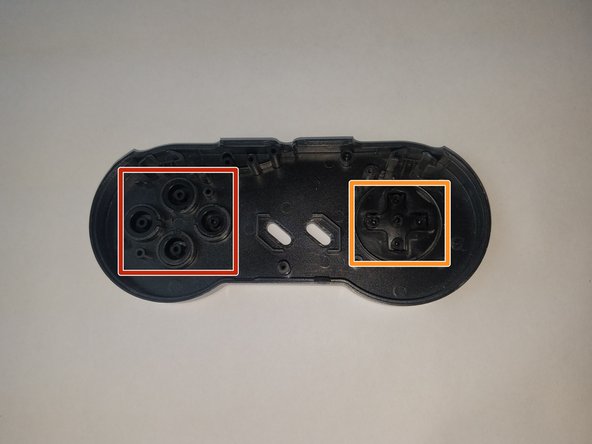
    • To replace the action button pad, lift this part out.

    • Lift the Select and Start button pad.

    • If replacing the D-Pad, lift this pad.

    • Pinch and lift the shoulder button pads.

  5. Retro-Bit Retro Duo Controller Button and Pad Replacement.: 5 단계, 이미지 1/3 Retro-Bit Retro Duo Controller Button and Pad Replacement.: 5 단계, 이미지 2/3 Retro-Bit Retro Duo Controller Button and Pad Replacement.: 5 단계, 이미지 3/3
    • Support the controller face and push buttons toward the inner case.

    • Use care. The buttons have a tiny tab to keep them in place.

    • Support the controller face and push the D-Pad toward the inner case.

결론

To reassemble your device, follow these instructions in reverse order.

Evelyn

회원 가입일: 09/25/17

223 평판

안내서 2개 작성하였습니다

USF Tampa, Team S4-G4, Eyestone Fall 2017 USF Tampa, Team S4-G4, Eyestone Fall 2017 회원

USFT-EYESTONE-F17S4G4

3 회원들

안내서 10개 작성하였습니다

댓글 0개

댓글 쓰기

조회 통계:

24 시간 전: 0

7일 전: 3

30일 전: 6

전체 시간: 1,167