주요 콘텐츠로 건너뛰기

Ricoh Theta S Internal microSD Replacement

필요한 것

  1. Ricoh Theta S Internal microSD Replacement, Outer Case: 1 단계, 이미지 1/1
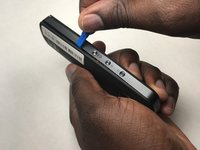
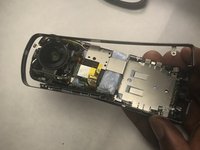
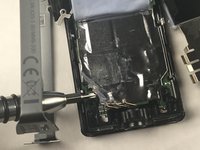
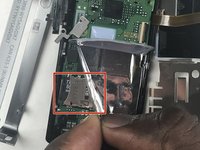
    • Wedge the spudger underneath the small plastic square located on the bottom of the device.

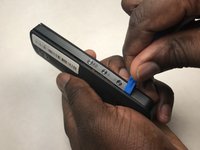
    • Move the spudger to remove the plastic cover.

  2. Ricoh Theta S Internal microSD Replacement: 2 단계, 이미지 1/2 Ricoh Theta S Internal microSD Replacement: 2 단계, 이미지 2/2
    • Remove the four 3-mm screws located on the bottom of the device. You will need to use the Phillips 00 screwdriver.

  3. Ricoh Theta S Internal microSD Replacement: 3 단계, 이미지 1/3 Ricoh Theta S Internal microSD Replacement: 3 단계, 이미지 2/3 Ricoh Theta S Internal microSD Replacement: 3 단계, 이미지 3/3
    • Insert the plastic opening tool in between the panels shown.

    • Apply pressure to unlatch the 9 spring clips located around the perimeter of the device.

    • Lift the panel from the device.

  4. Ricoh Theta S Internal microSD Replacement, Battery: 4 단계, 이미지 1/2 Ricoh Theta S Internal microSD Replacement, Battery: 4 단계, 이미지 2/2
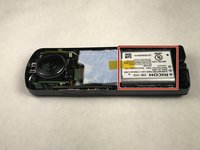
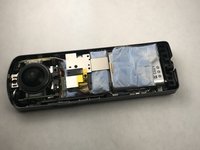
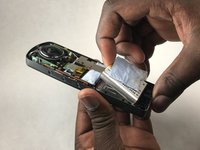
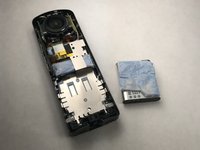
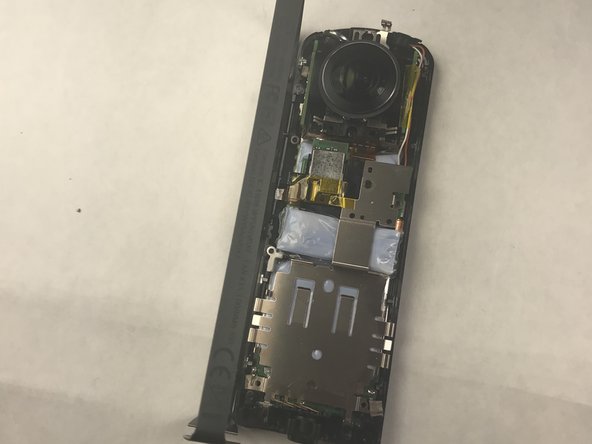
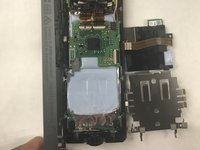
    • The battery is located near the bottom of the device.

    • Flip the plastic containing thermal compound over so it is resting on top of the battery.

  5. Ricoh Theta S Internal microSD Replacement: 5 단계, 이미지 1/2 Ricoh Theta S Internal microSD Replacement: 5 단계, 이미지 2/2
    • Lift the battery out of the device, beginning with the end closest to the camera.

  6. Ricoh Theta S Internal microSD Replacement, Internal microSD: 6 단계, 이미지 1/1
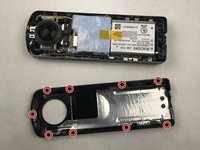
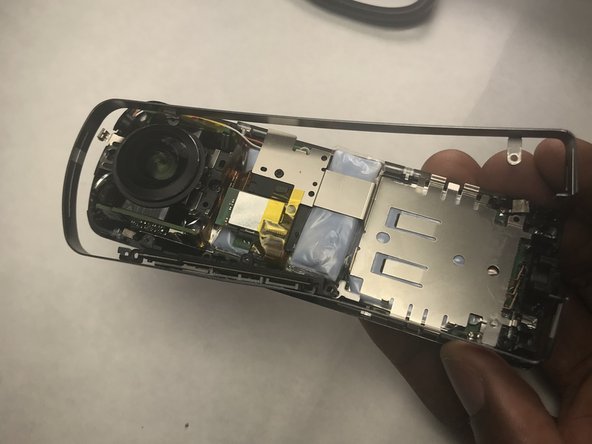
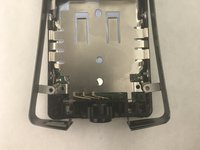
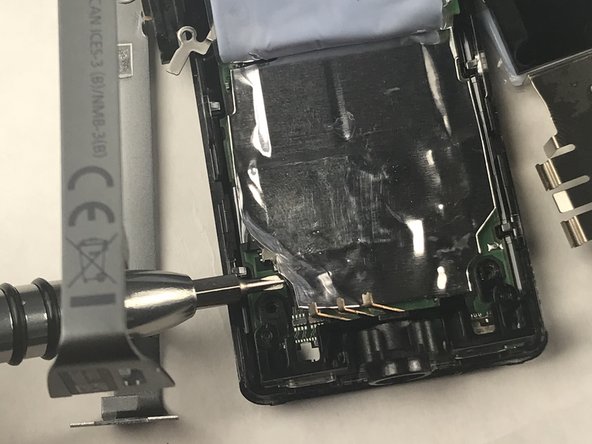
    • Remove the two 2mm Phillips screws.

    • Remove the black 2mm Phillips screw.

    • Remove the 1.5mm Phillips screw.

  7. Ricoh Theta S Internal microSD Replacement: 7 단계, 이미지 1/3 Ricoh Theta S Internal microSD Replacement: 7 단계, 이미지 2/3 Ricoh Theta S Internal microSD Replacement: 7 단계, 이미지 3/3
    • Carefully pull the side casing away from the camera.

  8. Ricoh Theta S Internal microSD Replacement: 8 단계, 이미지 1/3 Ricoh Theta S Internal microSD Replacement: 8 단계, 이미지 2/3 Ricoh Theta S Internal microSD Replacement: 8 단계, 이미지 3/3
    • Lift up the plastic containing thermal compound to reveal the thermal tape covering the motherboard.

    • Peel back the lower left corner of the thermal tape to reveal the microSD slot located on the motherboard.

  9. Ricoh Theta S Internal microSD Replacement: 9 단계, 이미지 1/2 Ricoh Theta S Internal microSD Replacement: 9 단계, 이미지 2/2
    • Push the microSD card inward, from the side.

    • Once a click is heard, pull the screwdriver away to eject the microSD card from the slot.

결론

To reassemble your device, follow these instructions in reverse order.

다른 한 분이 해당 안내서를 완성하였습니다.

Bradley Sutton

회원 가입일: 11/07/17

737 평판

안내서 4개 작성하였습니다

IUPUI, Team S3-G1, Harley Fall 2017 IUPUI, Team S3-G1, Harley Fall 2017 회원

IUPUI-HARLEY-F17S3G1

3 회원들

안내서 4개 작성하였습니다

댓글 8개

I was able to complete this however there is a clear plastic guard running around the bottom half of the Theta S, and the only way to get the SD Card above that guard was to remove a few additional screws. Fortunately was not that complex and reassembly was still successful. Good luck!

jason - 답글

Maximum size of SD Card? 128GB?

just - 답글

I’ve not heard of anyone getting anything over 32gb to work, but I don’t think that’s definitive, as, even with 32GB cards, some would work and some wouldn’t. I think I might order a 64gb and try it out…

Basil Yokarinis -

I successfully replaced my microSD card with a transcend 32gb card, and it’s working. Only thing is, I ended up with 2 tiny braided wire sleeves that fell out during the process, and I have no idea where they are supposed to be. Also, before the repair, I had, an error come up at random and stop interval shooting (while there was still space available and power):

_cameraError":[“FORMAT_CARD”]

Now, after the repair, the error is:

_cameraError":["FORMAT_INTERNAL_MEM"]

And it’s constant, but, aside from causing the red lamp to blink always, and also beeping when I turn it on, it doesn’t seem to affect the function of the camera.

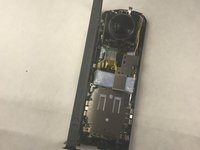
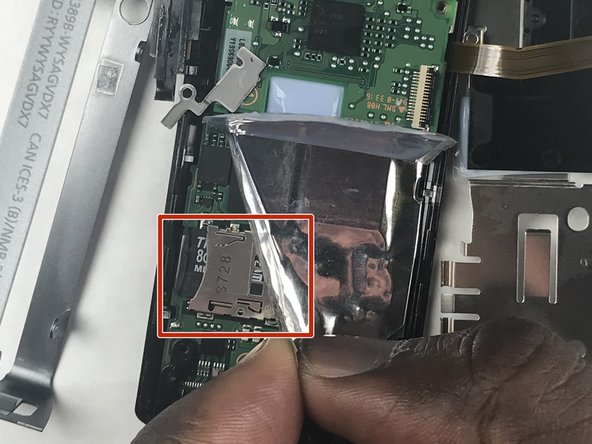
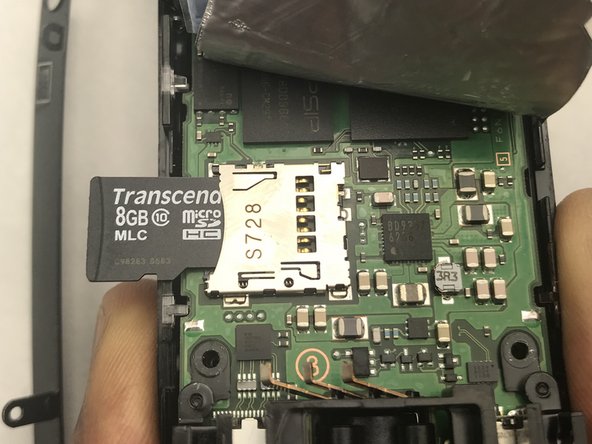
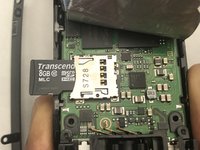
One point to improve the tutorial would be in step 8, in the 3rd picture, there’s a metallic, odd shaped piece sitting at an angle in the picture. This piece fell out when I was working to replace the microSD card, and I had to search other tutorials to figure out where it had to go.

Basil Yokarinis - 답글

Correction, it was a Sandisk Ultra

Basil Yokarinis -

댓글 쓰기

조회 통계:

24 시간 전: 0

7일 전: 4

30일 전: 25

전체 시간: 3,796