주요 콘텐츠로 건너뛰기

Ridgid JobMax R2851 Series B Directional Button Replacement

필요한 것

  1. Ridgid JobMax R2851 Series B Directional Button Replacement, Directional Button: 1 단계, 이미지 1/2 Ridgid JobMax R2851 Series B Directional Button Replacement, Directional Button: 1 단계, 이미지 2/2
    • Unplug the device from the wall.

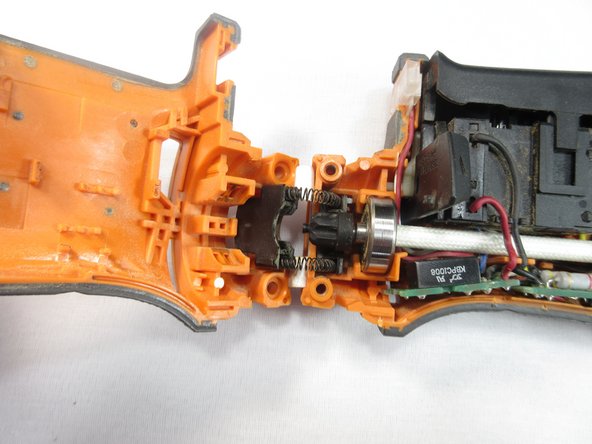
    • Orient the device so that the trigger is facing downwards.

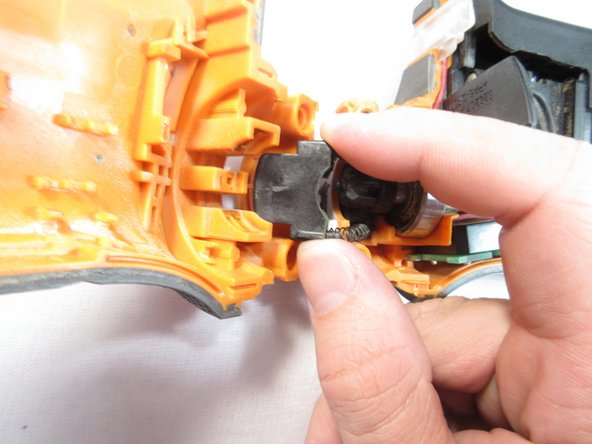
    • Place your thumb and index finger on the two buttons located on the head of the tool.

    • Press the two buttons in and pull the head of the tool off.

  2. Ridgid JobMax R2851 Series B Directional Button Replacement: 2 단계, 이미지 1/1
    • Loosen all eight 15mm T10 Torx screws.

    • You do not need to fully remove the screws yet; just loosen them enough that the device shell starts to open.

  3. Ridgid JobMax R2851 Series B Directional Button Replacement: 3 단계, 이미지 1/1
    • Orient the device so that the cord end is facing upwards.

    • Take a small cutting tool, and cut down the seam in the back, ensuring that you only cut the sticker.

    • Make a shallow cut to avoid damaging internal hardware.

  4. Ridgid JobMax R2851 Series B Directional Button Replacement: 4 단계, 이미지 1/2 Ridgid JobMax R2851 Series B Directional Button Replacement: 4 단계, 이미지 2/2
    • Completely remove all eight 15mm T10 Torx screws.

  5. Ridgid JobMax R2851 Series B Directional Button Replacement: 5 단계, 이미지 1/3 Ridgid JobMax R2851 Series B Directional Button Replacement: 5 단계, 이미지 2/3 Ridgid JobMax R2851 Series B Directional Button Replacement: 5 단계, 이미지 3/3
    • Pull the device case off, gripping at the back of the case and rotating it towards the front of the device.

    • Once the device has been separated gently pull on the trigger assembly to remove it from one side of the case.

    • Watch out for the locking mechanism for the head of the device when removing.

  6. Ridgid JobMax R2851 Series B Directional Button Replacement: 6 단계, 이미지 1/1
    • Grab the trigger mechanism, and lift it up and away from the device.

    • Be gentle when lifting it out—it is still attached by short wires.

  7. Ridgid JobMax R2851 Series B Directional Button Replacement: 7 단계, 이미지 1/2 Ridgid JobMax R2851 Series B Directional Button Replacement: 7 단계, 이미지 2/2
    • Slide and wiggle the metal rod holding down the directional button.

    • This rod is connected by two small holes in the directional button so moving up and to the right is the best.

  8. Ridgid JobMax R2851 Series B Directional Button Replacement: 8 단계, 이미지 1/2 Ridgid JobMax R2851 Series B Directional Button Replacement: 8 단계, 이미지 2/2
    • Slide the directional button up and out of the device.

    • Hole and slot for reassembly

    • After the button is replaced, the metal rod fits into a small hole and slot to the right of the button. The tiny spring has to be slid over to set it in place.

결론

To reassemble your device, follow these instructions in reverse order.

다른 한 분이 해당 안내서를 완성하였습니다.

Brent Shepherd

회원 가입일: 02/12/19

884 평판

안내서 5개 작성하였습니다

댓글 0개

댓글 쓰기

조회 통계:

24 시간 전: 3

7일 전: 4

30일 전: 9

전체 시간: 602