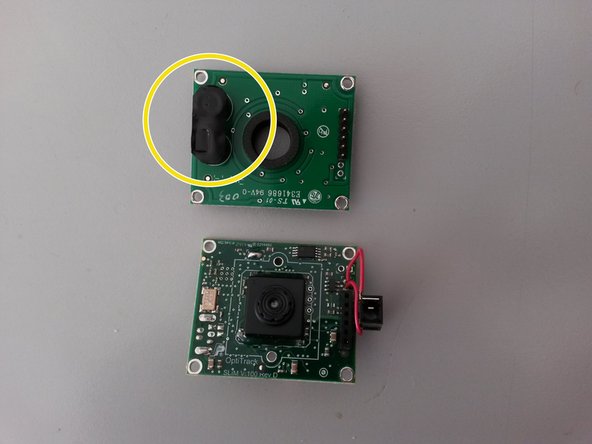
주요 콘텐츠로 건너뛰기

Riparazione SmartNav4 problema contatti

필요한 것

  1. Riparazione SmartNav4 problema contatti, Aprire il dispositivo: 1 단계, 이미지 1/3 Riparazione SmartNav4 problema contatti, Aprire il dispositivo: 1 단계, 이미지 2/3 Riparazione SmartNav4 problema contatti, Aprire il dispositivo: 1 단계, 이미지 3/3
    • Aprì delicatamente le quattro linguette con un piccolo cacciavite a taglio.

    • Rimuovi prestando attenzione la copertura nera e argentata.

  2. Riparazione SmartNav4 problema contatti: 2 단계, 이미지 1/2 Riparazione SmartNav4 problema contatti: 2 단계, 이미지 2/2
    • Dopo aver staccato le due parti.

    • Svita le quattro viti esagonali, con la chiave esagonale da 2mm.

  3. Riparazione SmartNav4 problema contatti: 3 단계, 이미지 1/3 Riparazione SmartNav4 problema contatti: 3 단계, 이미지 2/3 Riparazione SmartNav4 problema contatti: 3 단계, 이미지 3/3
    • Separa i componenti

    • Il problema è causato dall'isolante nero posto fra le due schede elettroniche.

  4. Riparazione SmartNav4 problema contatti: 4 단계, 이미지 1/1
    • Rimuovi l'isolante

  5. Riparazione SmartNav4 problema contatti: 5 단계, 이미지 1/3 Riparazione SmartNav4 problema contatti: 5 단계, 이미지 2/3 Riparazione SmartNav4 problema contatti: 5 단계, 이미지 3/3
    • Prepara un nuovo isolante. Ho usato un pezzo di plastica rigido di 0,4 mm.

    • Puoi utilizzare un pezzo di plastica rigido, molto fine di spessore (es. 0.4mm)

    • Prendi le misure e adattalo.

  6. Riparazione SmartNav4 problema contatti: 6 단계, 이미지 1/3 Riparazione SmartNav4 problema contatti: 6 단계, 이미지 2/3 Riparazione SmartNav4 problema contatti: 6 단계, 이미지 3/3
    • Ricomponi il dispositivo. Seguendo la guida al contrario.

결론

Per rimontare il dispositivo, segui queste istruzioni in ordine inverso.

다른 2명이 해당 안내서를 완성하였습니다.

Stefano Ficacci

회원 가입일: 05/27/16

166 평판

안내서 1개 작성함

댓글 2개

Has anyone ever able to fix the issue with the smartnav not powering on

Shane Agnew - 답글

I can give only the basic level of suggestions here.

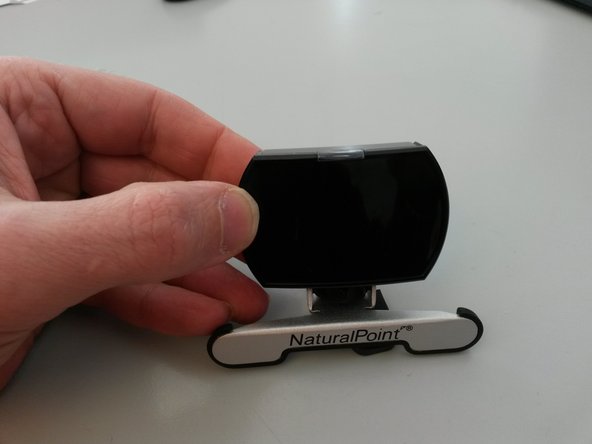
The device is not responding at all, this is the situation I'm considering here, which means: no lights and no reaction from the computer when it is connected.

You should check first the cable and the computer port, this can be done with a different cable and a different port and/or with a different device on the same cable and port, better both methods.

Once you are sure that the cable and the port are good, you need to disassemble the unit, and you may need a tester for voltage and continuity.

A visual check will tell you if there are clear signs of problems such as cracks, rust or damaged components.

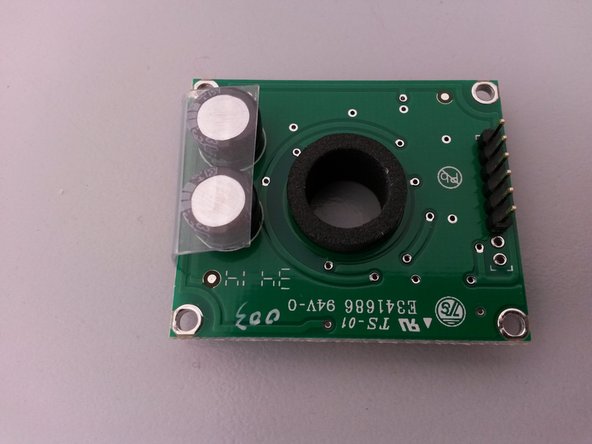
Chances are that the problem is in a faulty contact (the usb connector to begin with) but it still can be a defective component (the capacitors in this case).

From here on you may need to test the power supply to the ic circuit, without short circuiting other components with the probes.

A soldering unit could be necessary then.

Stefano Ficacci - 답글

댓글 쓰기

조회 통계:

24 시간 전: 0

7일 전: 2

30일 전: 6

전체 시간: 1,256