이 버전에는 잘못된 편집 사항이 있을 수 있습니다. 최신 확인된 스냅샷으로 전환하십시오.
필요한 것
-
이 단계는 번역되지 않았습니다. 번역을 도와주십시오
-
Twist the plastic lid counterclockwise to unlock it.
-
Lift the lid to remove it from the container.
-
-
이 단계는 번역되지 않았습니다. 번역을 도와주십시오
-
With your hand, twist the container counter-clockwise until it unlocks from the base. Remove the container by lifting it straight up.
-
-
이 단계는 번역되지 않았습니다. 번역을 도와주십시오
-
Use your fingers to pry out the two rubber feet from the bottom cover of the base.
-
-
이 단계는 번역되지 않았습니다. 번역을 도와주십시오
-
Use the Phillips #2 screwdriver to unscrew the two 12.7-mm screws underneath the rubber feet.
-
Use the same screwdriver to unscrew the 15.88-mm screw from the back of the chopper.
-
-
-
이 단계는 번역되지 않았습니다. 번역을 도와주십시오
-
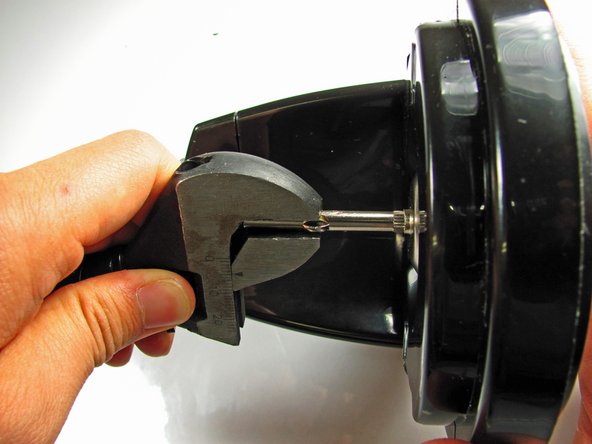
Use a pair of pliers or any other clamping tool to securely hold the blade-shaft that sits above the base.
-
Continue turning the gear until completely removed from the blade-shaft.
-
-
이 단계는 번역되지 않았습니다. 번역을 도와주십시오
-
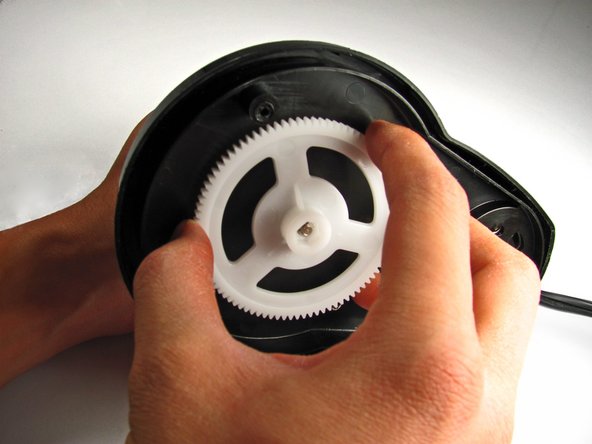
Use the plastic opening tool to pry open the base from the main body.
-
Once freed, lift the base panel from the main body. The motor and power cable are connected to this panel.
-
-
이 단계는 번역되지 않았습니다. 번역을 도와주십시오
-
Use a Phillips #2 screwdriver to remove the screws that attach the motor to the base.
-
-
이 단계는 번역되지 않았습니다. 번역을 도와주십시오
-
Pull the power cord wires up from underneath the wire hook on the side of the motor.
-
-
이 단계는 번역되지 않았습니다. 번역을 도와주십시오
-
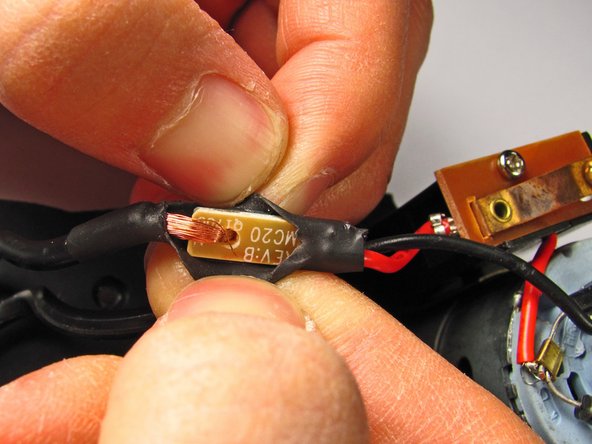
Carefully cut into the black wire casing for both wires using a small knife, and peel away the black casing.
-
-
이 단계는 번역되지 않았습니다. 번역을 도와주십시오
-
Use a soldering kit to remove solder from the circuit board for the red wire.
-
Follow this soldering guide if you need extra help!
-
-
이 단계는 번역되지 않았습니다. 번역을 도와주십시오
-
Use a small knife to cut the copper wires from the bracket holding the black wire and power cord together.
-
-
이 단계는 번역되지 않았습니다. 번역을 도와주십시오
-
Use a Phillips #1 screwdriver to unscrew the single 4.76-mm screw from the motor base to finish removing the motor.
-


다른 3명이 해당 안내서를 완성하였습니다.

팀

Cal Poly, Team 4-29, Amido Fall 2013 Cal Poly, Team 4-29, Amido Fall 2013 회원
CPSU-AMIDO-F13S4G29
4 회원들
안내서 5개 작성하였습니다